Indian Street Food & Chaat Snacks
Indians are extremely hospitable people. We love organizing parties, get-togethers and similar events, as much as we like enjoying them ourselves. Also, none of our gatherings or parties are ever complete without food playing a major role in it. We have a varied list of snacks and starters for the same, as we have dishes in other courses. So, here’s a personalized collection of popular Indian street food Snacks Recipes that will make your job easy while planning a special gathering at home. Most of these recipes are fuss-free, easy to make, yet supremely delicious. I’d say, try them all!

Golgappa Recipe (Delhi Style) | Golgappa Pani
A) Making Golgappa Pani
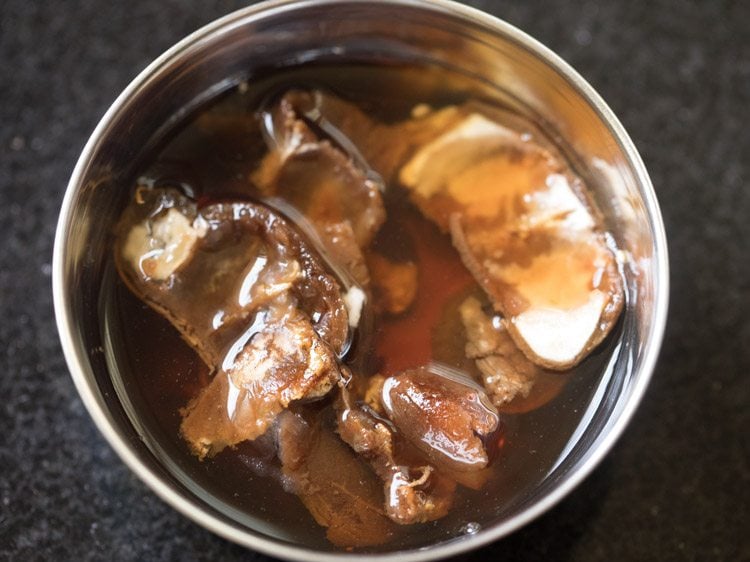
1. Soak 1 tablespoon of tightly packed tamarind in ¼ cup hot water for about 20 minutes.
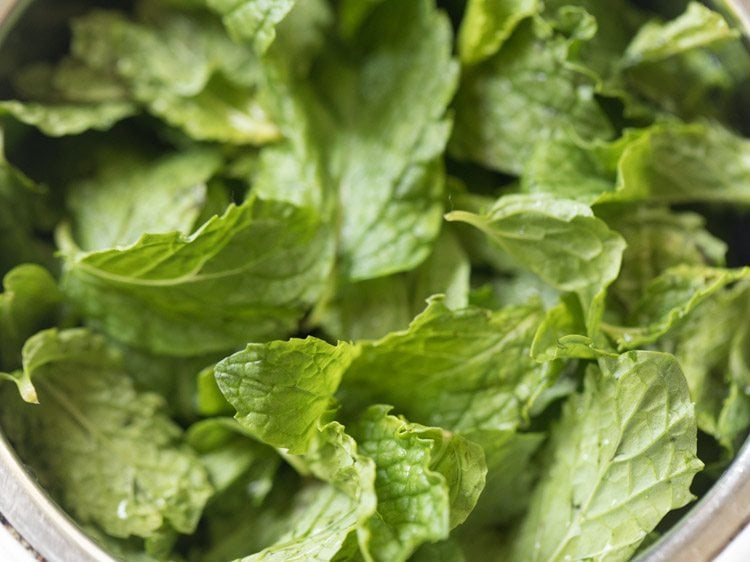
2. Take ⅓ cup loosely packed fresh mint leaves in a small grinder jar. Only use the mint leaves. Do not add the stems as then the pani can become bitter.
Rinse the mint leaves well with water before adding them to the grinder jar.
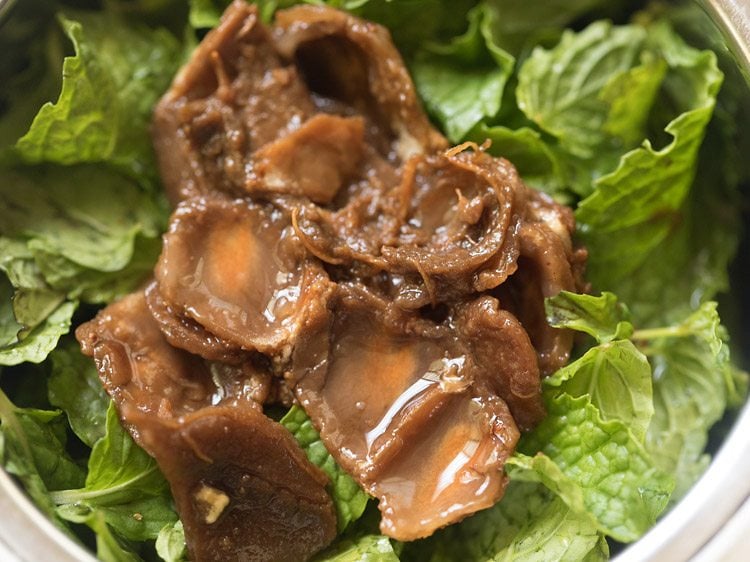
3. Add the soaked tamarind along with its water. Make sure there are no seeds in the tamarind.
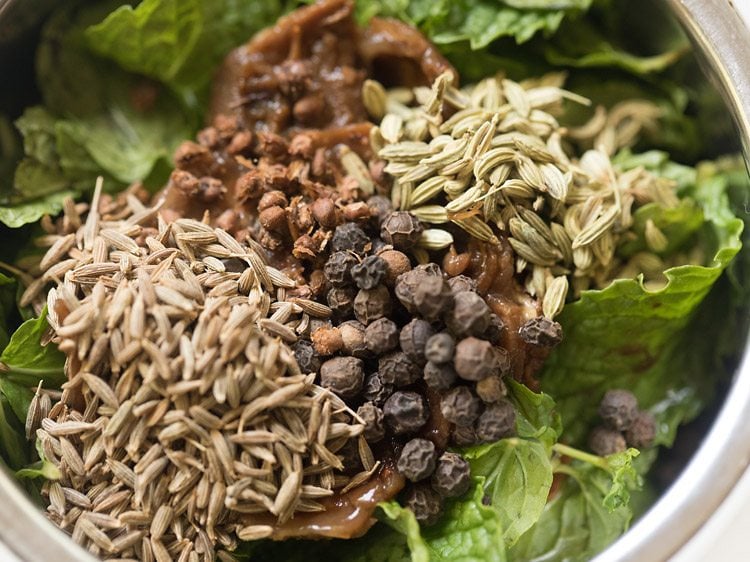
4. Add the following spices – 1.5 teaspoons cumin seeds, 1 teaspoon fennel, ½ teaspoon black pepper and seeds removed from 1 black cardamom. Discard the outer cardamom cover. To get the seeds, lightly crush the cardamom in a mortar-pestle. Then remove the seeds.
5. Now add 1 teaspoon amchur (dry mango powder), 1 teaspoon chaat masala, 1 pinch asafoetida (hing) and black salt as required.
If you do not have dry mango powder, then you can add some lemon juice. Instead of dry mango powder, kachri powder or bel powder can also be used. Instead of black salt, you can use rock salt or sea salt.
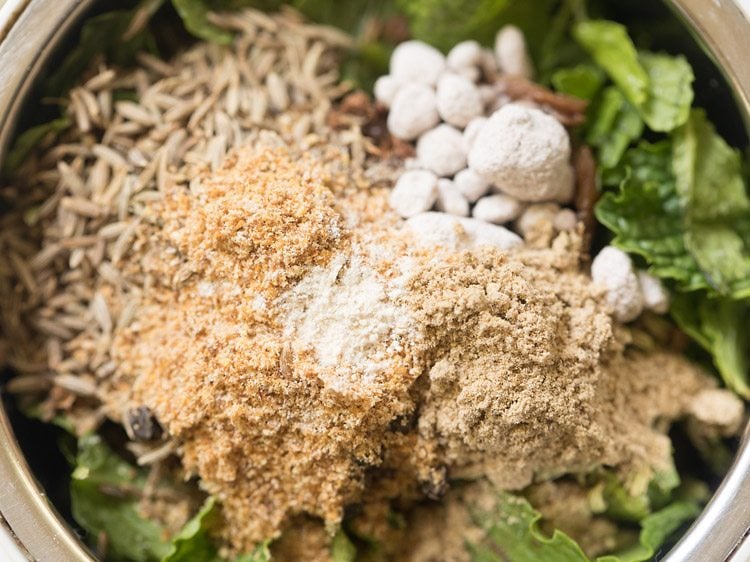
6. Grind to a smooth chutney.
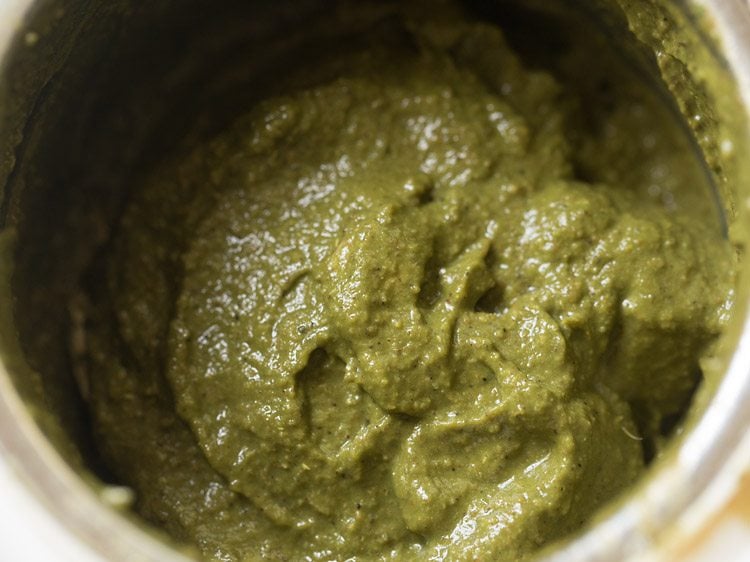
7. Take the jaljeera chutney in a bowl. Also add 1.5 cups water.
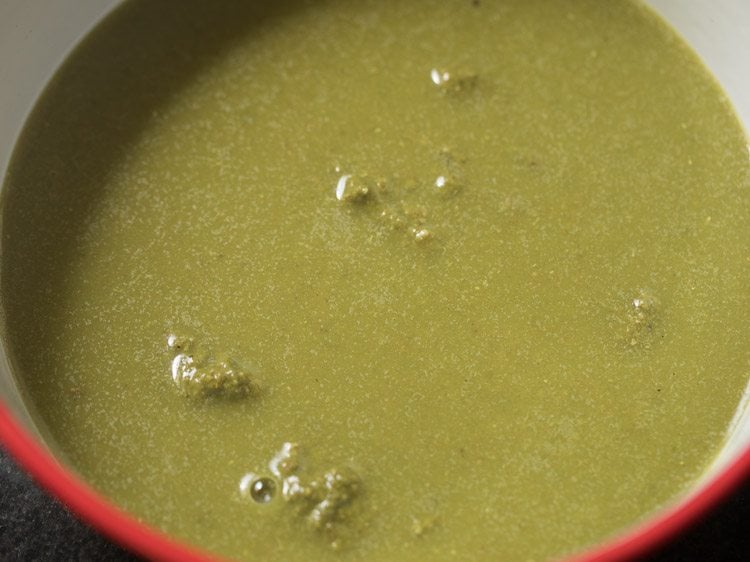
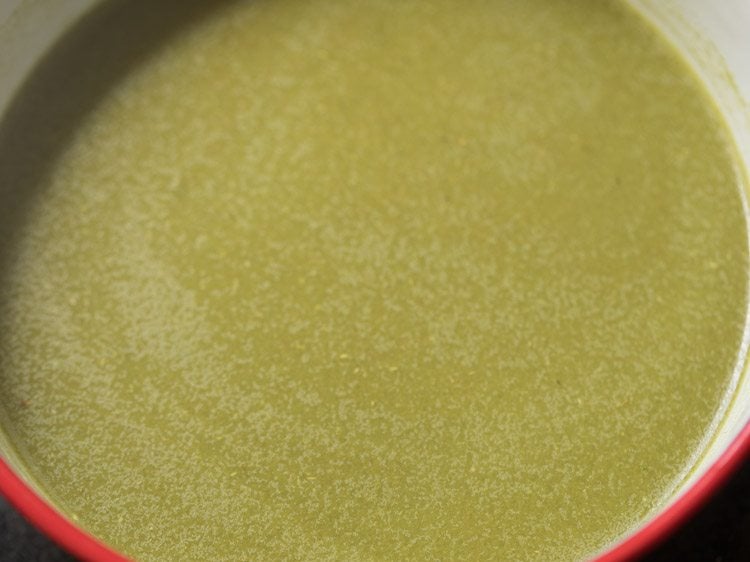
8. Mix very well. Check the taste of golgappa pani and add more salt and dry mango powder if required. You can also add some lemon juice if you want.
If in case the pani tastes bitter (due to the type and quality of mint leaves), then add some lemon juice to balance the bitterness. If you want then you can keep this golgappa pani in the refrigerator.
Making golgappa stuffing
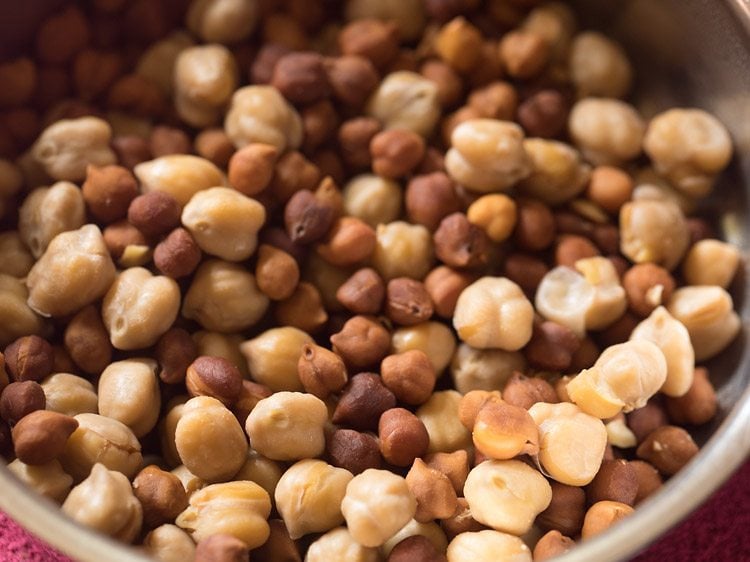
9. Rinse and then soak ⅓ cup white chickpeas and ⅓ cup black chickpeas in enough water overnight or for 8 to 9 hours. Later drain all the water and rinse the chickpeas very well in running water.
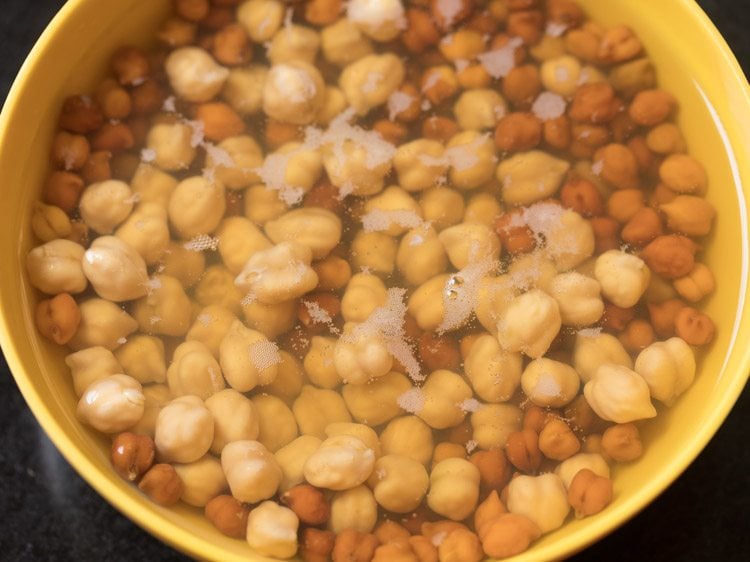
10. Add the chickpeas in a stovetop pressure cooker. Also add 2.5 cups water. You can also use just one type of chickpea.
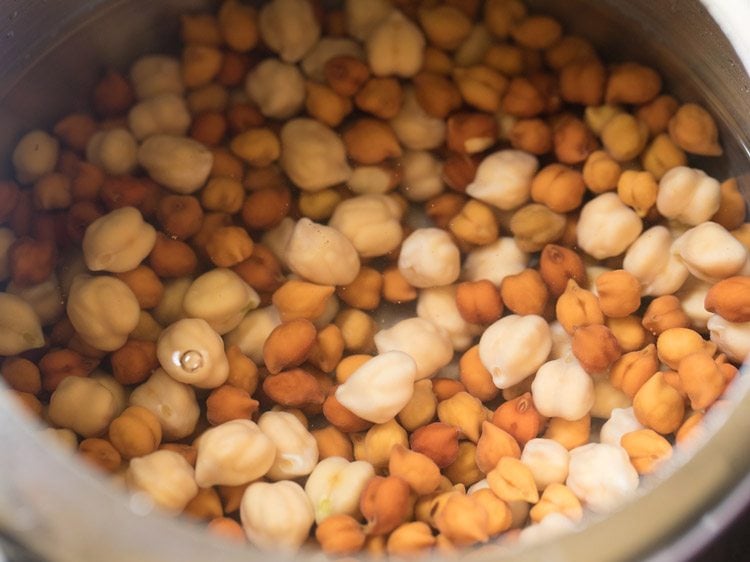
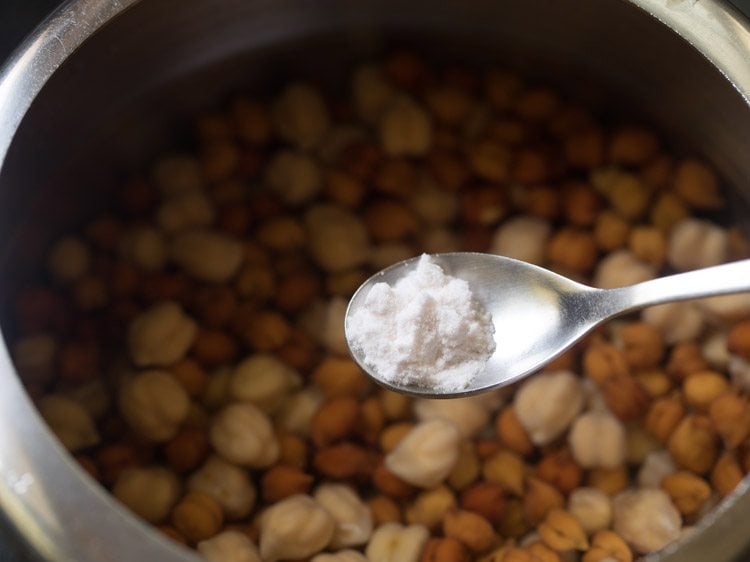
11. Add ½ teaspoon salt.
12. Pressure cook on medium heat for 18 to 19 minutes. When pressure settles down on its own in the cooker, then only open the lid and check if the chickpeas are cooked well or not.
If not, then pressure cook for some more time till the chickpeas are cooked well.
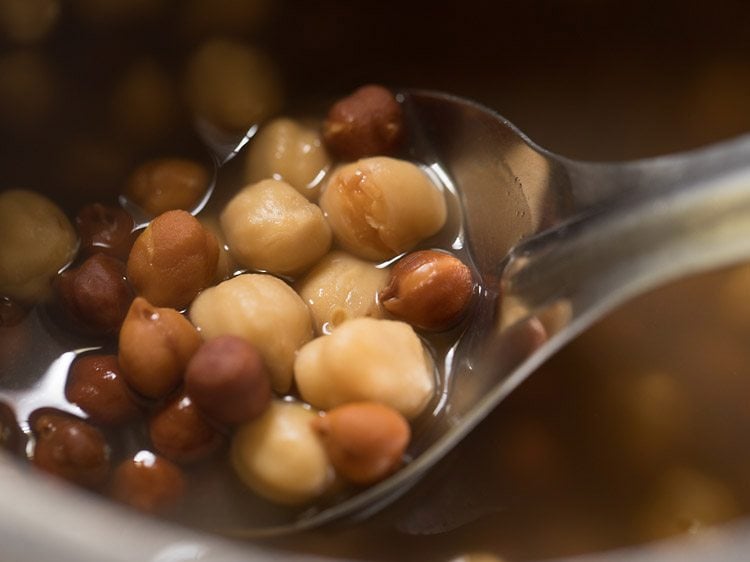
13. Drain all the water and take the chickpeas in a bowl.
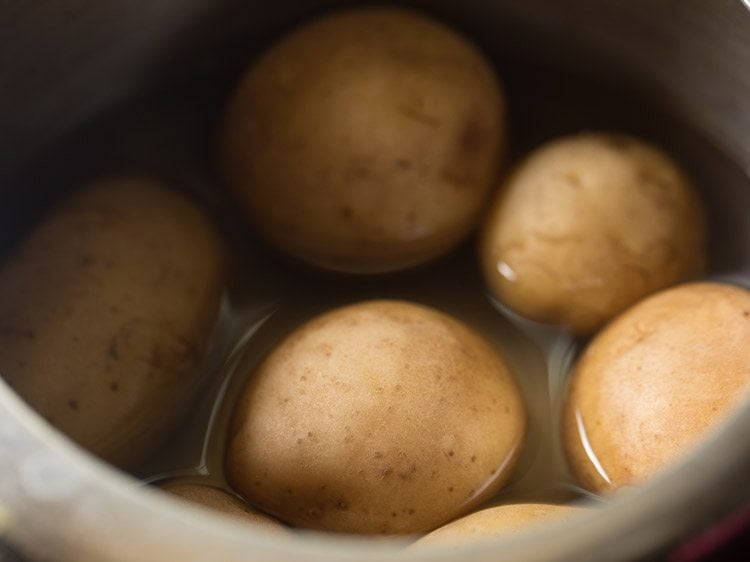
14. In another stovetop pressure cooker, take 2 to 3 medium sized rinsed potatoes. Add enough water just about covering the potatoes. Also add ½ teaspoon salt.
Pressure cook them for 5 to 6 whistles or 9 to 11 minutes on medium heat. In the picture below there are more potatoes as I added them in another chaat recipe.
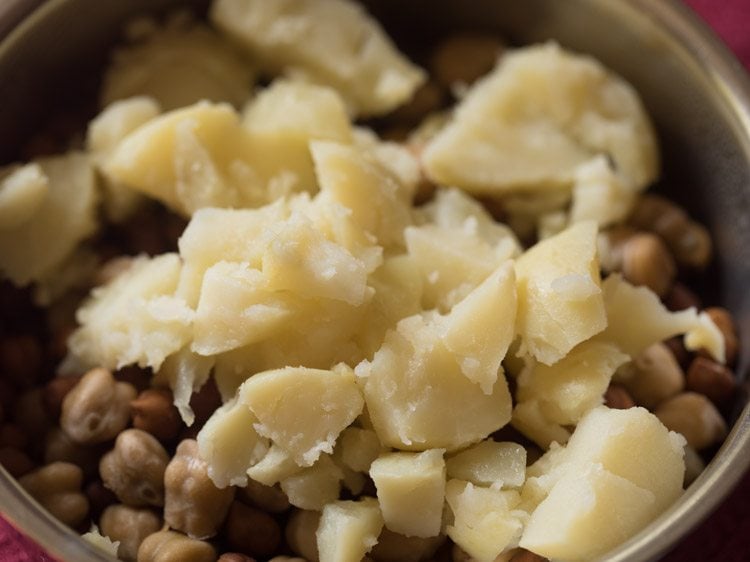
15. When the pressure settles down on its own in the cooker, remove the potatoes. Let them cool a bit. Then peel and chop them. Add the chopped potatoes to the cooked chickpeas.
16. Sprinkle ½ teaspoon Kashmiri red chili powder, ½ teaspoon chaat masala and ¼ teaspoon black salt or add as required.
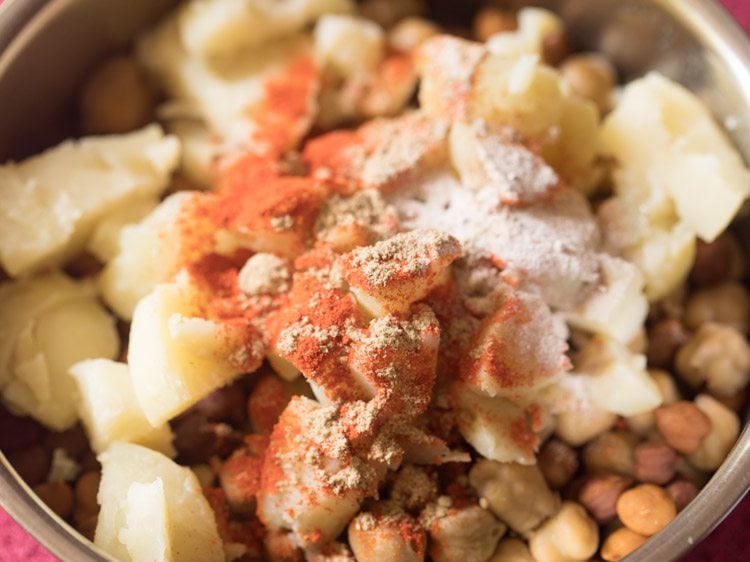
17. Mix everything well. Keep aside.
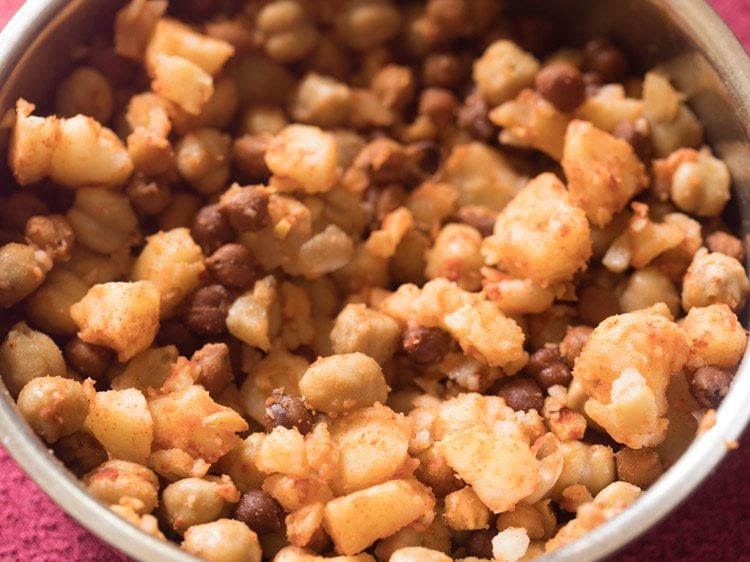
Assembling golgappa
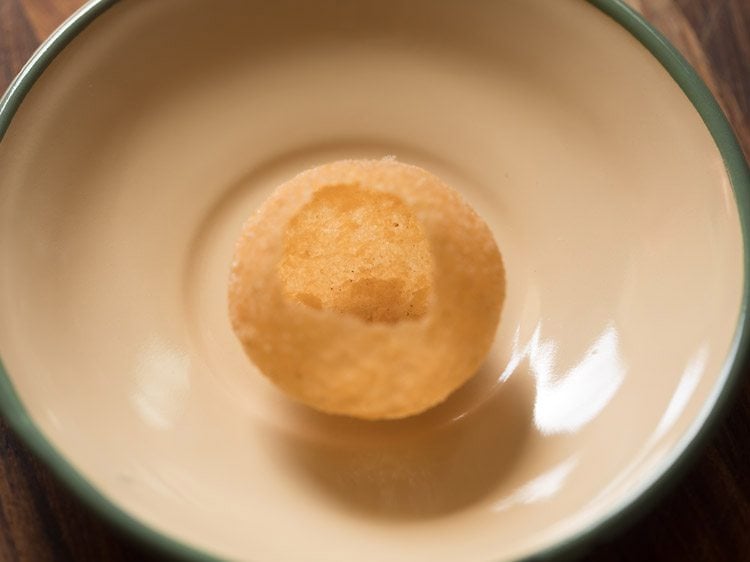
18. Keep all the elements of golgappa before assembling them – jaljeera pani, tamarind chutney, chana and potatoes stuffing.
Take the golgappa puri in a small plate. Crack open the top with a spoon or with clean fingers.
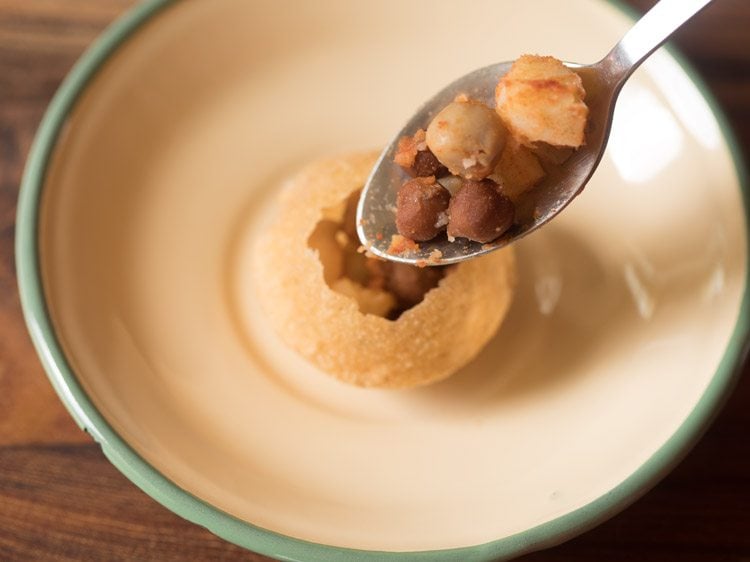
19. Place the chickpeas and potato stuffing inside the golgappa puri.
20. Spoon some sweet tamarind chutney less or more as per your preferences.
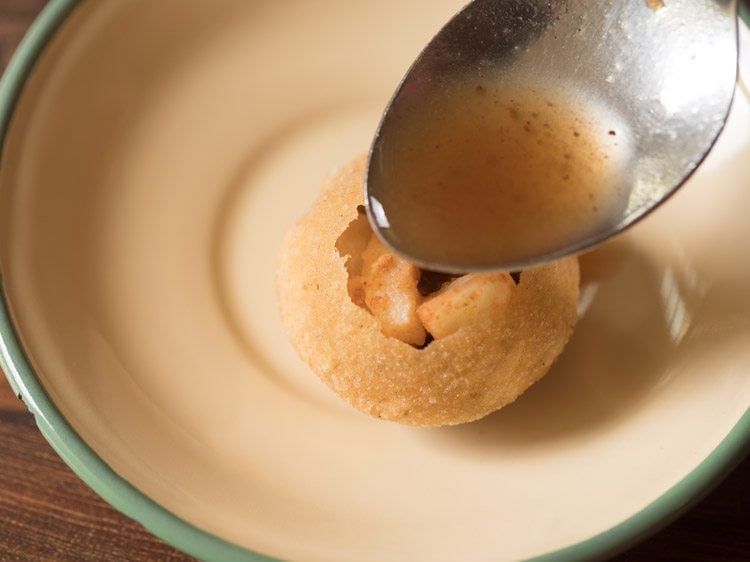
21. Now spoon the jaljeera pani or golgappa pani less or more as required.
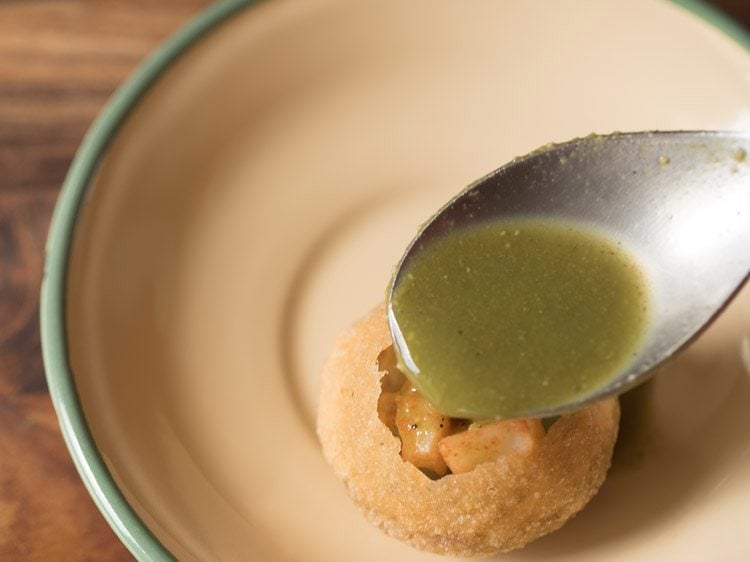
22. Have them immediately.
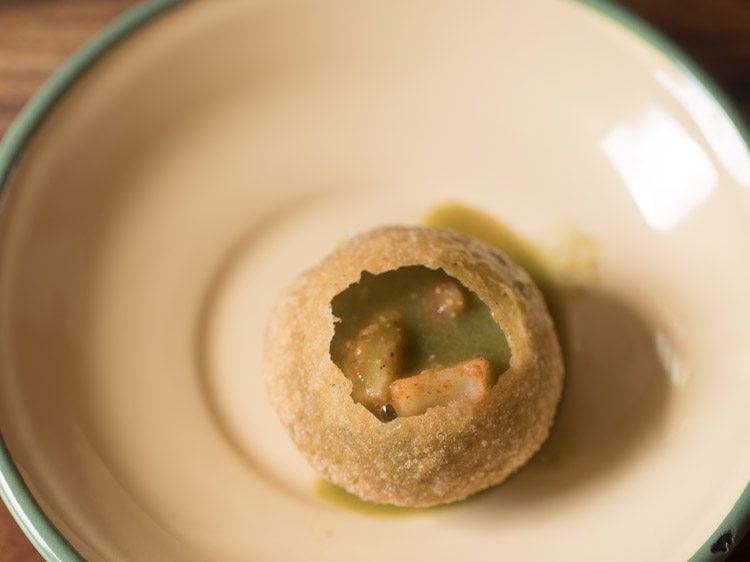
23. You can also arrange all the golgappa elements on the dining table and let people make the golgappa for themselves.
Papdi Chaat Recipe | Papri Chaat (Street Style)
How to Make Papdi Chaat Recipe
Cook Chickpeas and Potatoes
1. Start by prepping the ingredients for papdi chaat. You’ll need cook dried chickpeas or canned chickpeas. I prefer to use cooked chickpeas, so I always soak them overnight or for 8 to 9 hours in water.
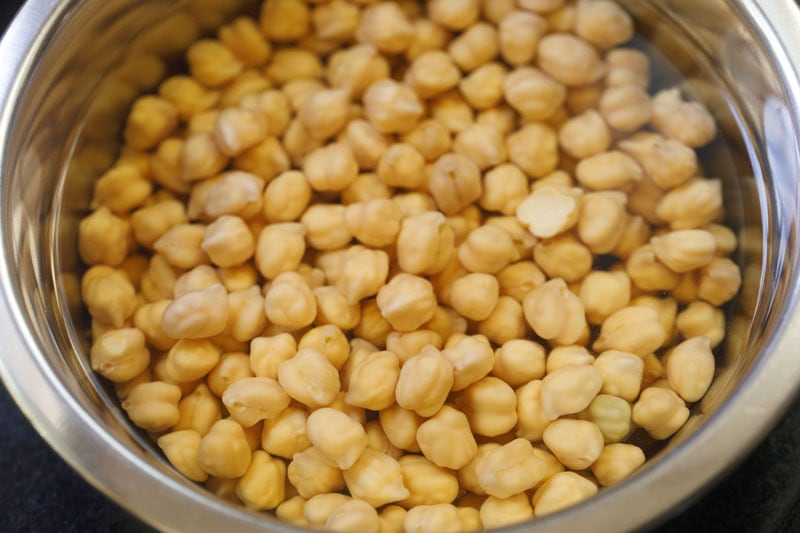
Rinse 1 cup of chickpeas a couple of times in fresh water. Then soak them in 3 cups of water overnight or for about 8 hours. Below is the photo of overnight soaked chickpeas in water.
2. Once the chickpeas have soaked rinse them again, drain the water and add the chickpeas to a 2 litre stovetop pressure cooker with ½ teaspoon of salt.
Alternatively, if you are using canned chickpeas rinse and drain the water. Measure to get 2.5 to 3 cups of canned chickpeas and then move to step 10.
But you will need to cook the potatoes if you plan to add them. So either steam them or cook in a pan or pot.
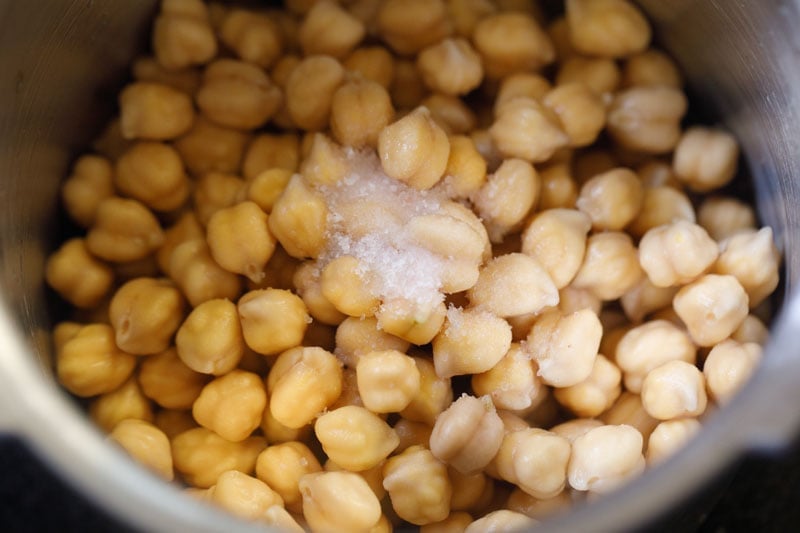
3. Add 2 cups of water.
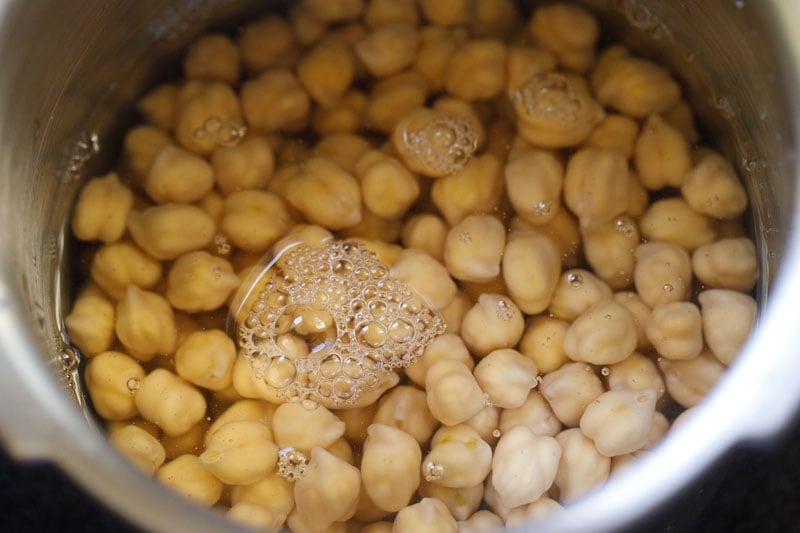
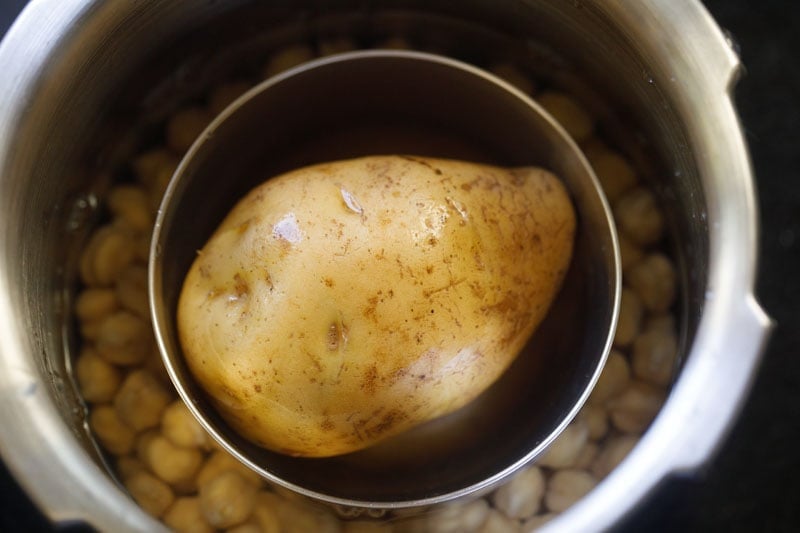
4. Place a steel bowl on the chickpeas in the cooker. Then rinse and place 1 medium-sized to large potato inside the bowl. The potato and chickpeas will be cooked together.
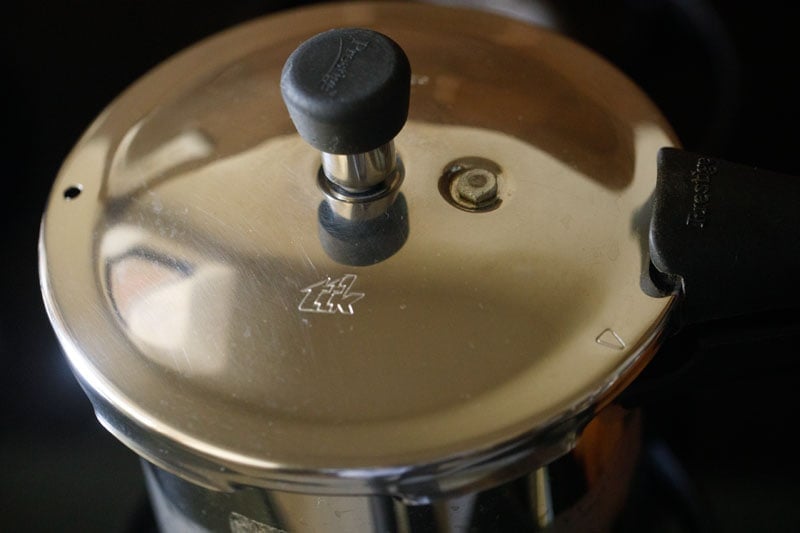
5. Cover the cooker tightly with the lid and pressure cook on medium heat until the pressure starts building and you hear the hissing sound in the cooker.
Then lower the heat a bit and pressure cook for 10 to 12 whistles.
6. When the pressure settles on its own in the cooker then only remove the lid.
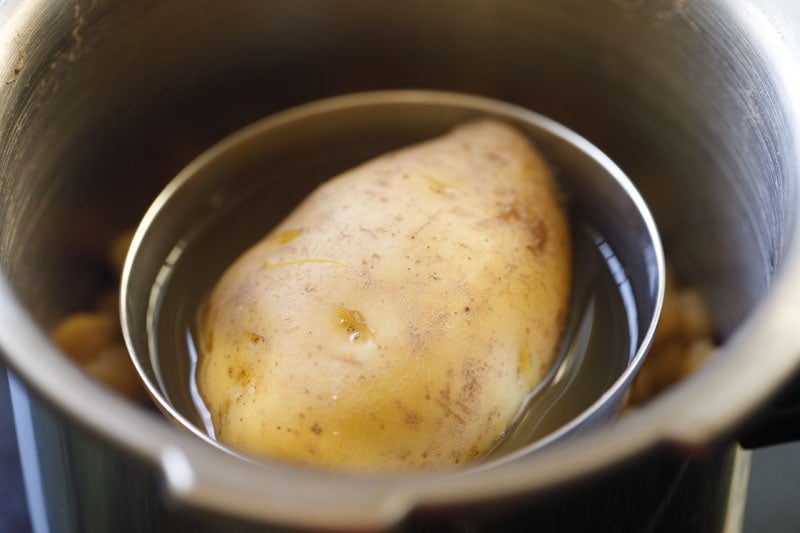
7. Check the potato by piercing it with a knife or fork. It should be tender and softened and the knife should easily pass through it.
Lift the potato with a pasta tong and set it aside to cool at room temperature.
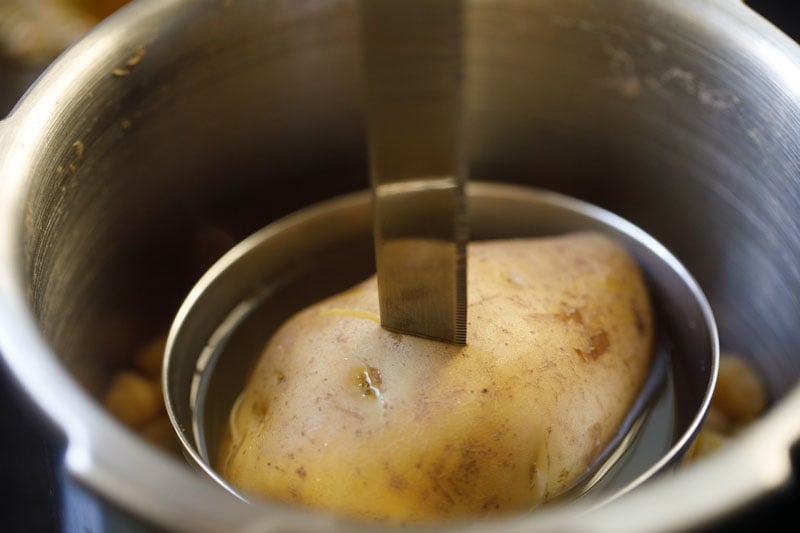
8. Check to see if the chickpeas are cooked. They should have a soft melt-in-the-mouth texture.
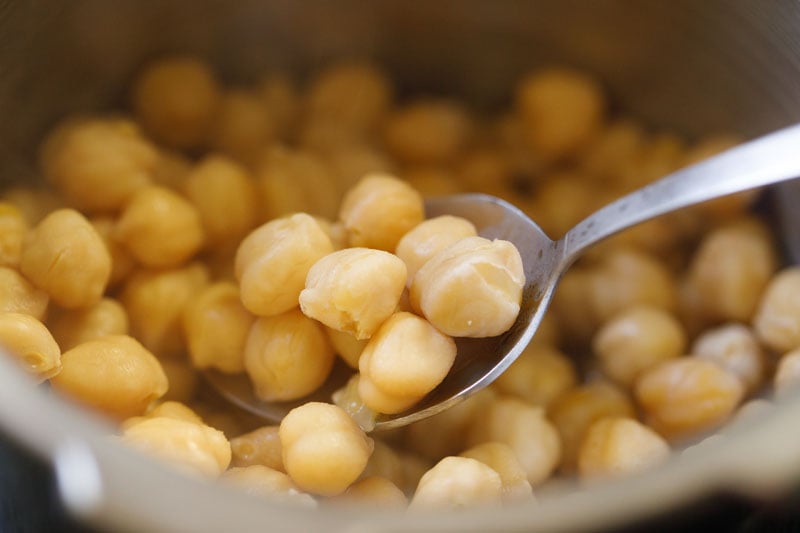
9. Drain the water and set the chickpeas aside.
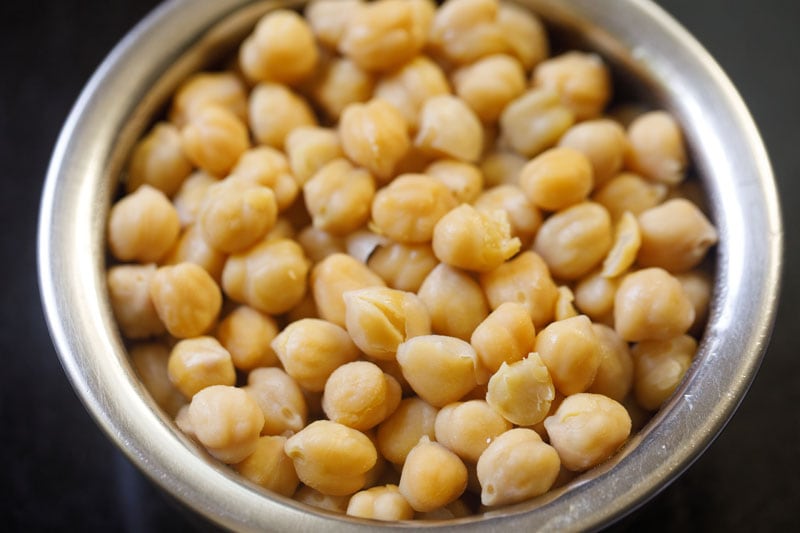
More Papri Chaat Prep Work
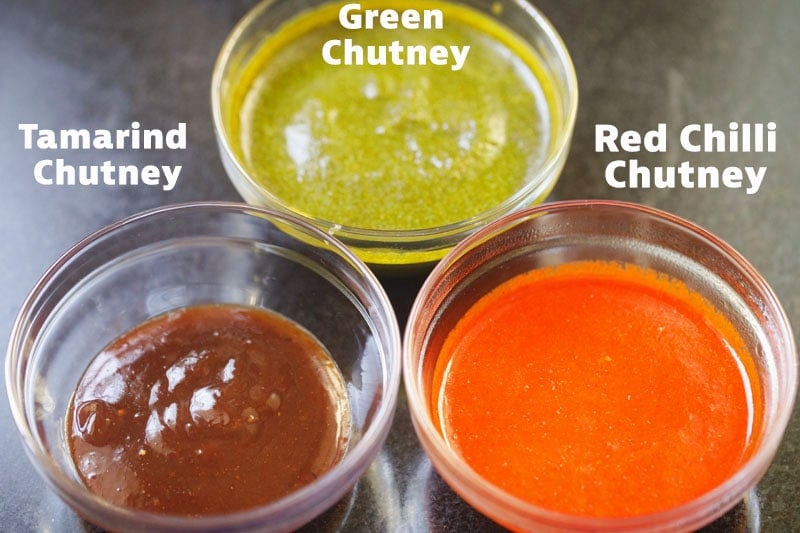
10. Prep the chutneys for the chaat. Make them a day ahead or make them while the chickpeas are cooking. The chaat chutney recipes are listed in the recipe card below.
You can add green chutney and tamarind chutney. But feel free to skip the red chili chutney if you don’t like your papri chaat to be spicy and pungent.
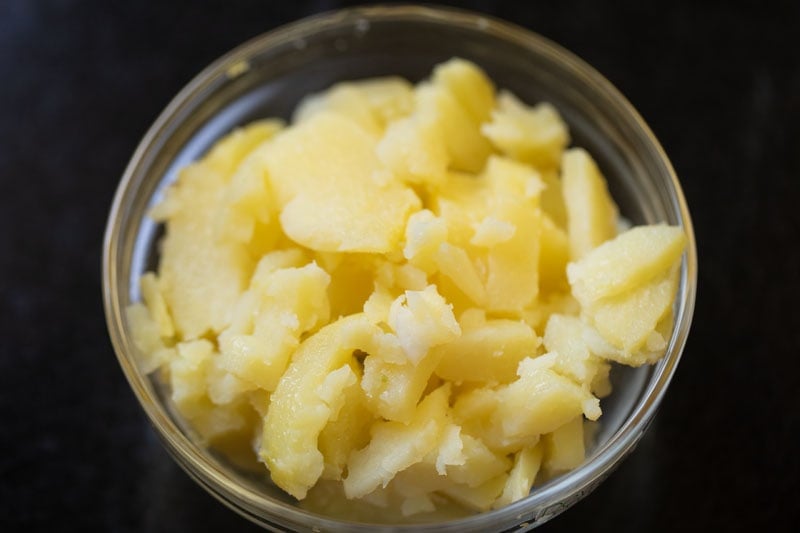
11. Once the potatoes are warm peel and chop them into small cubes.
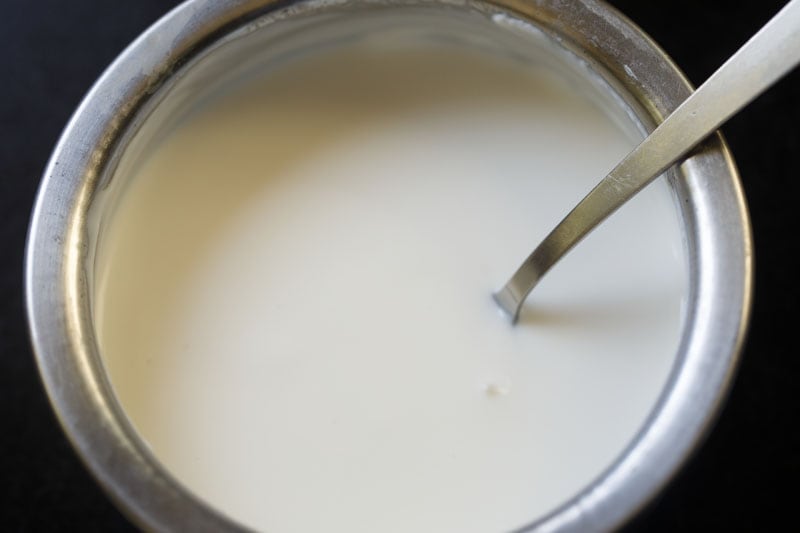
12. In a separate bowl, beat 1 cup of curd (yogurt) using a spoon or wired whisk until smooth.
Ideally the yogurt is cold or chilled when making papdi chaat. But you can opt for a room temperature yogurt.
Make Papdi Chaat
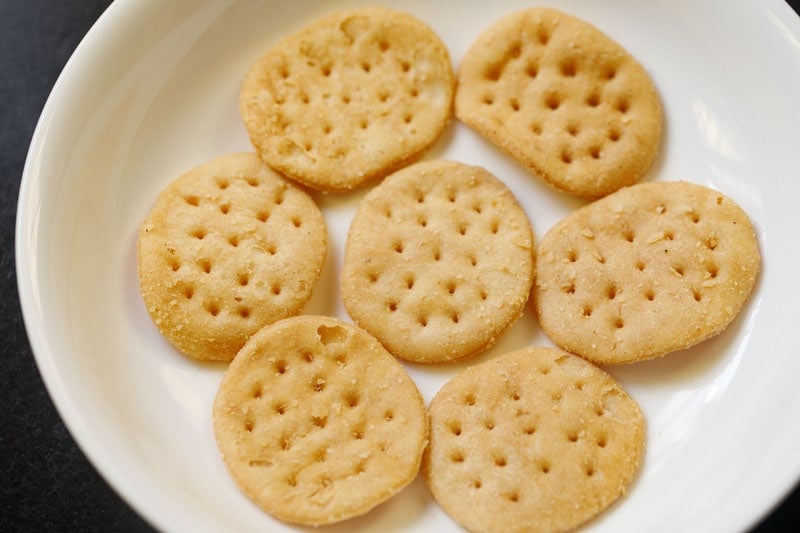
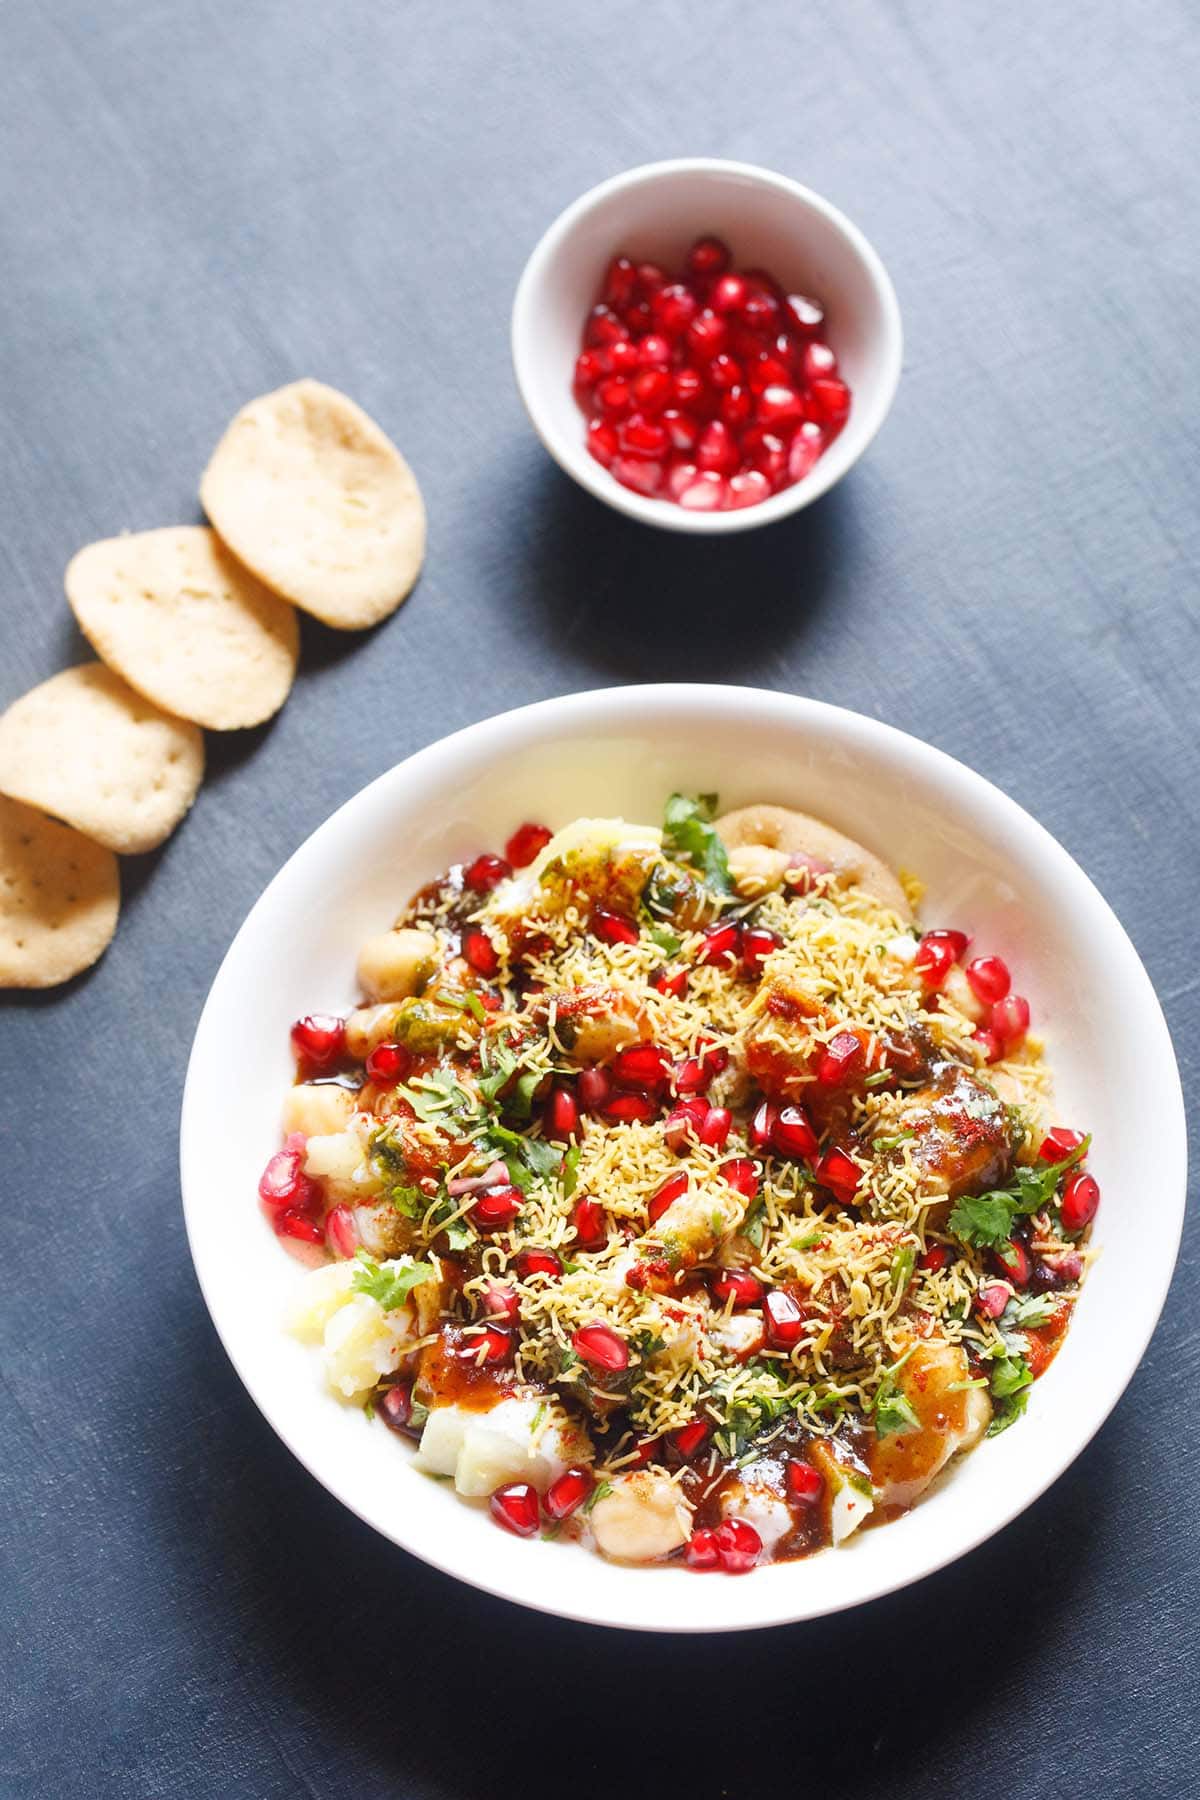
13. Arrange 6 to 8 papdi in a shallow bowl or plate.
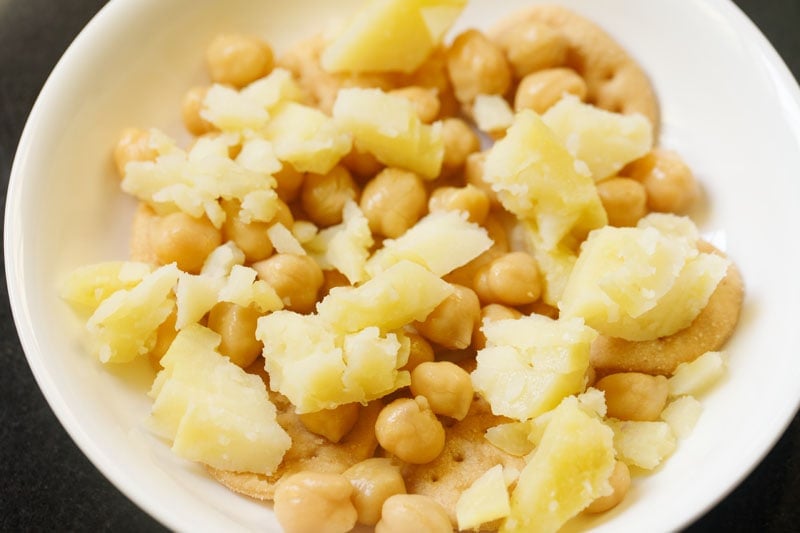
14. Top the papdis with boiled potatoes and boiled chickpeas. At this stage, you can also add some finely chopped onions and tomatoes.
Onions add a delicious crunch to the chaat papdi while tomatoes add a sweet tangy flavor.
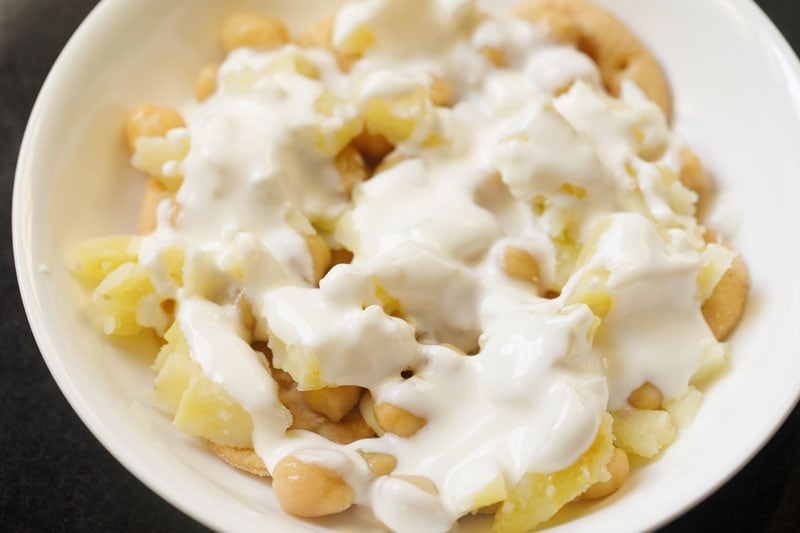
15. Add a generous amount of freshly beaten curd.
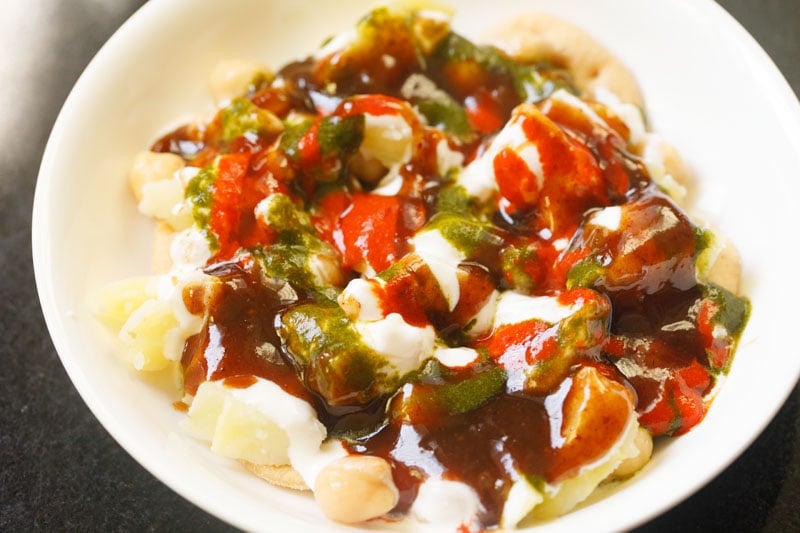
16. Add 1 to 2 tablespoons of green mint coriander chutney, 2 to 3 tablespoons of sweet tamarind chutney and 1 to 2 teaspoons of spicy red chili garlic chutney.
Tip: Feel free to add less or more of each chutney depending on your preferred taste.
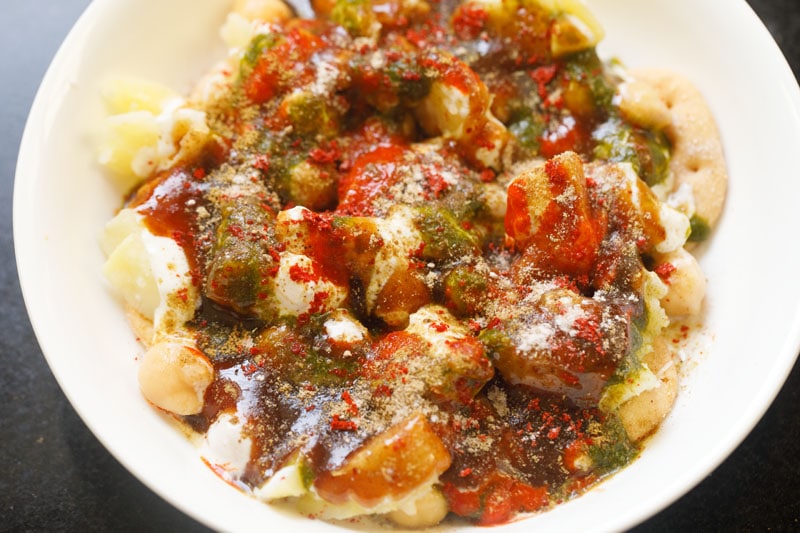
17. Sprinkle a few pinches of ground spice powders such as chaat masala, roasted cumin powder and optionally kashmiri red chilli powder.
Then season it with a few pinches of black salt or regular salt.
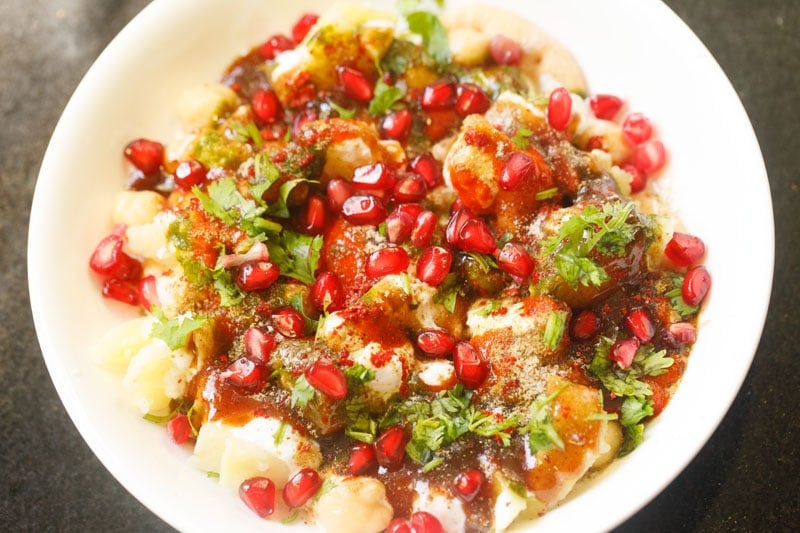
18. Garnish papdi chaat with chopped coriander and pomegranate seeds to add beautiful colors and delicious textures.
If you do not have pomegranates then skip them.
19. Opt to add sev for some color and crispiness.
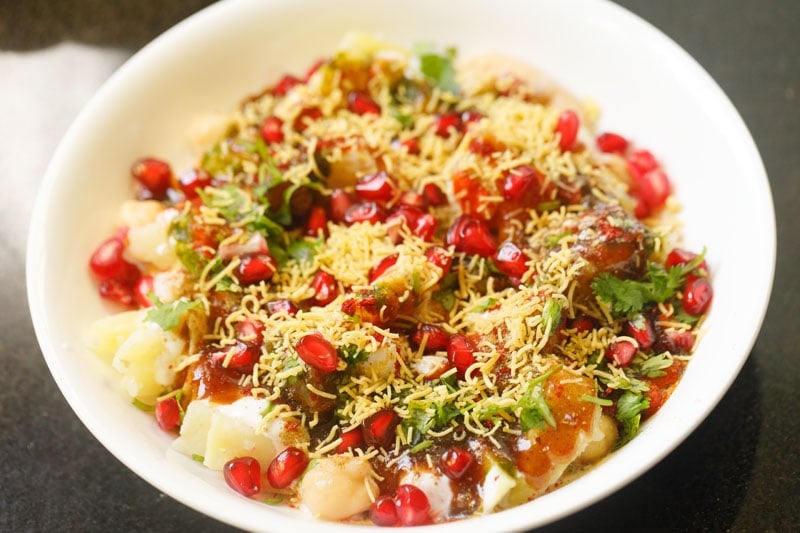
20. Serve papdi chaat immediately to ensure that it stays crispy. If papdi chaat is left for too long it may become soggy.
This way you can assemble the papdi chaat for your family or friends. Or choose to fill the various chaat elements in separate bowls and place them on the dining table – so that the people can assemble and make the papri chaat for themselves.
Expert Tips for Chaat Papdi
- Healthy papdi: If you would like to make healthier papdis bake them instead of frying them. This will result in less greasy papdi. To make papdi chaat even more nutritious add fruits like unripe raw mango or pomegranate arils and vegetables or lentils like grated beets or carrots and cooked moong sprouts.
- Serve: To get the best results serve the papri chaat straight away. Avoid leaving it out for some minutes because it will become soggy and won’t be as enjoyable.
- Substitutions: If you don’t have pakoris then feel free to substitue it with boondi. Before adding the boondi to the papdi chaat, soak the boondi in water and squeeze the water from the boondi.
- Variation: It is very easy to customize aloo papdi chaat to your taste. For example, omit the pomegranates if you don’t have any to hand, add less or more of your favorite chutney and add sev for extra crispiness. It is completely up to you!
Aloo Chaat Recipe (Street Style)
How to make Aloo Chaat
Fry Potatoes
1. Rinse 3 medium sized potatoes (250 grams) in fresh water and then peel them. Chop the potatoes in small bite sized cubes.
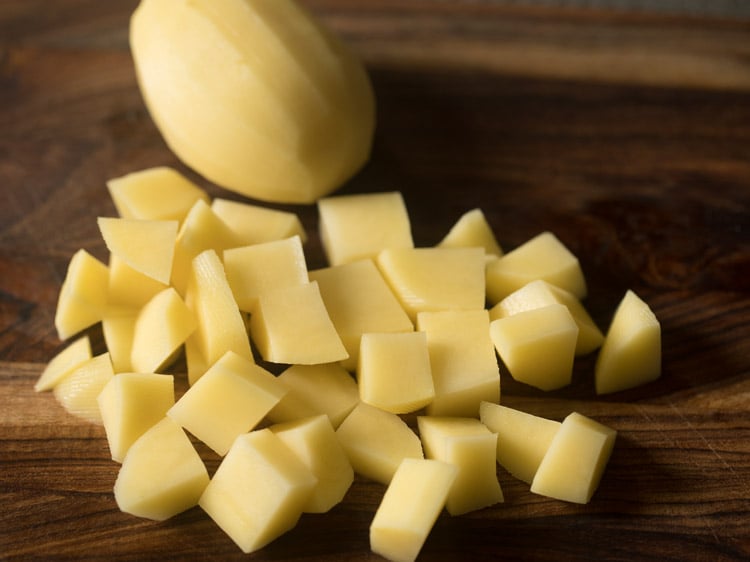
2. Heat 4 tablespoons of oil in a frying pan or kadai on a medium heat. Add the potato cubes for frying. Use any neutral flavored with a high smoke point for frying.
Tip 1: If you have a large pan then fry the potatoes all together, but if the pan is small then half the batch, and fry them twice.
Tip 2: Use a well seasoned wok or pan so that the potatoes do not stick to the pan and you can fry them easily.
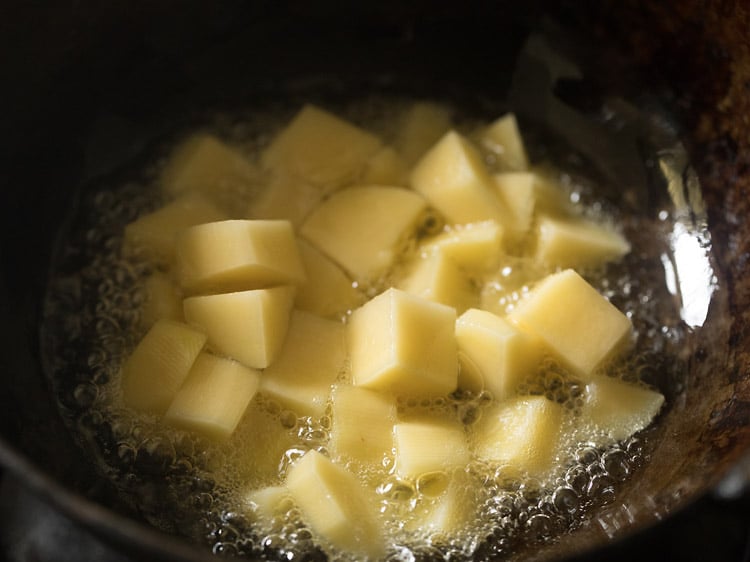
3. Mix with the oil and begin to fry them. Remember to fry at medium heat.
Warm or a cooler temperature of the oil will make the potatoes soggy with oil. A very hot oil will brown the outer crust of the potato cubes quickly but they will be undercooked from the center.
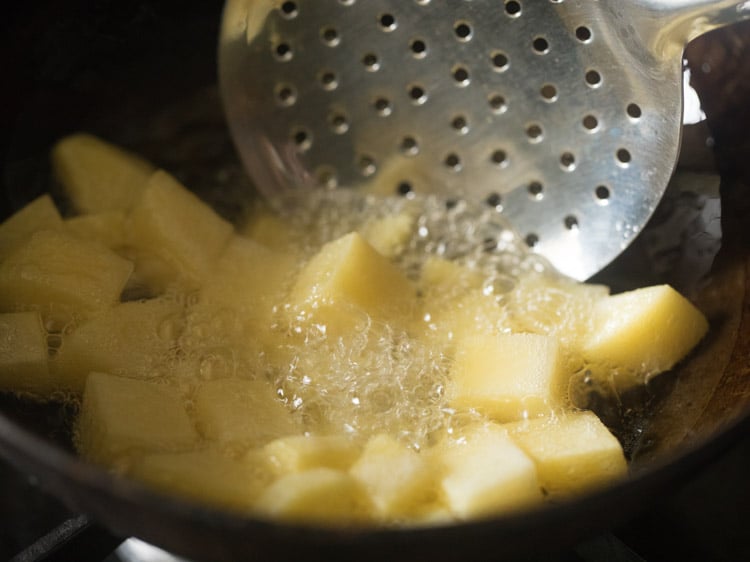
4. When one side becomes golden, turn the potatoes over and fry them on the other side. Keep on turning the potatoes at intervals using a slotted spoon until they are fried evenly.
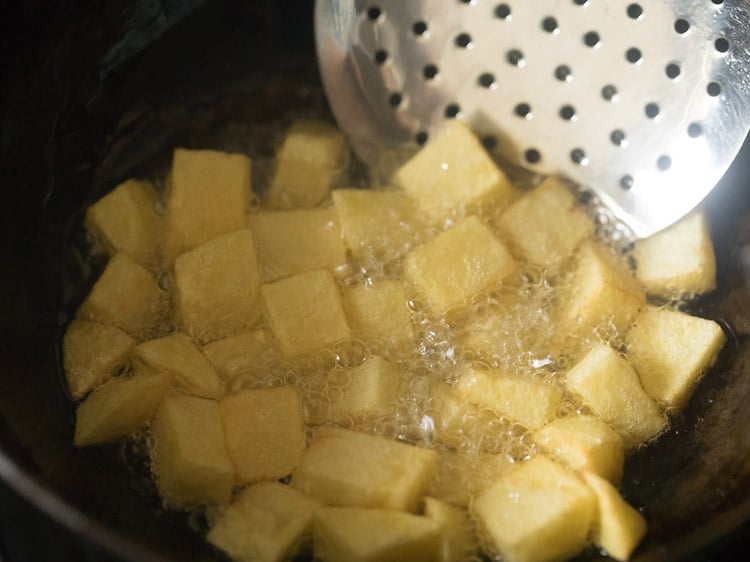
5. Fry until the potatoes are crispy and golden. Make sure the potato cubes are not raw or half-cooked on the inside.
Tip: Remove 1 to 2 potato cubes from the oil. Place them on a plate. Push a fork into the potato cubes to check if it is done. If the fork goes in easily then it is done, if not then leave the potatoes to cook for a bit longer.
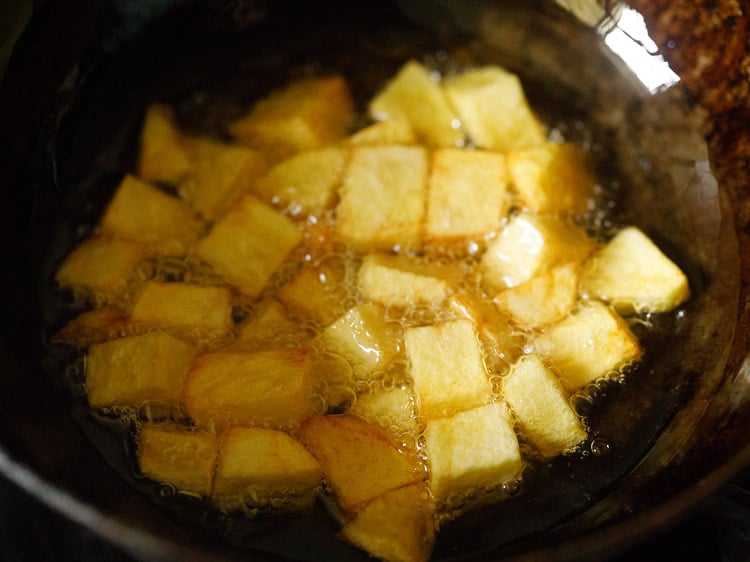
6. Once the potatoes are tender, crisp and golden then remove them with a slotted spoon draining as much oil in the pan as possible.
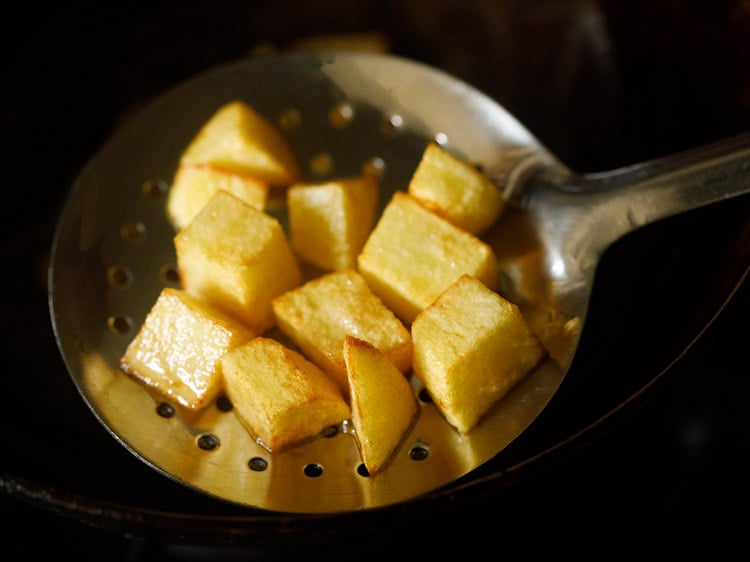
7. Place fried potato cubes on kitchen paper towels to absorb extra oil. Then, fry the second batch of potatoes if you have used a small or medium-sized wok or pan.
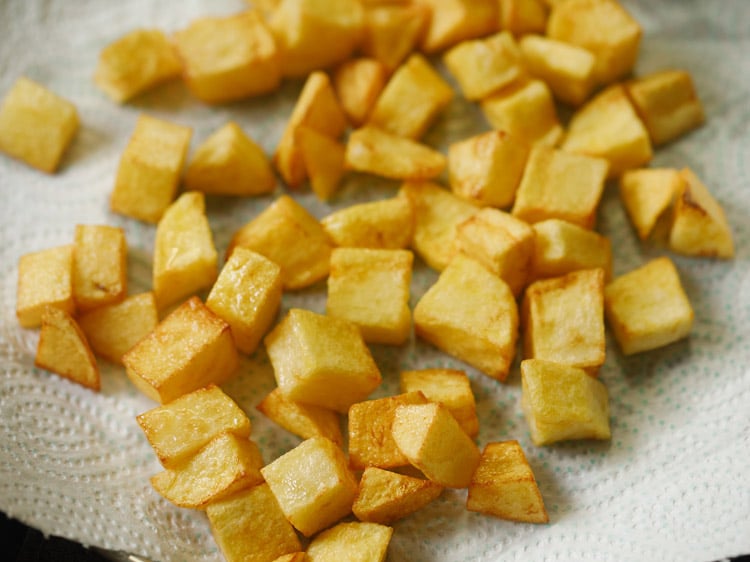
Make Aloo Chaat
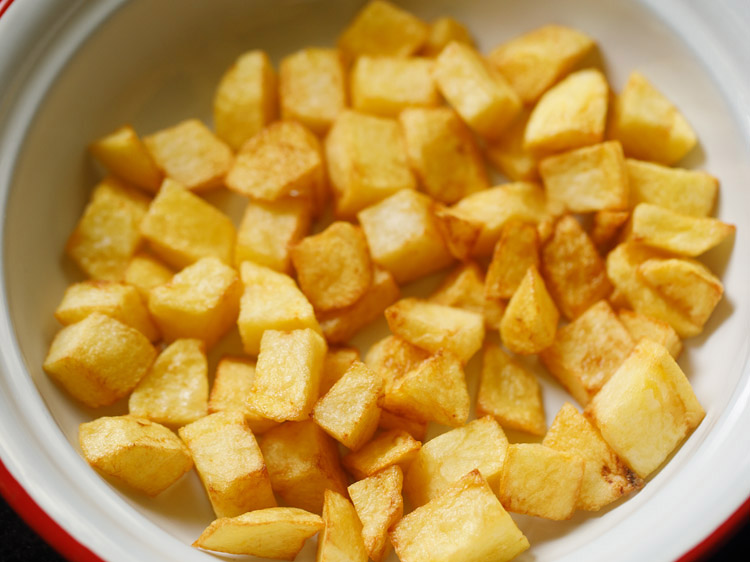
8. When the potatoes are still hot take all of them in a mixing bowl.
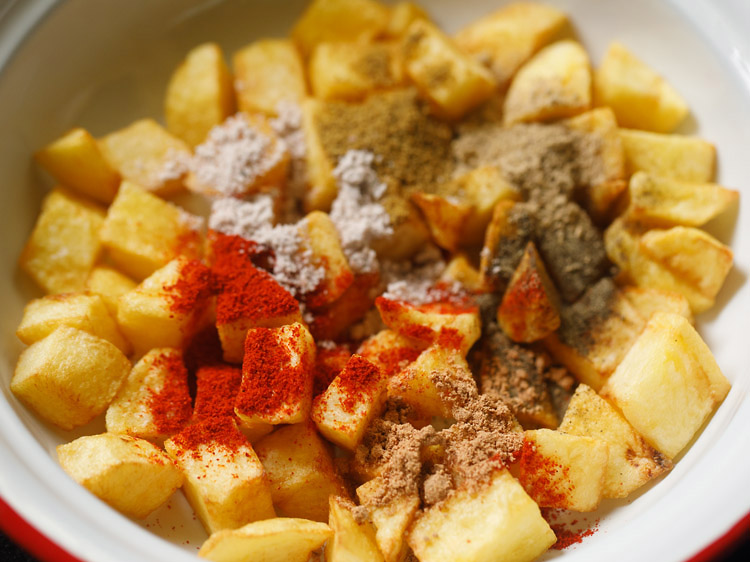
9. Then add the following ground spice powders:
- ¼ teaspoon of black pepper powder
- ½ teaspoon of Kashmiri red chili powder or sweet paprika
- ½ teaspoon of roasted cumin powder
- ½ teaspoon of dry mango powder (amchur powder)
- ½ teaspoon of chaat masala powder
- black salt or pink salt or regular white salt to taste
Tip: Feel free to adjust the spice powders to your taste.
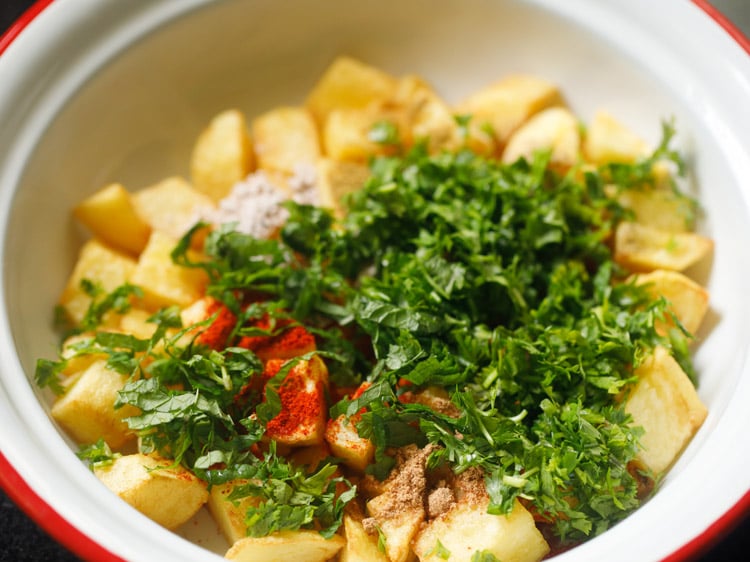
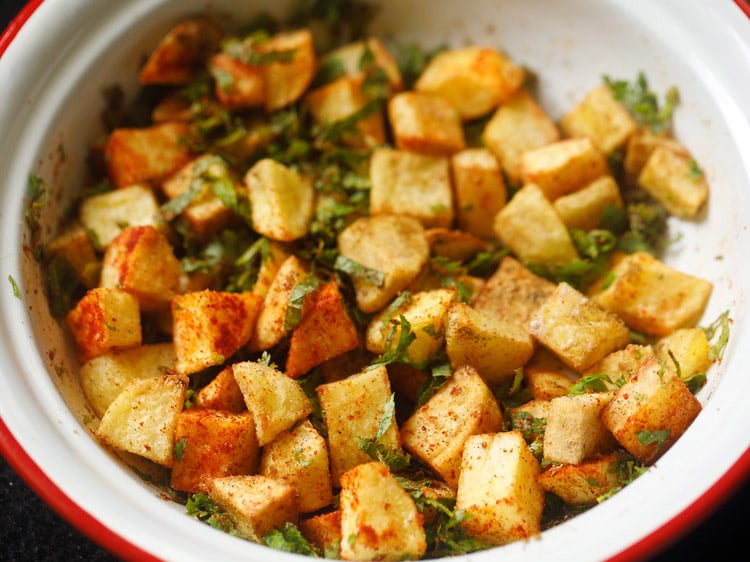
10. Next, add 1 tablespoon of finely chopped mint leaves and 2 tablespoons of finely chopped coriander leaves (cilantro).
Options: Add 1 finely chopped green chili (about ½ teaspoon finely chopped). Green chilies add pungent hot notes to the potatoes. Only add green chilies if you like eating raw green chilies. Here I have not added green chillies, but I do add them on occasions.
11. Toss and mix well.
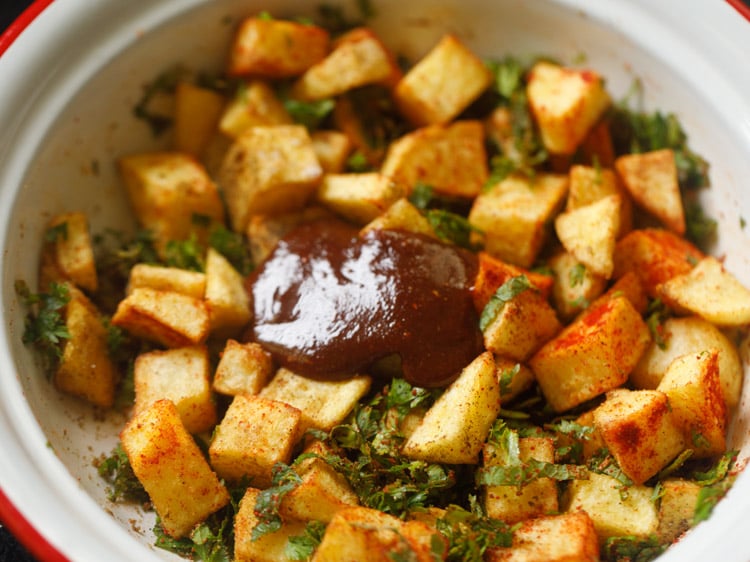
12. Then add 1 tablespoon of sweet tamarind chutney. Add less or more to suit your taste. At this step you can add coriander chutney or green chutney if you want.
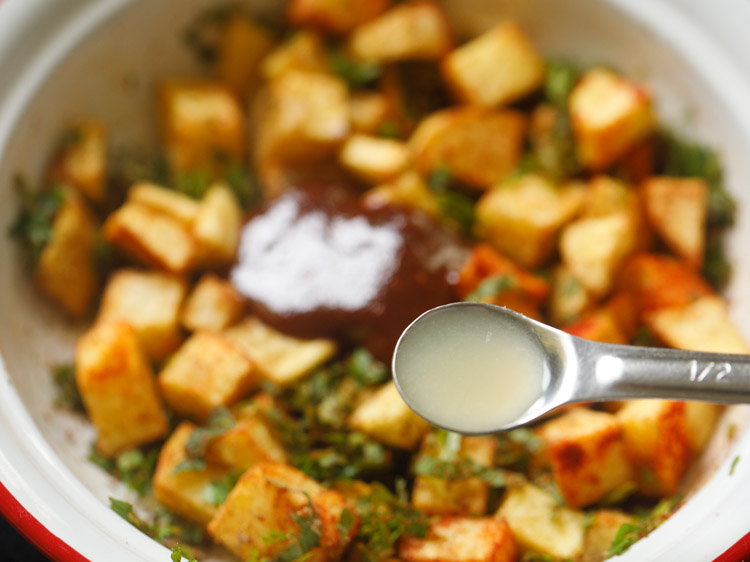
13. Sprinkle 1 to 2 teaspoons of lemon juice for some tang.
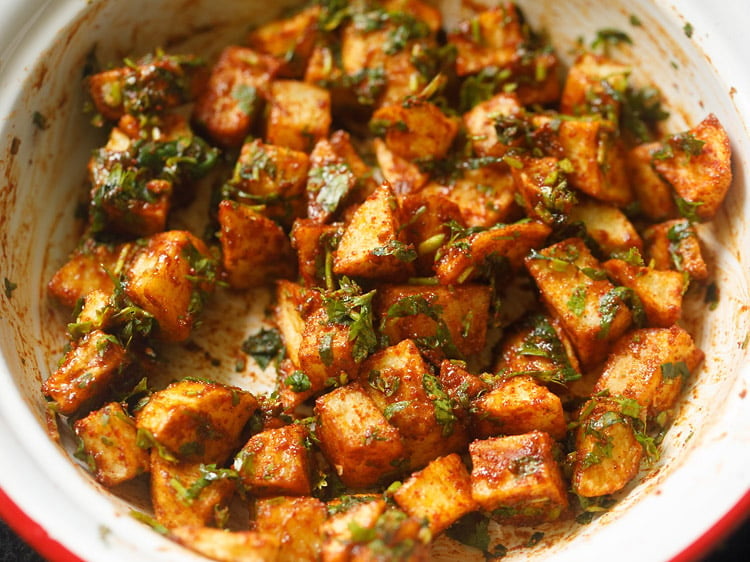
14. Toss and mix everything very well. The chutney, spice powders and lemon juice should coat the fried potatoes evenly. Taste the potatoes and adjust the seasoning to your taste.
Some people like to add whisked curd to the aloo chaat. Since we have used sweet tamarind chutney you can easily add beaten or whisked curd at this point according to your taste.
The addition of curd will add some richness and creaminess. Make sure the curd or yogurt is fresh and not sour.
15. Add chaat to a serving bowl and serve aloo chaat garnish with pomegranate arils or sev (fried gram flour vermicelli) and serve as an evening snack or starter.
If garnishing or topping with sev then serve immediately or else they will soften and you won’t get that crunchy texture of the sev.
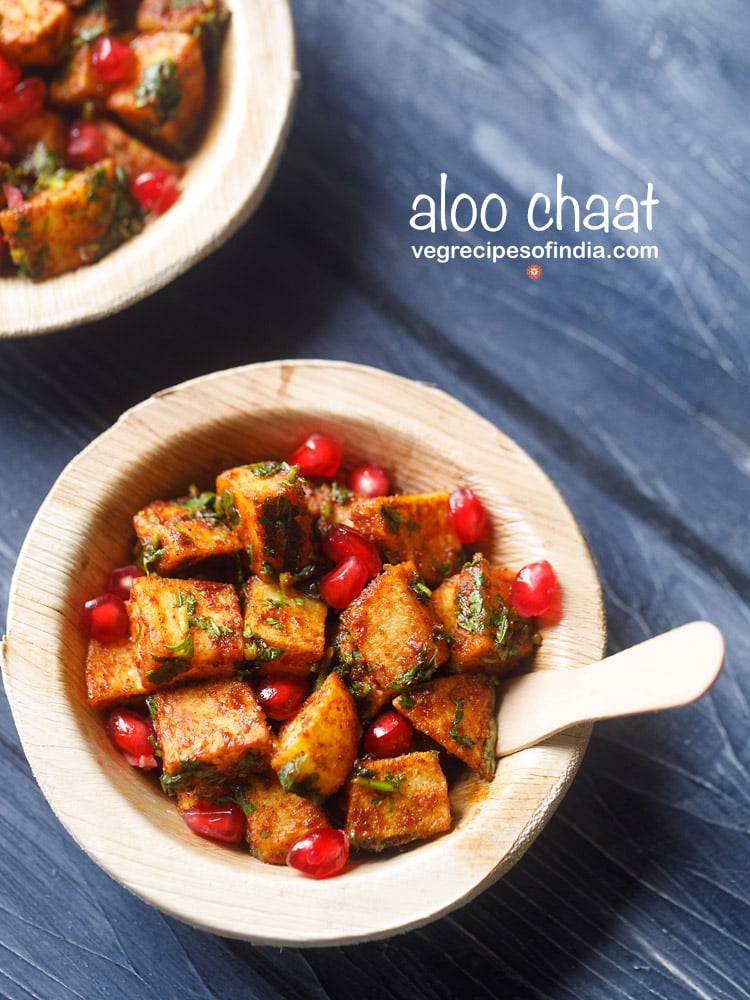
How to air fry potato cubes
You can also air-fry the potatoes instead of frying and follow the rest of the recipe. I have tried this air-frying method and the potatoes tasted just as delicious and they were a bit lighter compared to fried aloo chat.
Simply coat the potato cubes with 1 to 2 tablespoons oil. Preheat your air-fryer for 5 minutes at 180 degrees Celsius.
Then air-fry the potato cubes at a moderately hot temperature of 180 degrees Celsius/356 Fahrenheit until crispy and golden.
Do remove the air-fryer basket a couple of times while air-frying. Gently shake or toss the basket or turn over the potato cubes with a spoon, spatula or fork.
Place the basket with the potatoes back into the air-fryer and continue to air-fry.
Recipe Notes
- Frying: Aloo chaat is served at street food joints and is usually prepared using a huge tawa (griddle). You can use a large tawa or skillet to fry the potatoes, but I prefer to fry the potatoes in a kadai or wok as I find it easier. You can deep fry or shallow fry them. For a healthier chaat you can air-fry or bake the potato cubes.
- Potatoes: Use potatoes with a high starch content like Russet potatoes, Idaho, Maris Piper as these will give a crispy crust from outside with a soft, tender texture from inside.
- Frying Potatoes: Make sure the potatoes are cooked and soft on the inside. Sometimes the potatoes become crispy on the outside before the inside cooks. To avoid this remove a few potatoes from the pan and place them on a plate.
Then push a fork into the potato cubes to check if they are done. If the fork goes in easily then the potatoes are ready, but if the potatoes are still firm then continue to fry them for a bit longer. - Alternatives: Aloo chat can be made in several different ways. Alter the amount of spice powders to suit your taste and if you like spicy aloo chaat add ½ to 1 teaspoon finely chopped green chilies.
These chilies are quite hot so only add them if you are a fan of raw green chilies. You can also add some curd (yogurt) too. Green chutney can also be added. - Proportions: This is a fantastic flavorful vegan and gluten-free potato dish that is always a great starter option for gatherings. Double or triple this recipe to feed a crowd.
Vada Pav Recipe (Mumbai Style)
How to Make Vada Pav
Make seriously awesome vada pav with my step-by-step guide! In this guide, I have shared how to make potato vada in detail. The green chutney and sweet chutney recipes are also in the recipe card below.
Make Potato Stuffing
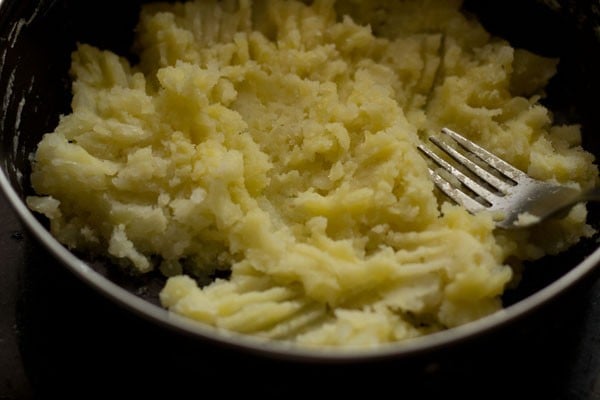
1. Boil 2 large potatoes that weigh about 350 grams. Peel and then mash them with a fork in a bowl.
You can boil or steam the potatoes in a pan, Instant pot or stovetop pressure cooker adding water as needed.
Remember to drain the water very well from the boiled potatoes before you mash them. Set aside the potatoes to cool. When they become warm, peel and mash them with a fork or a potato masher.
Also crush 6 to 7 small/medium-sized garlic cloves and 1 to 2 green chilies in a mortar pestle.
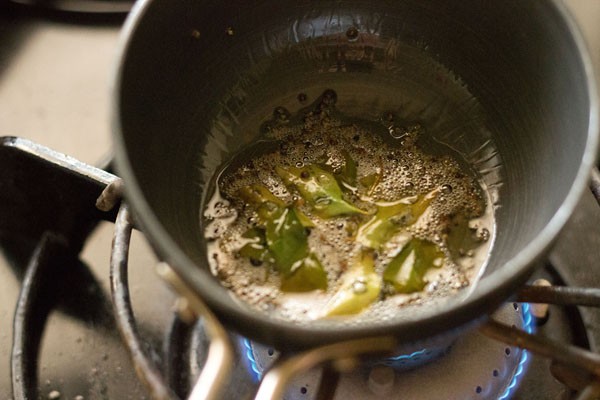
2. Heat 2 to 3 teaspoons of oil in a small pan. Add ½ a teaspoon of mustard seeds and crackle them.
Then add 7 to 8 curry leaves and a pinch of asafoetida (hing). Stir and sauté for about 5 seconds on low heat.
3. Add the crushed garlic cloves and green chilies mixture to the pan. Add ⅛ teaspoon of turmeric powder (about 2 to 3 pinches).
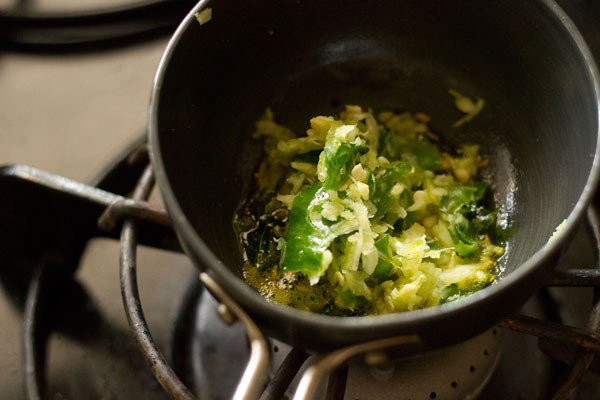
4. Stir on a low heat for some seconds or until the raw aroma of garlic goes away.
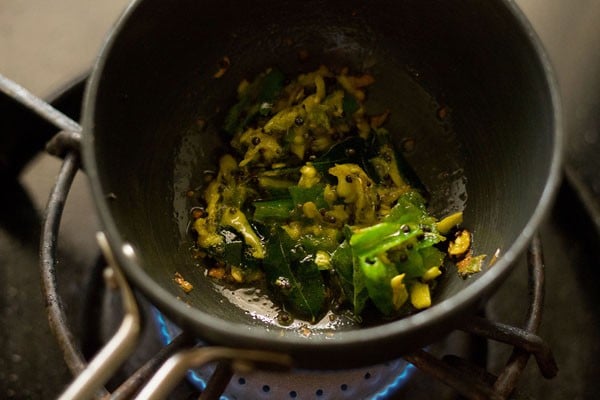
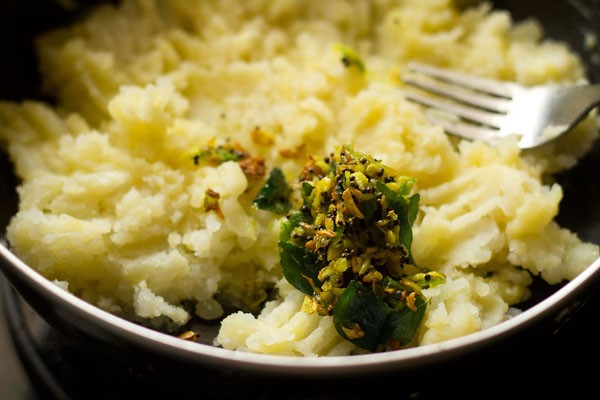
5. Pour this tempering mixture together with the oil to the mashed potatoes.
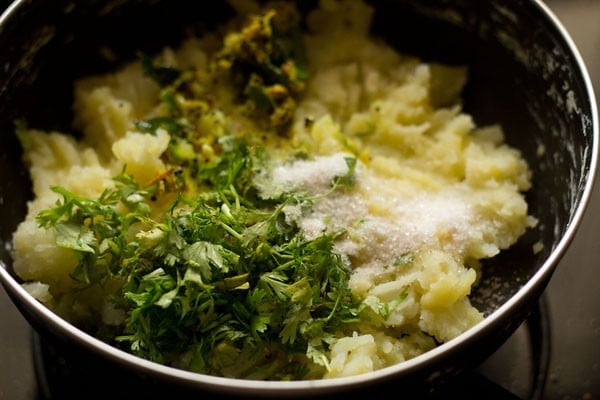
6. Add 1 to 2 tablespoons of chopped coriander leaves (cilantro) and salt as required.
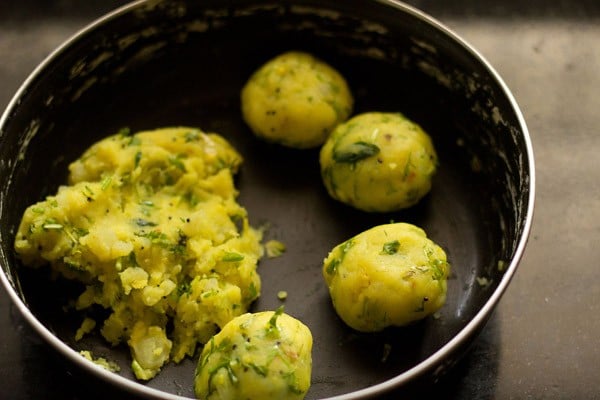
7. Mix everything well with a spoon. Do a taste test and if needed, add more salt.
Then make small to medium balls from the mashed potato mixture. Flatten these balls a bit. Cover and keep aside.
Make Batter
8. In another bowl, make a smooth batter from 1 to 1.25 cups besan (gram flour), ⅛ teaspoon turmeric powder (about 2 to 3 pinches), a pinch of asafoetida (hing), a pinch of baking soda (optional), salt and ½ cup water or as needed.
The batter should have a medium-thick flowing consistency. It should not be too thick or thin.
If the batter becomes thin, add 1 or 2 tablespoons of gram flour. If the batter becomes thick, then add 1 or 2 tablespoons of water.
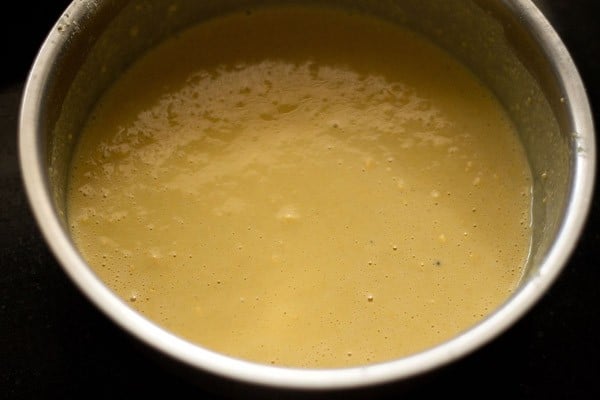
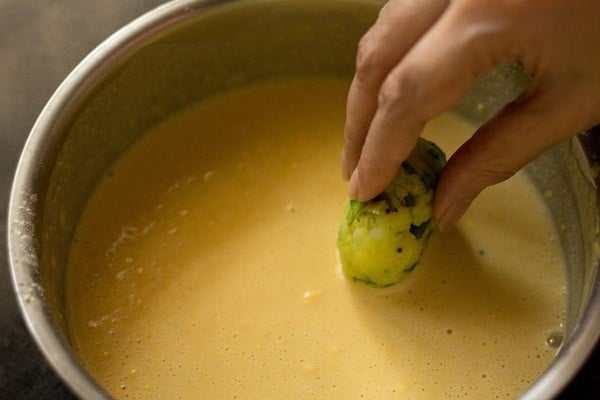
9. Dip the slightly flattened potato balls in the batter and coat it evenly with the batter.
Fry Batata Vada
10. Before you dip the batata vada in the batter, heat oil in a pan or wok (kadai). When the oil becomes hot then dip the batata vada in the batter to coat as shown in the above steps.
Carefully and gently drop these batter coated potato balls in medium hot oil.
Note: You can read more details on the frying temperature in the ‘expert tips’ section below.
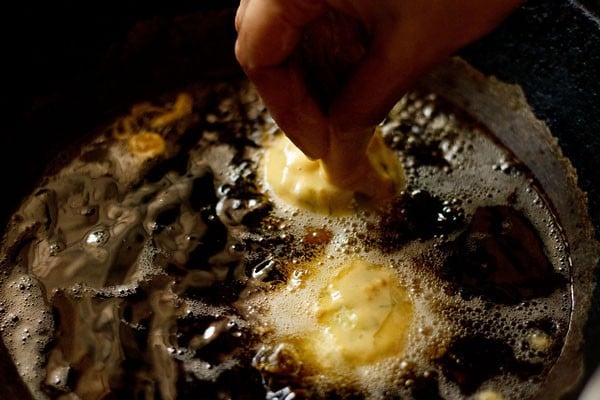
11. Depending on the size of the kadai or pan, you can add more or less of the vada while frying. But don’t overcrowd the pan
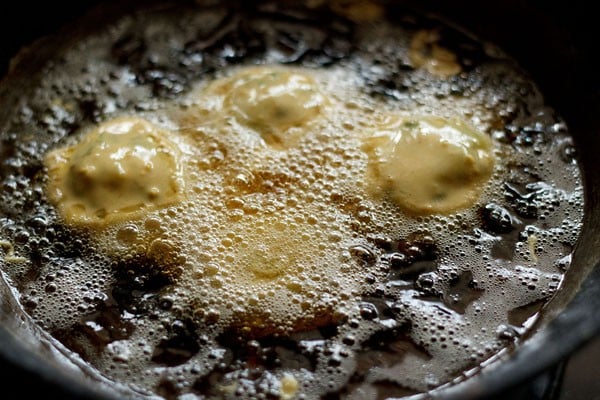
12. When one side firms up, becomes slightly crisp and golden then only turn over gently with a slotted spoon.
Fry the second side. This way deep fry them till golden, turning a couple of times as needed.
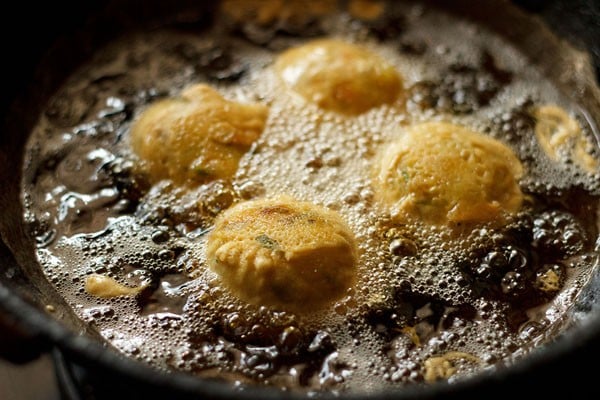
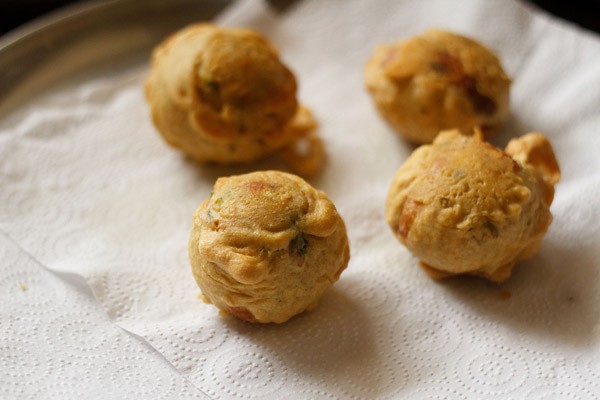
13. Place them on kitchen paper towels to absorb extra oil. Make all batata vada this way in batches and set aside.
If required, regulate the stovetop heat when frying the vadas.
Assemble Vada Pav
14. Serve them when they are still hot or warm. Put all the chutneys and pav on your work surface. Slice the pav without breaking it into two parts and set aside.
If you don’t have sweet chutney, then make the vada pav with green chutney. The green chutney and sweet chutney recipes are mentioned in the recipe card below.
You can make these two chutney recipes some hours ahead or a day before and refrigerate.
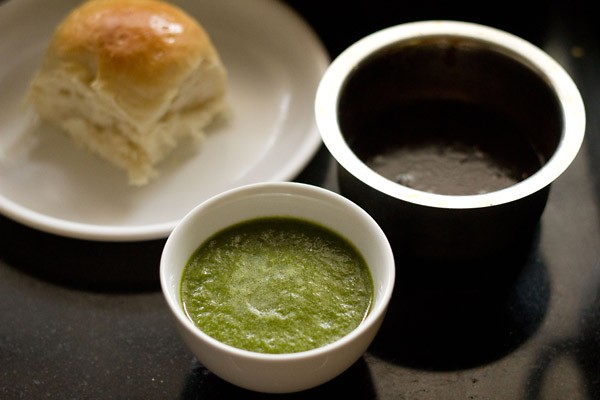
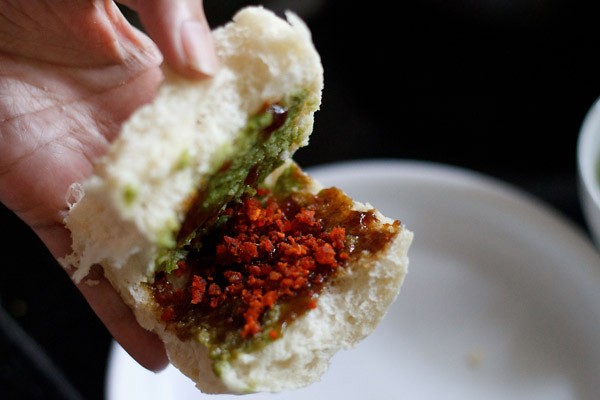
15. Spread both the green chutney and sweet chutney on the sliced pav. You can also spread green chutney on one side and sweet chutney on the other side.
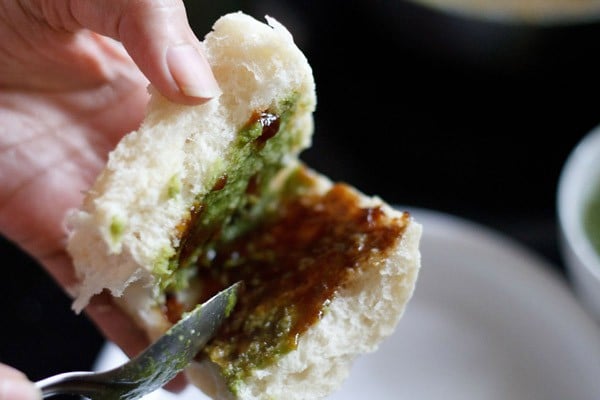
16. Sprinkle the dry garlic chutney on the pav. This step is optional and you can skip it if you don’t have garlic chutney.
17. Place the hot batata vada in the bread slices.
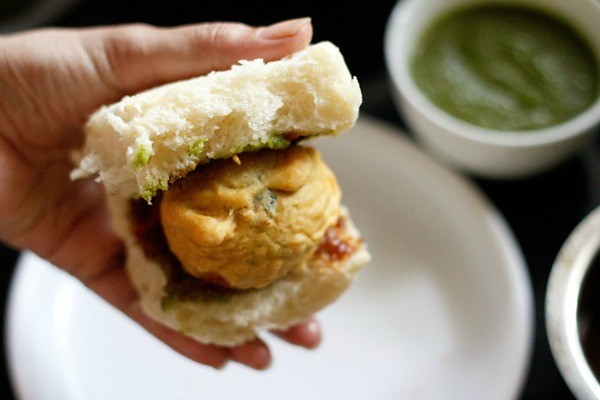
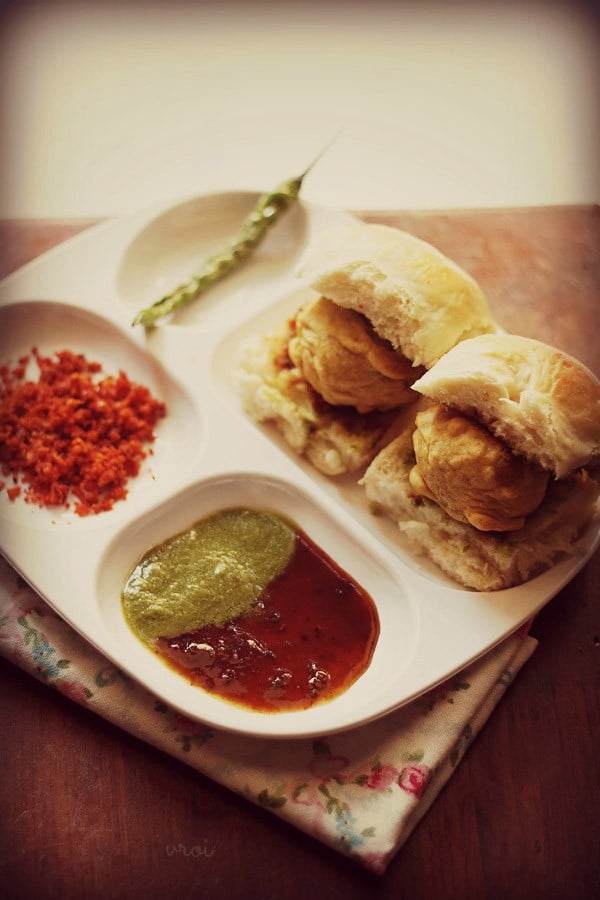
18. Serve vada pav immediately or else the pav becomes soggy. You can also serve some salted fried green chilies and both of the chutneys with it.
It makes for a good filling evening snack high on carbs. A cup of hot tea or coffee can also be served as a side beverage.
Expert Tips
- When frying batata vada the oil should be moderately hot at a temperature of 180 to 190 degrees Celsius (360 degrees to 375 degrees Fahrenheit). You can use a candy or deep-fry thermometer to check the temperature of the oil.
- Alternatively, you can add some droplets of the batter to the oil. If the droplets rise to the surface gradually and start bubbling then the oil is ready. However, if the droplets rise slowly or get submerged inside then the oil is not hot enough. If the droplets rise too quickly and get burnt or browned then the oil is too hot.
- When batata vada is fried in oil that is too hot, it remains undercooked on the inside and burnt and overcooked on the outside. Frying them in oil that is not hot enough causes them to absorb more oil and become soggy and oily.
- You can alter the amount of spices as per your taste preference. In some Maharashtrian cities like Kolhapur, the vada pav served in the street is very spicy. My recipe does not make for a spicy vada pav. If you want to make it spicy then add more green chilies.
Corn Chaat Recipe | Sweet Corn Chaat
How to make Corn Chaat
Pressure Cook Corn
1. Rinse 1 cup corn kernels or 1 medium size corn on cob a couple of times in water. I have used American sweet corn kernels here.
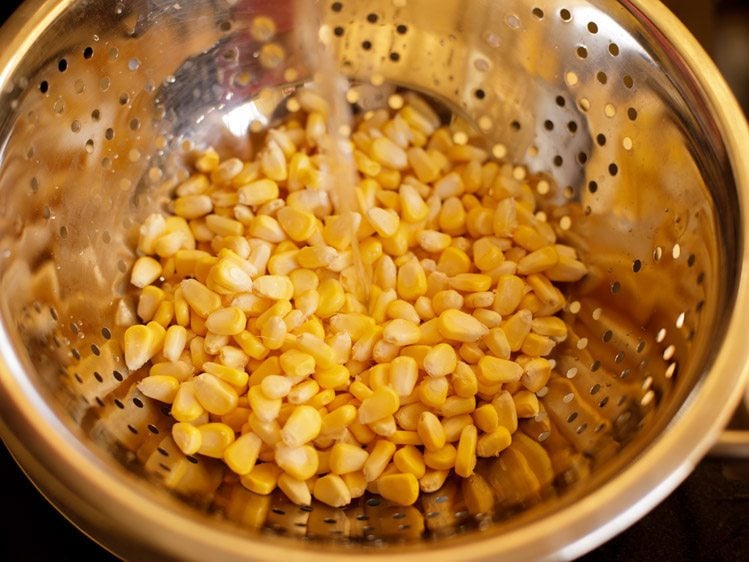
2. Add the rinsed corn kernels or corn on cob in a 2 to 3 litre stovetop pressure cooker. Also, add 1.5 cups water and ¼ teaspoon salt or add as required.
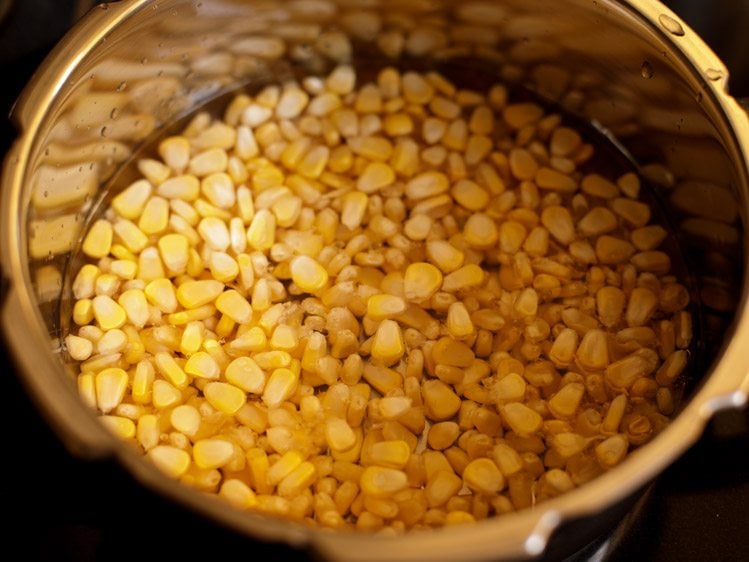
3. Pressure cook the corn kernels or corn on cob on medium heat for 3 to 4 whistles or tender.
You can also steam or boil kernels in a pan or Instant pot adding water as needed. Though cooking corn kernels in a pan on the stove-top will take a longer time.
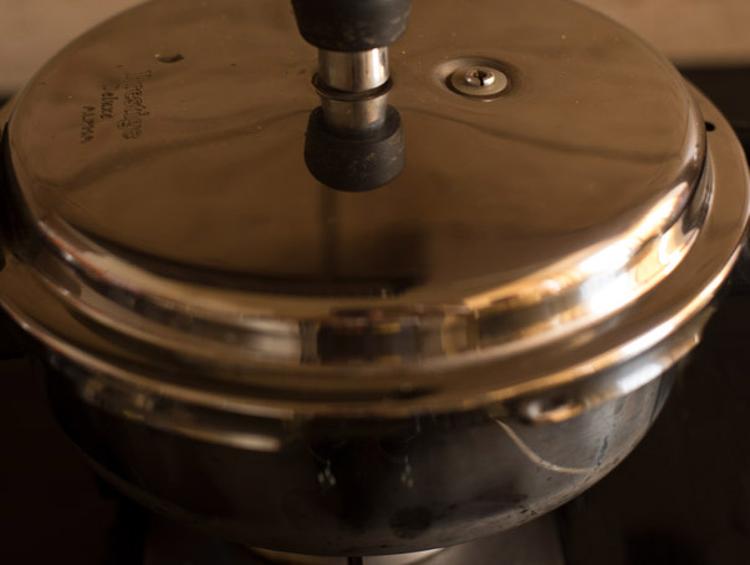
4. Let the pressure settle down naturally in the pressure cooker. Then only remove the lid.
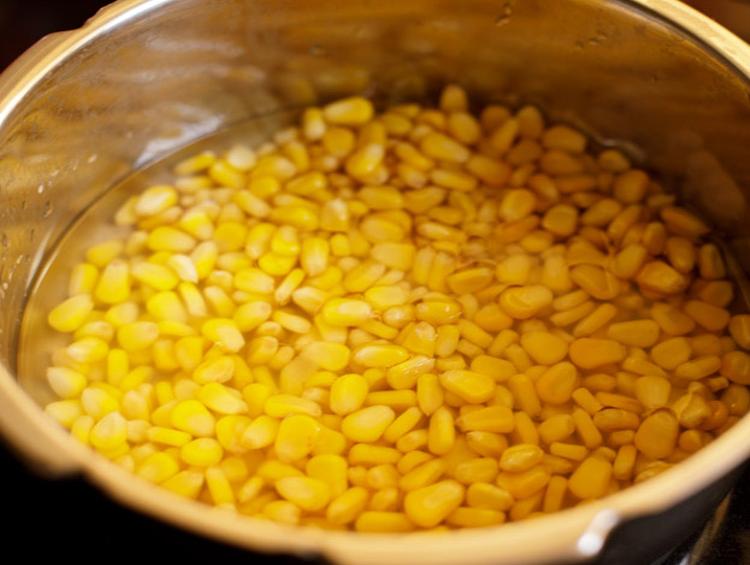
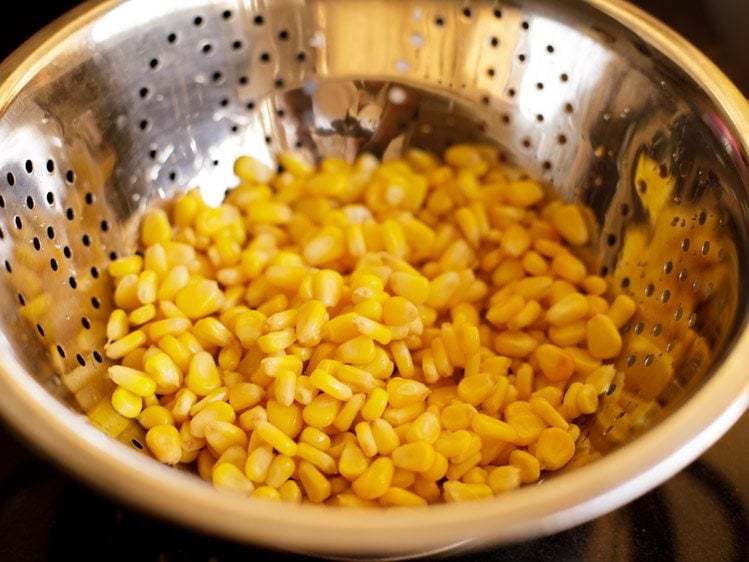
5. In a colander or strainer, strain the boiled corn kernels or corn on cob. Drain all the water and keep the cooked corn kernels aside.
If you have used a corn cob, then let it become warm or cool. After it has become warm or cooled, carefully remove the corn kernels with a knife.
Make Sweet Corn Chaat
6. Chop 1 small onion, 1 small to medium tomato, 1 green chili and some coriander or parsley leaves.
Keep all the following ingredients ready:
- ¼ cup finely chopped onions
- ⅓ cup finely chopped tomatoes
- ½ to 1 teaspoon finely chopped
- 1 tablespoon finely chopped parsley or coriander leaves (cilantro)
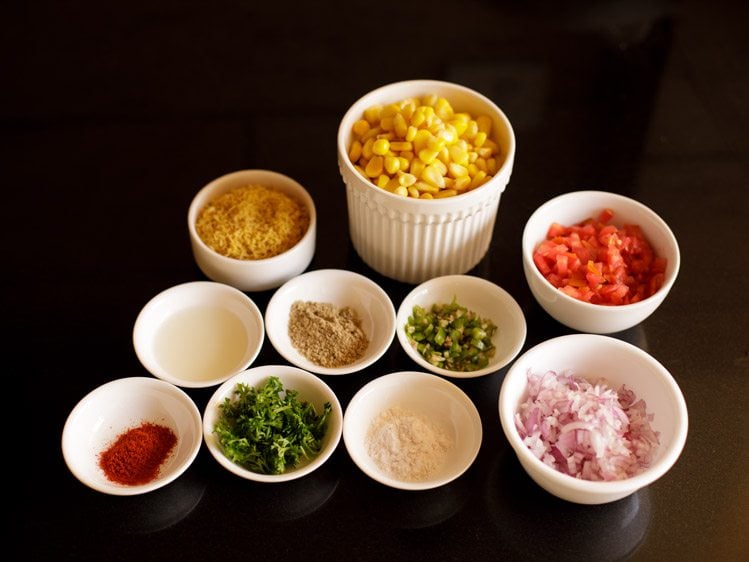
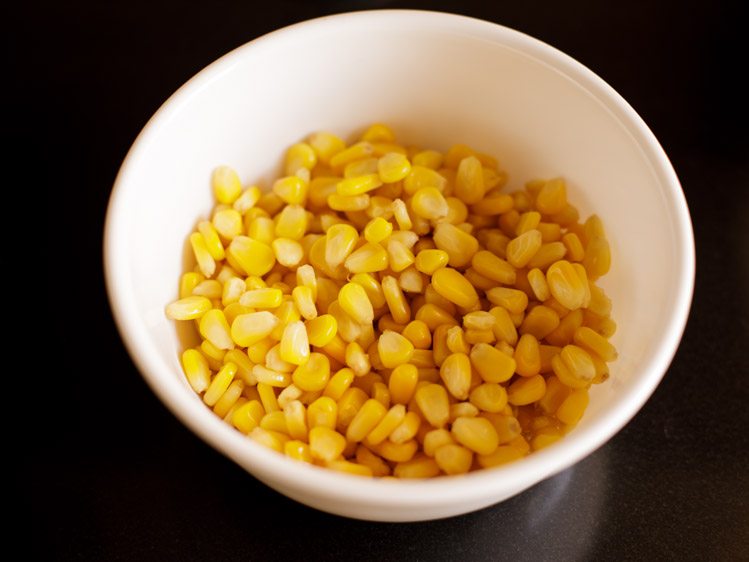
7. Now, take the boiled corn kernels in a mixing bowl.
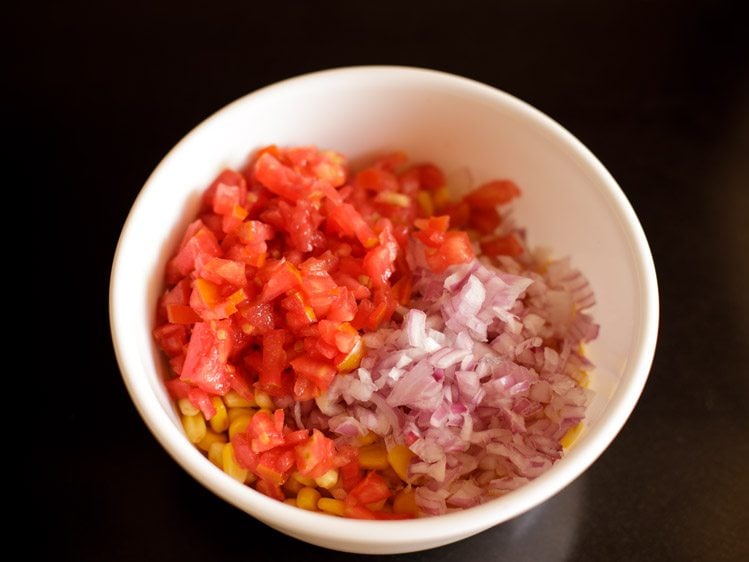
8. Next, add the ¼ cup finely chopped onions and ⅓ cup finely chopped tomatoes to the corn kernels.
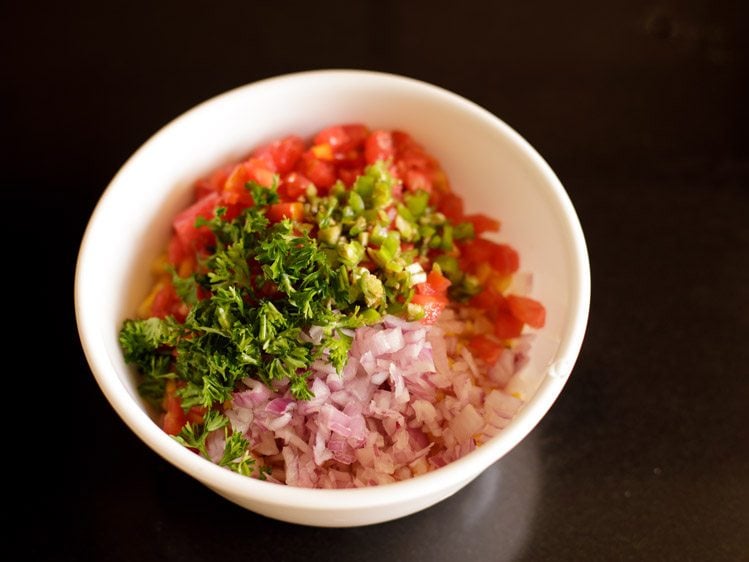
9. Add ½ to 1 teaspoon finely chopped green chilies and 1 tablespoon finely chopped coriander leaves or parsley leaves.
10. Add ¼ teaspoon red chili powder, 1 teaspoon chaat masala powder and salt as required.
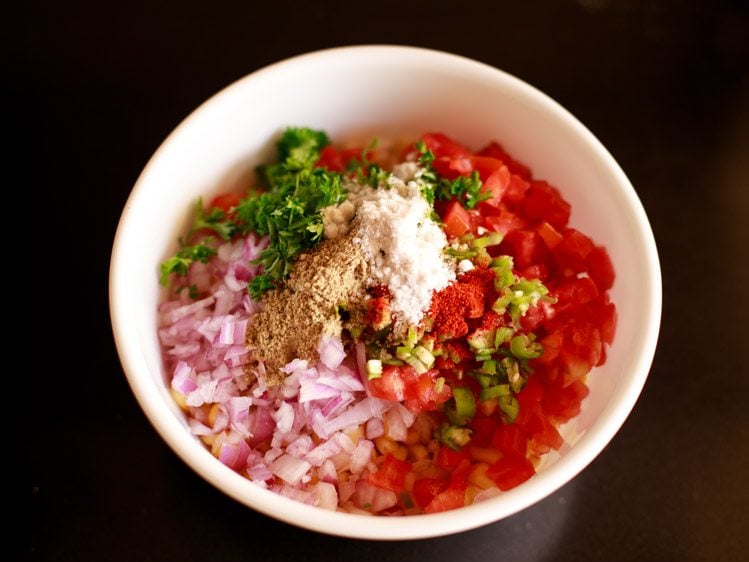
11. Finally, add 1 to 2 teaspoons lemon juice or add as per taste.
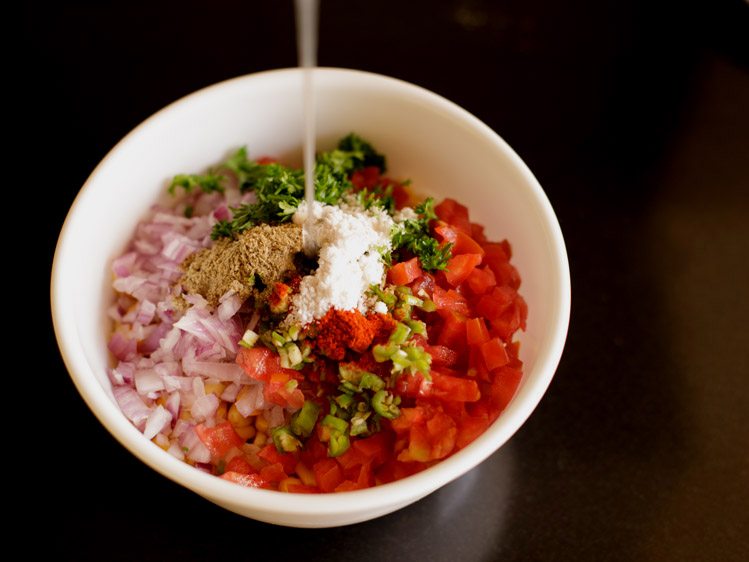
12. Stir well to mix. Check the taste and add more salt, chaat masala or lemon juice, if required.
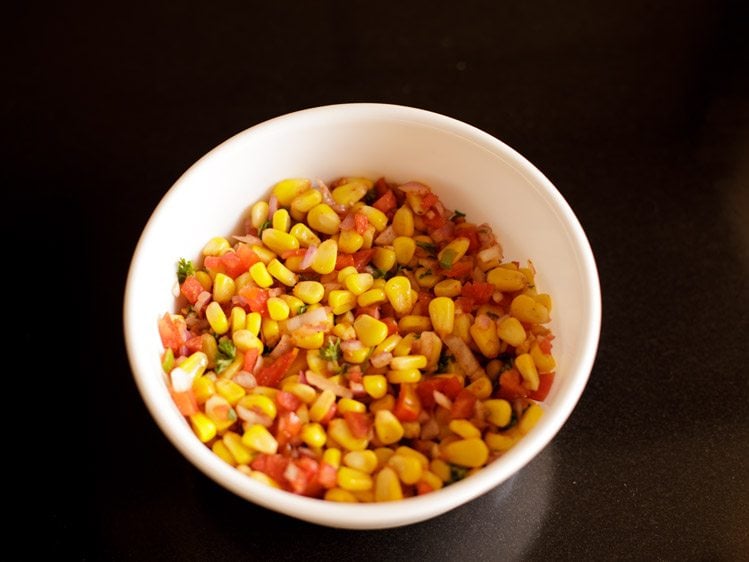
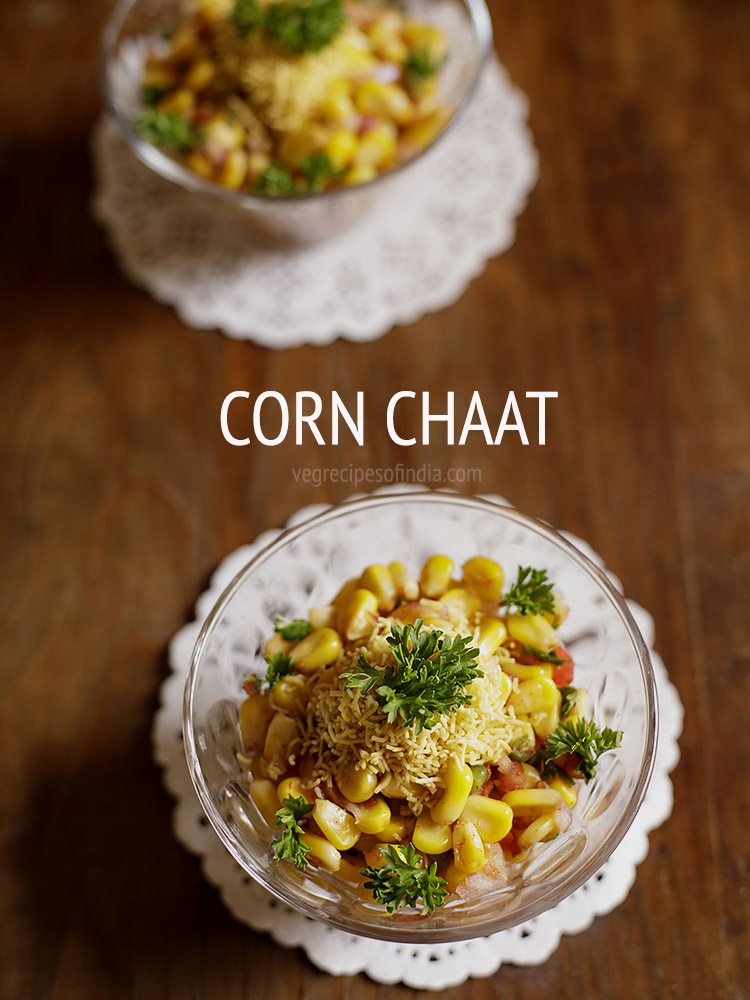
12. Serve the Corn Chaat immediately, in individual serving bowls or plates. Optionally top the chaat with sev (fried gram flour vermicelli) and some finely chopped coriander leaves or parsley leaves.
Expert Tips
- Fresh corn tastes best in this Corn Chaat recipe. However, you can even use canned sweet corn kernels.
- If you are using corn on cob, after cooking it, drain the water and let it cool down a bit or become warm. Then, remove the kernels carefully using a knife.
- Corn kernels can also be boiled in a pan on the stove-top. You can also cook the corn cob or corn kernels in the Instant Pot.
- You can roast the corn kernels slightly in ghee, butter or oil before mixing it up with the other ingredients. This imparts a rustic flavor to the chaat.
- Other vegetables, fruits, legumes like cucumber, boiled potato, boiled chickpeas, fresh pomegranate pearls, mango, kiwi, etc. can also be added in this chaat.
- Make sure the chaat is served immediately as the sev tends to get soggy after a while.
- This Sweet Corn Chaat recipe can be scaled accordingly. For a more Indian street style tastier variation consider adding some Coriander Chutney and Tamarind Chutney to the chaat together with some boiled chopped potatoes, pomegranate arils, crispy puris and sev.
Kathi Roll | How To Make Veg Kathi Roll
How to make Kathi Roll Recipe
Steaming veggies
1. Rinse the veggies in fresh water. Then chop all veggies and take them in a pan or bowl that fits inside a 3 litre pressure cooker.
You will need 1 cup chopped small cauliflower florets, ½ cup chopped carrot cubes, ½ cup chopped potato cubes, ⅓ cup green peas and ¼ cup chopped french beans.
You can also add your choice of veggies.
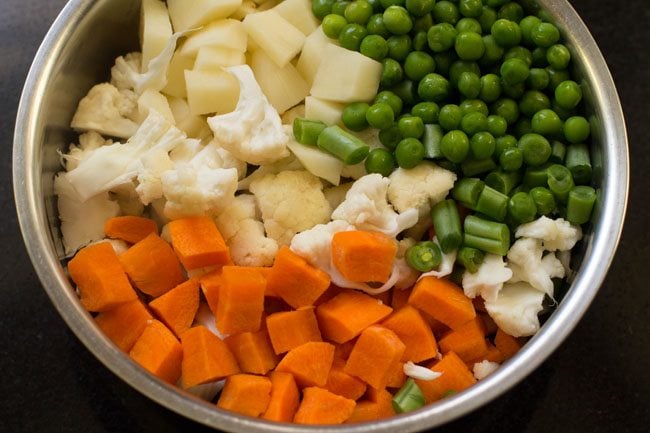
2. Now add 1.5 cups water in the pressure cooker. Place the pan in the cooker.
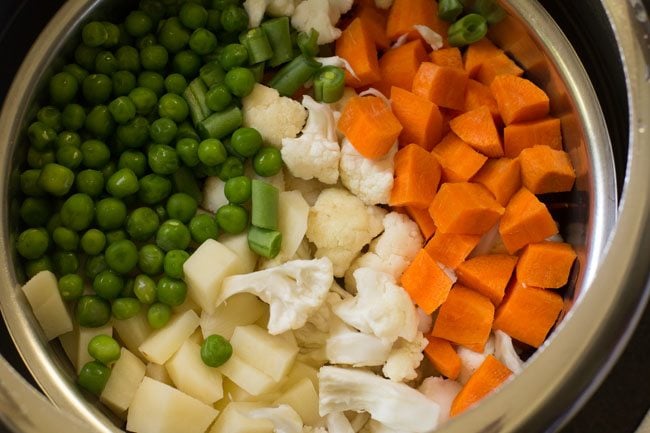
3. Pressure cook for 2 to 3 whistles on medium heat or for 12 to 15 minutes. The veggies have to cook well, yet retain their shape. You can also steam veggies in a pan or an electric rice cooker. Cover and keep aside.
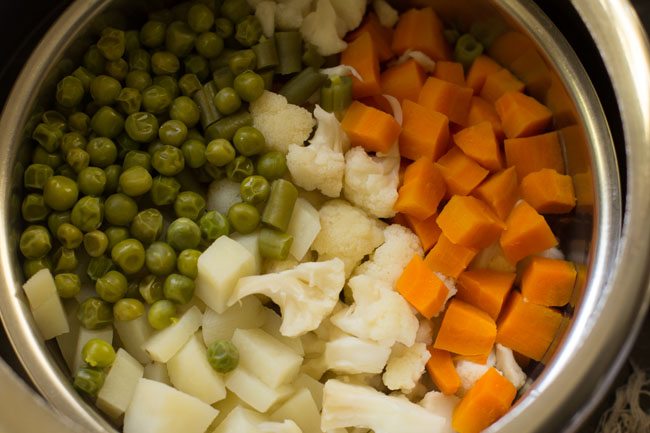
Kneading dough
1. In a mixing bowl or pan or a large tray, take 2 cups whole wheat flour and ½ teaspoon salt.
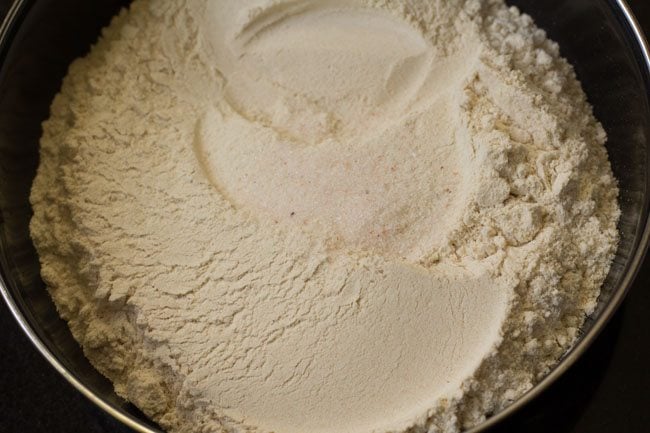
2. Then add 1 tablespoon oil and 1 cup water in parts. First you can add ½ cup water and add the remaining required amount of water later.
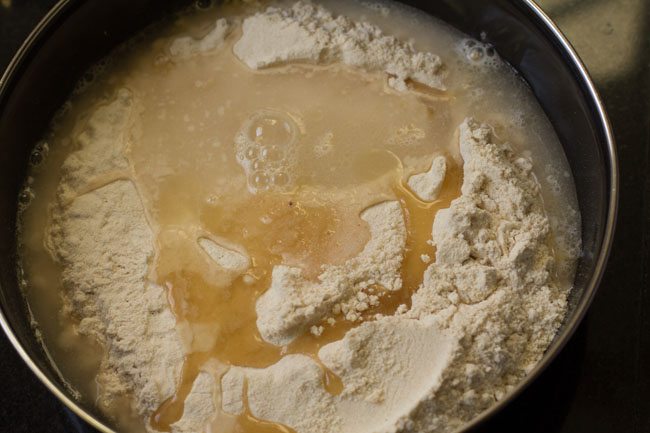
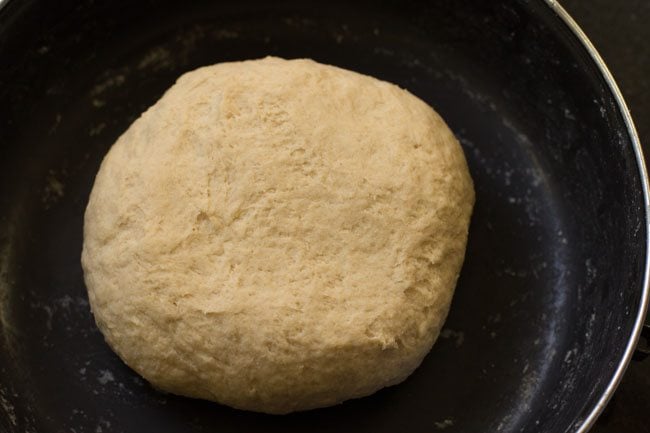
3. Begin to knead. Add water as required and knead to a smooth soft dough. Cover the dough and keep aside for it to rest for 30 minutes.
Preparing marinated onions
1. In a small bowl, take ⅓ cup thinly sliced onions, ½ teaspoon chaat masala powder, ¼ teaspoon Kashmiri red chili powder (OR a pinch of red chili powder) and ¾ teaspoon lemon juice or add as per taste.
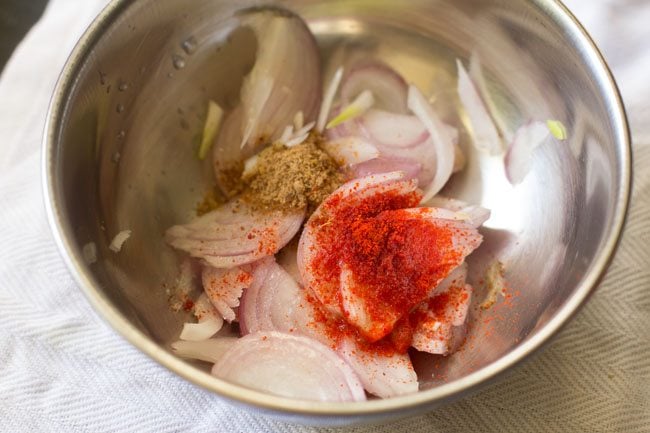
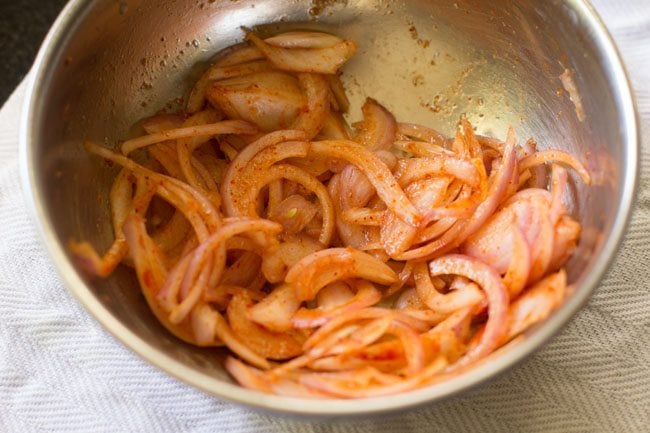
2. Mix very well. Cover and keep aside or you can refrigerate too.
Making Kathi Roll Stuffing
1. Heat 2 tablespoons oil in a pan or kadai. You can use any neutral-flavored oil.
Then add ¼ teaspoon ajwain (carom seeds) and ¼ teaspoon cumin seeds. Let them splutter.
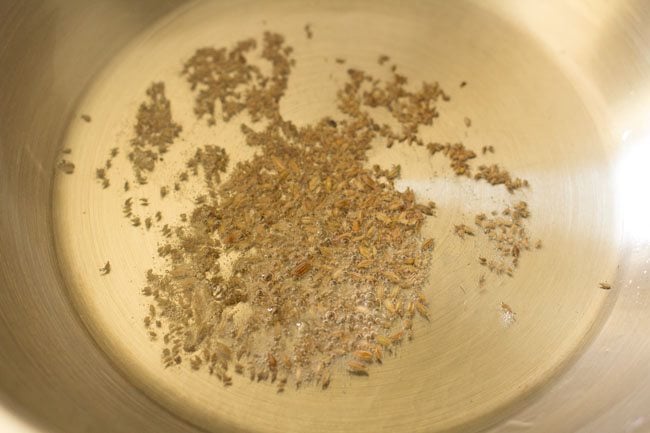
2. Then add ⅓ cup finely chopped onions
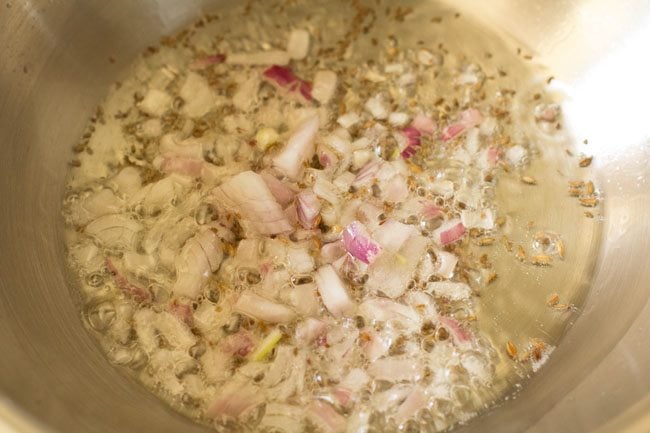
3. Saute stirring often till the onions turn translucent.
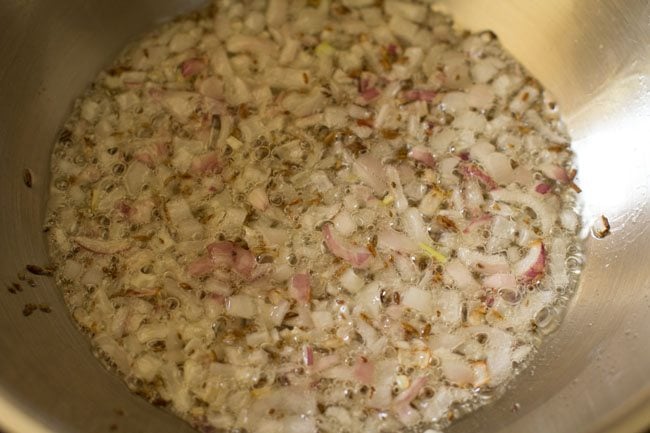
4. Add 1 teaspoon ginger-garlic paste.
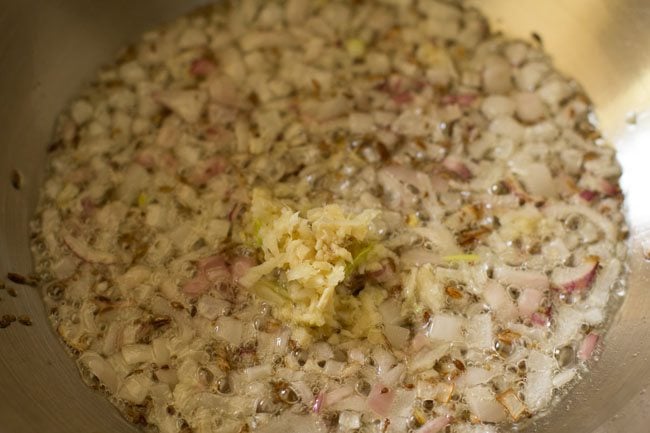
5. Stir and saute for a few seconds or till the raw aroma of both ginger and garlic goes away.
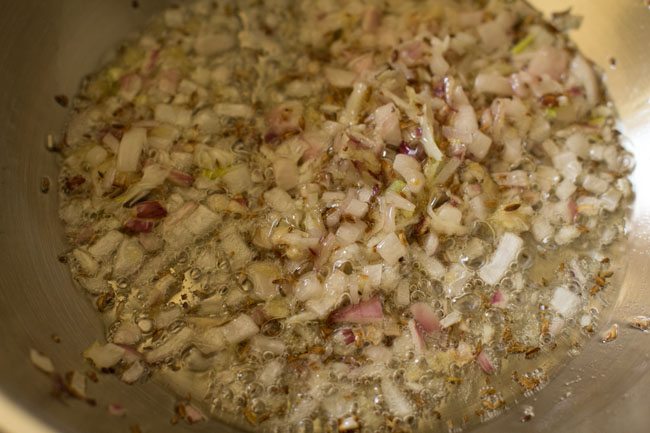
6. Add ½ cup chopped tomatoes.
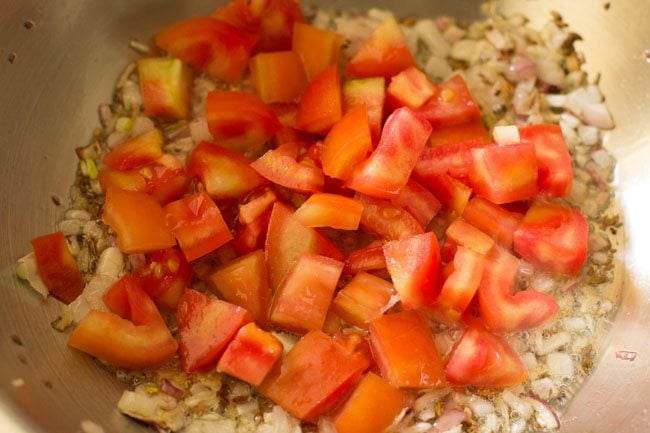
7. Mix well and saute the tomatoes on a low to medium heat for 3 minutes or till they soften.
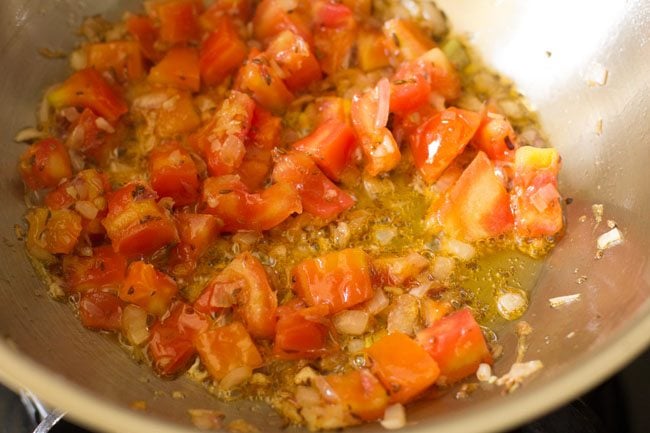
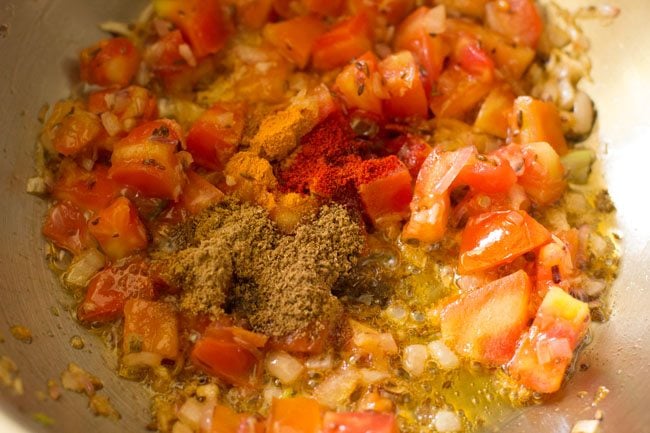
8. Then add the following ground spices and mix very well.
- ¼ teaspoon turmeric powder
- ½ teaspoon Kashmiri red chilli powder (If using regular red chili powder, then add ¼ teaspoon of it.)
- ½ teaspoon coriander powder
- ½ teaspoon garam masala powder.
You can vary the amount of spices as per your taste buds.
9. Then add ⅓ cup chopped capsicum cubes.
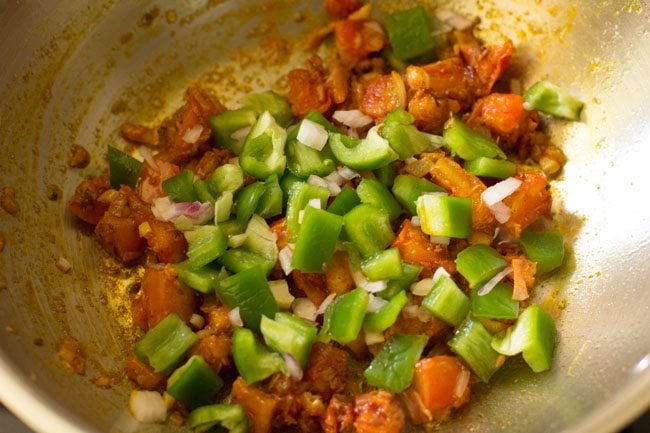
10. Saute for two or three minutes.
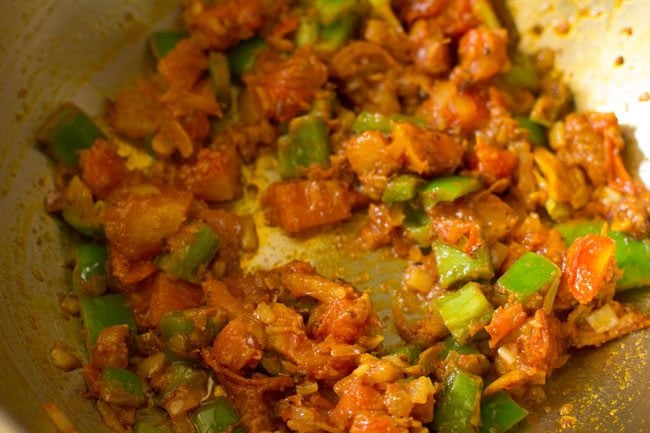
11. Next add all the steamed veggies. If there is any water in the pan of the steamed veggies, then add this water too. Also add salt as per taste.
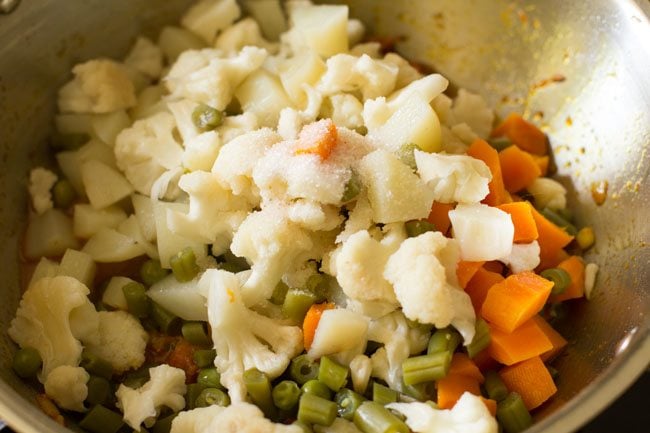
12. Mix very well.
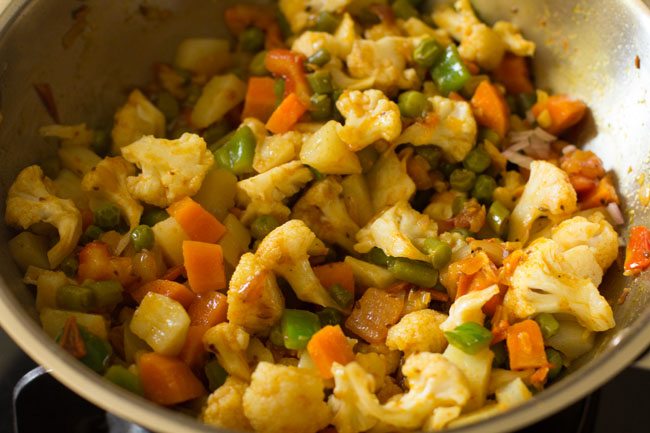
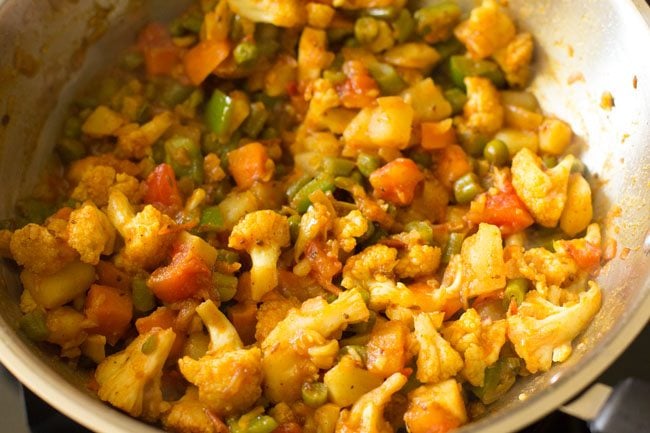
13. On a low to medium heat saute for 4 to 5 minutes. Do make sure that the veg stuffing is dry.
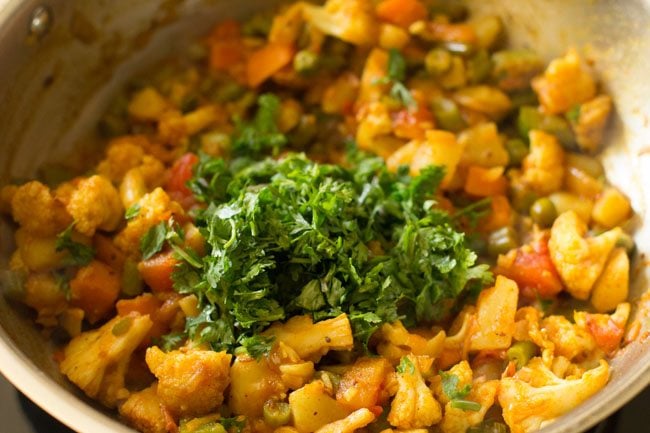
14. Next add ¼ cup of chopped coriander leaves. Mix very well.
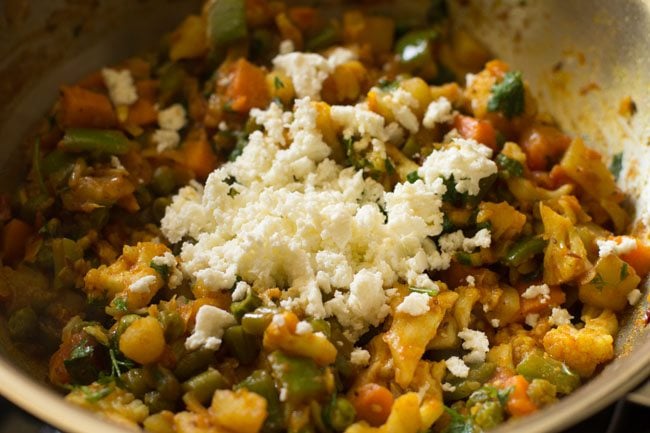
15. Lastly add ¼ cup grated or crumbled paneer. Paneer is optional and you can skip it. Check the taste and add more salt or chili powder if required. Mix very well and keep the veg stuffing aside.
Preparing Rotis
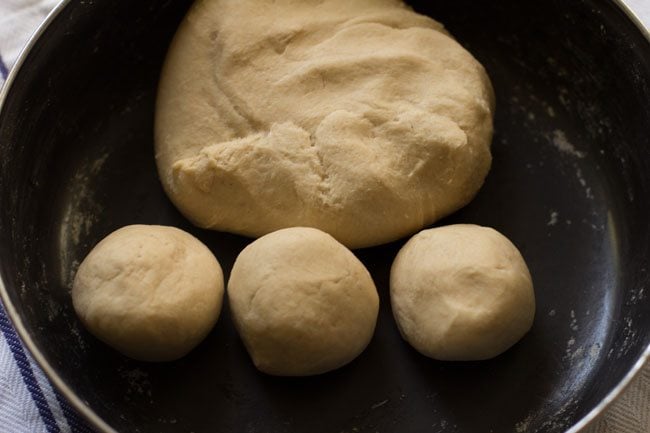
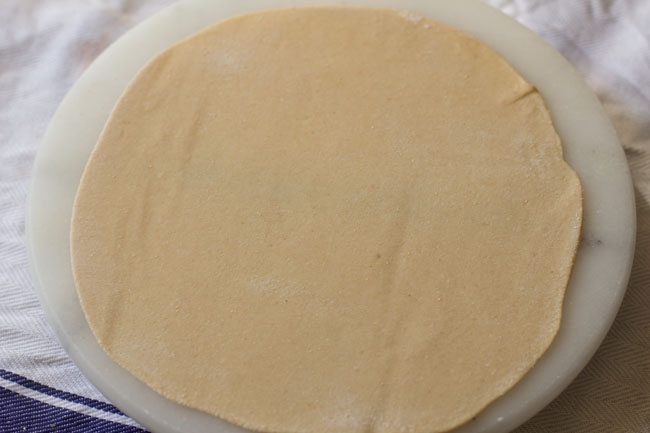
1. After 30 minutes, divide the dough into small or medium sized balls. This depends on the size of the wraps you want to make. You can also make mini wraps.
2. Dust the dough ball with some flour. then gently roll to thin roti. The roti should not be thick. If required while rolling, you can add some more flour.
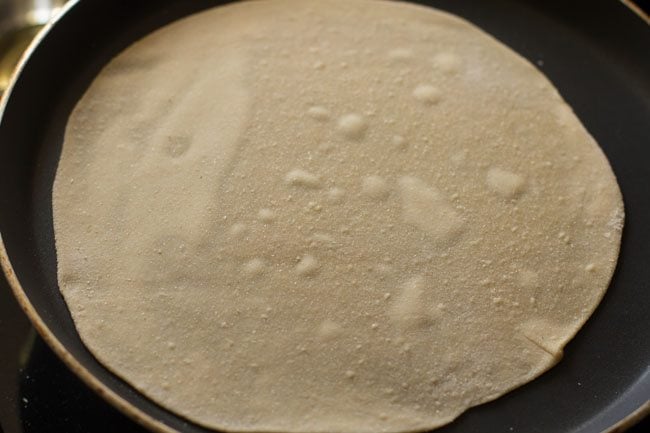
3. Place the roti on a hot tawa. Cook the base till you see bubbles appearing on the rotis or the roti is ¼th cooked.
Do note that the tawa should be hot. So cook on a medium-high to high heat. On a low heat, the rotis will become like papads.
4. Then flip the roti.
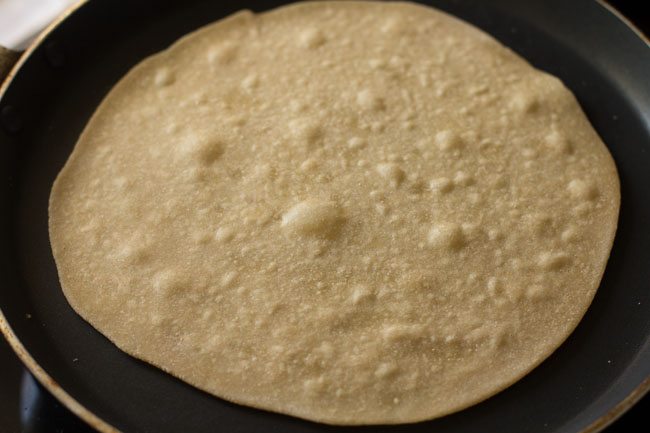
5. Spread some oil all over.
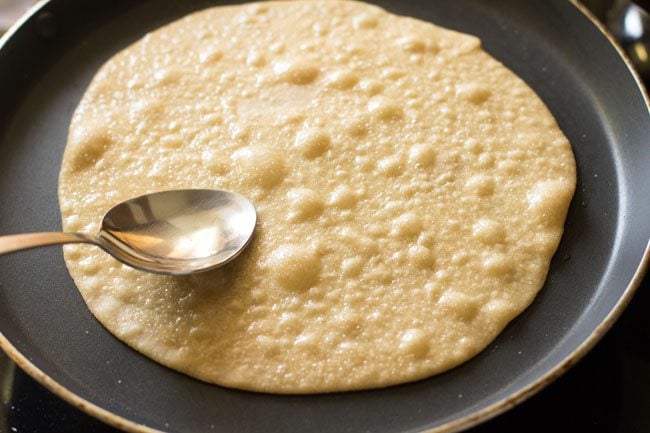
6. Then flip again when the second side is ½ cooked. You will see light golden blisters on the roti.
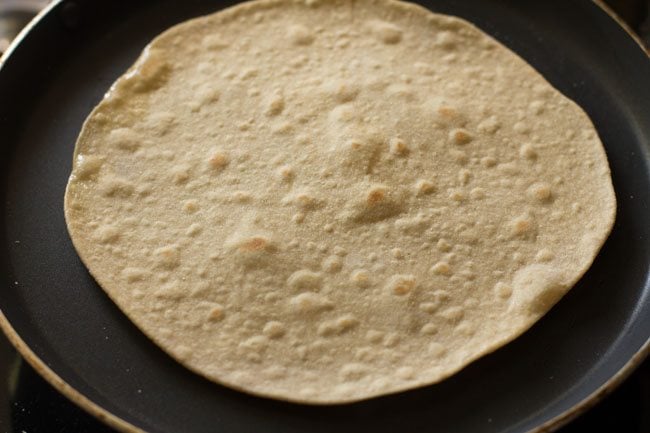
7. Spread some oil on this side too.
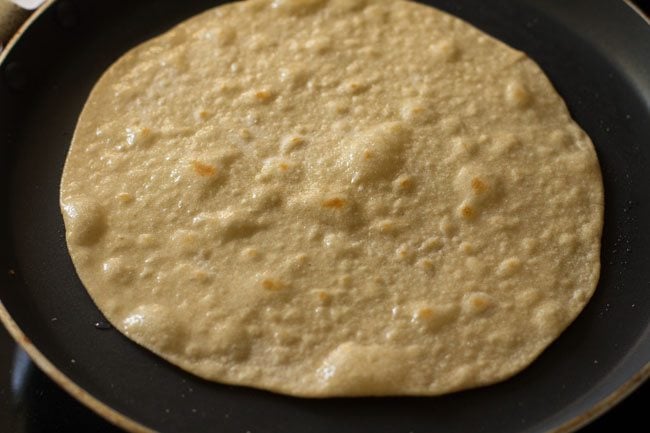
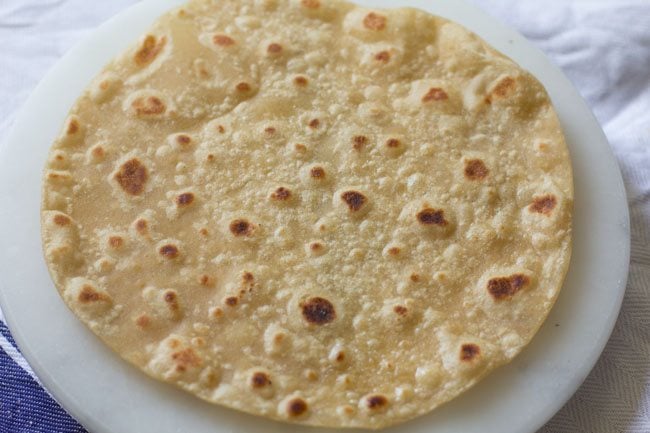
8. Flip once or twice more for even roasting. Remove and keep the roti in a roti basket or in a warm casserole. Prepare all rotis this way.
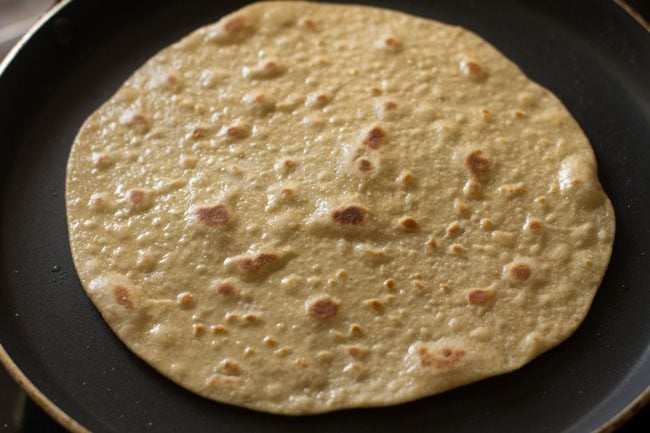
Making veg kathi roll
1. Now take a single roti.
2. Place the mix veggie stuffing in the centre. if you have mint coriander chutney, you can also spread some chutney on the rotis, before placing the veg stuffing.
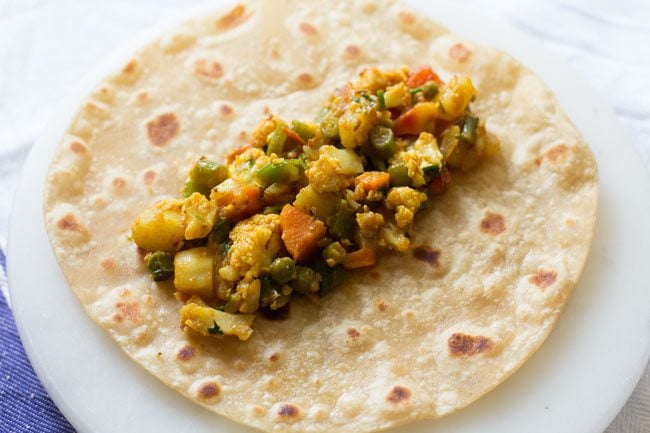
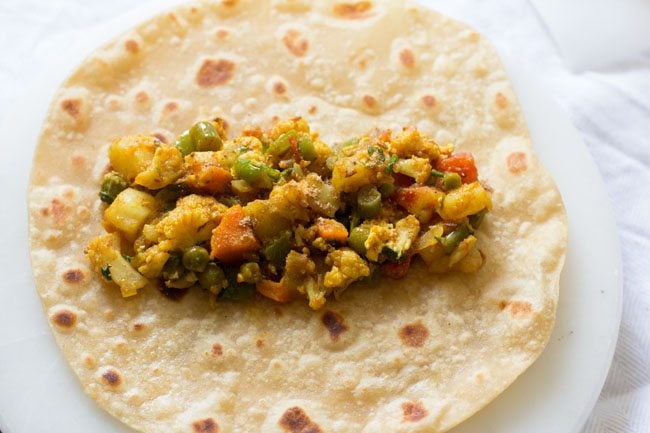
3. Sprinkle some chaat masala powder on top.
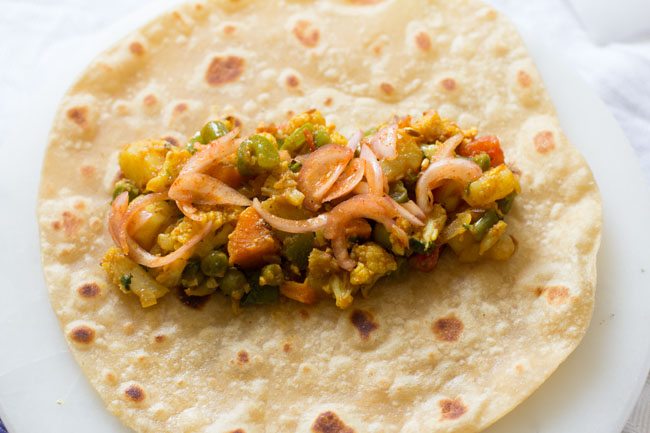
4. Add the marinated onions on top of the veg stuffing. You can also add some grated cheddar cheese or paneer on top.
5. Now roll both the sides of the roti
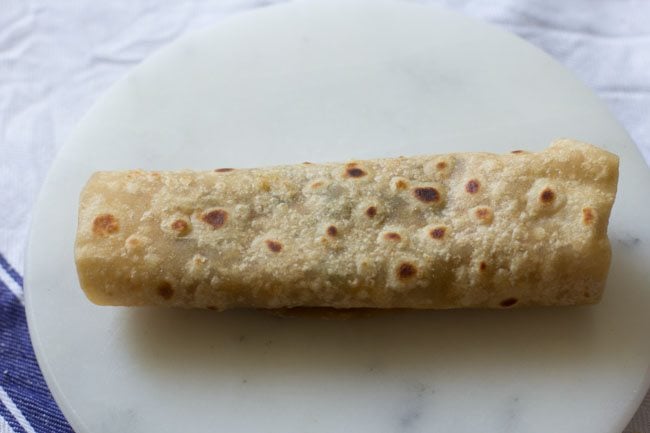
6. You can wrap them in butter paper or aluminium foil from the base, so that while eating the stuffing does not fall down. If you want you can even secure the wraps with a toothpick. You can even pack these in tiffin box.
Skip adding onions if packing in tiffin box.
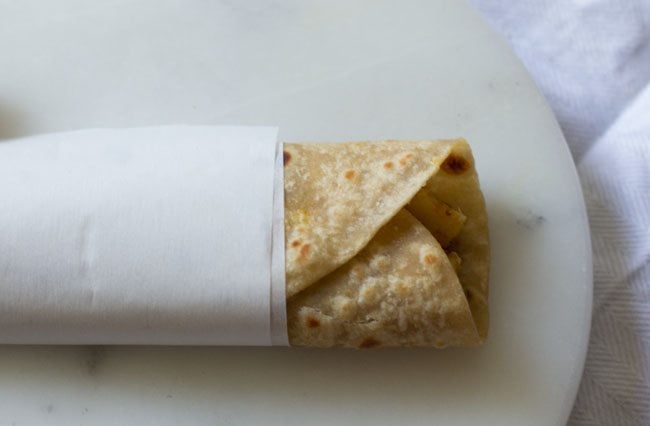
Serve veg kathi rolls just plain as they taste good the way they are. Or you can accompany some chutney or tomato ketchup by the side.
Khaman Dhokla Recipe
How to make Khaman Dhokla
Prep Pan
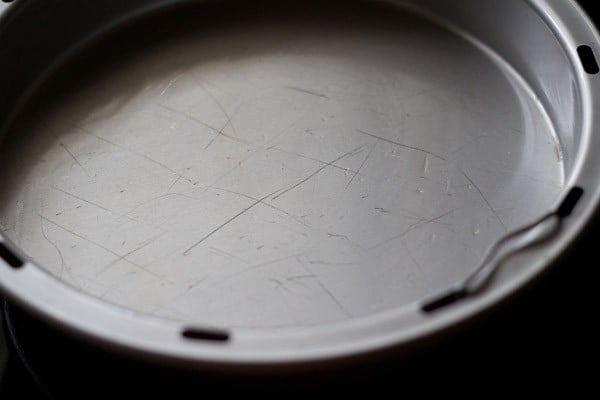
1. Grease a steamer pan with 2 to 3 teaspoons oil.
Make Batter
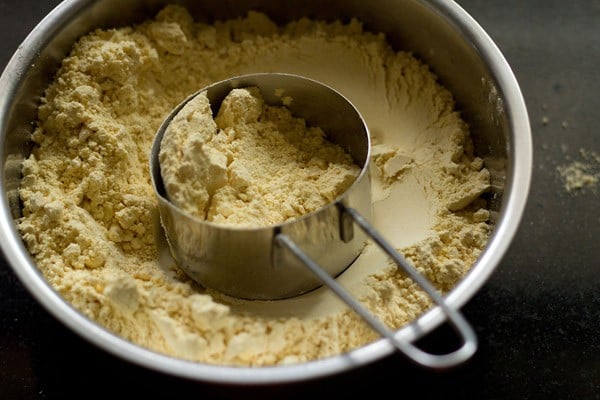
2. Take 1.5 cups gram flour (120 grams besan) in a mixing bowl or pan. Do use gram flour which has a fine texture.
TIP: You can make khaman with chickpea flour as well.
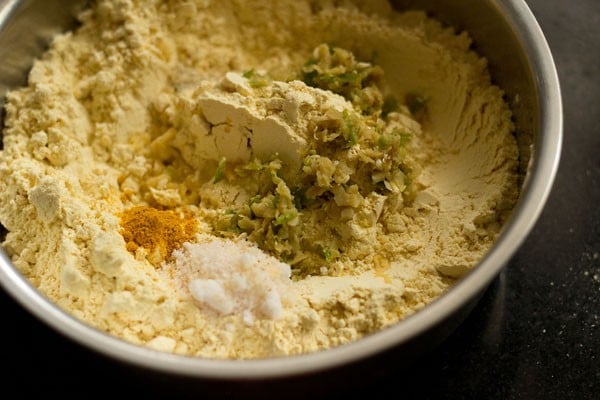
3. The add the following ingredients:
- 2 to 3 pinches of turmeric powder
- a generous pinch of asafoetida (skip to make a gluten-free version)
- 1.5 tablespoons lemon or lime juice or ⅓ to ½ teaspoon pure citric acid
- 1.5 teaspoons ginger paste (crush 1.5 inch ginger and 1.5 teaspoons green chilies in a mortar-pestle)
- 1.5 teaspoons green chili paste
- 1 tablespoon sugar or add according to taste
- 1 teaspoon salt or add as per taste
TIP: Avoid adding too much of turmeric powder as then the fruit salt or baking soda reacts with the turmeric powder and makes it red in color, thereby giving reddish dots, specks or tones in the khaman.
4. Add 1 cup water (or more or less as needed) and 1 tablespoon oil to make a thick yet smooth flowing batter. The amount of water needed depends on the quality of flour, so start with 1 cup and add as required. Stir well to combine.
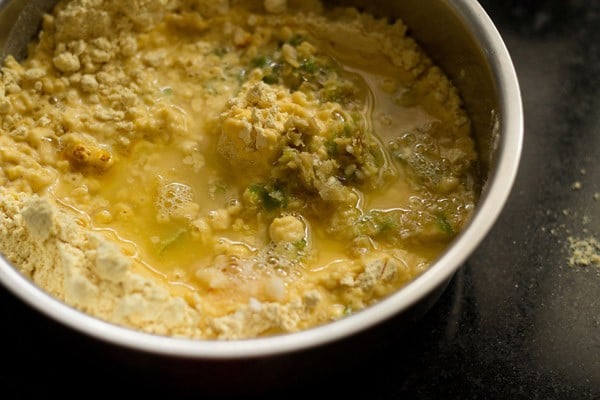
5. Then add 1 tablespoon rava (semolina). This is entirely optional but adds a good texture to the khaman. Skip rava or semolina for a gluten-free option.
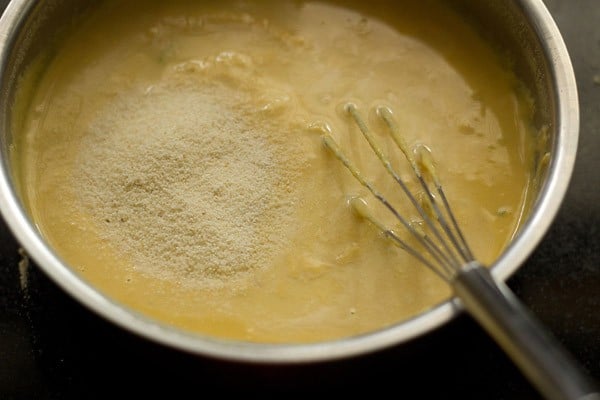
6. Stir with a whisk to create a smooth, thick batter without any lumps.
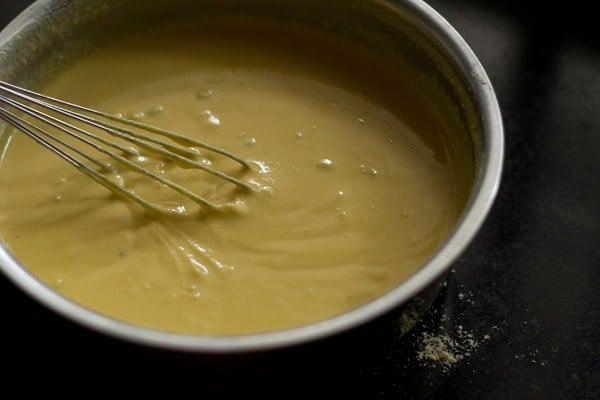
Consistency of Batter
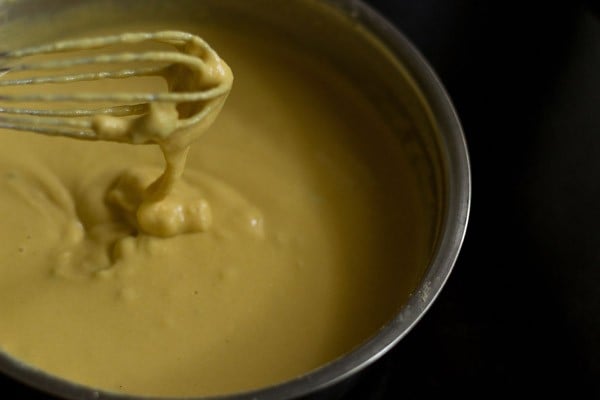
7. The batter should be thick yet flow easily off of the whisk. A quick tip is that if the batter becomes thin, then 1 to 2 tablespoons of gram flour.
Next bring 2 to 2.5 cups of water to a boil in a steamer pan or electric cooker or pressure cooker. The amount of water to be added depends on the size of the steamer or pressure cooker.
NOTE: To know more about the steaming in a pan, cooker and Instant Pot in detail, do read the tips section below.
Leaven Khaman Batter
9. Next add 2 teaspoons Eno or fruit salt. 2 teaspoons of Eno makes the khaman soft and fluffy. But there is a slightly alkaline taste to Eno.
If you’re not a fan of this flavor then add only 1.5 teaspoons of Eno. If using baking soda as your leavening agent add ½ teaspoon to ¾ teaspoon.
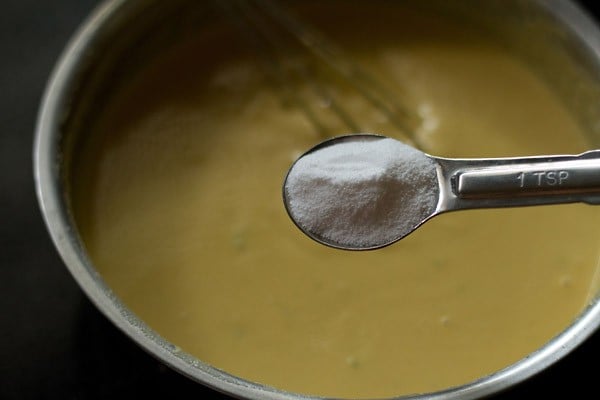
10. Stir the eno with the batter briskly and quickly.
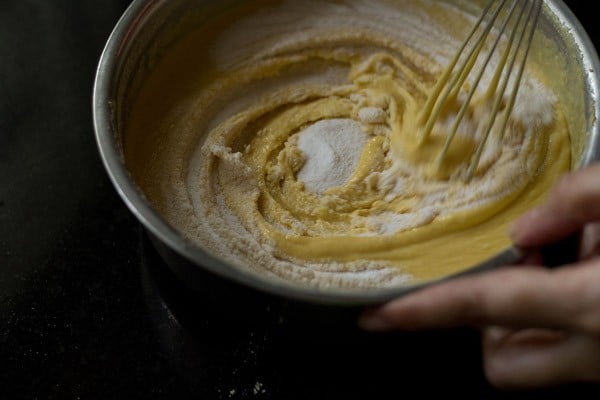
11. The fruit salt should be mixed evenly with the batter. Or else you get uneven texture in the khaman.
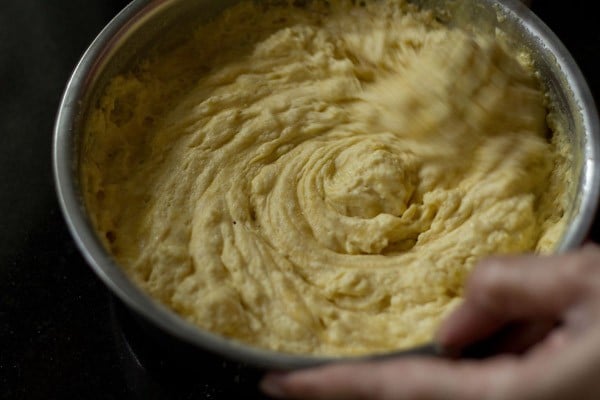
12. The eno will make the batter become frothy, so you need to work quickly to whisk it in thoroughly.
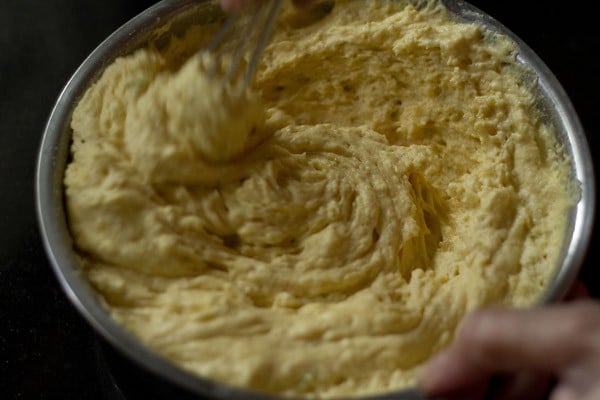
12. Pour the prepared batter into the greased pan.
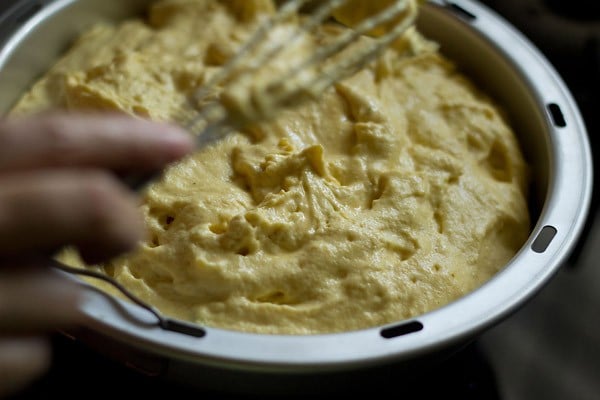
13. Gently shake so that the batter evens out in the pan. Below is a picture of the batter ready to be steamed.
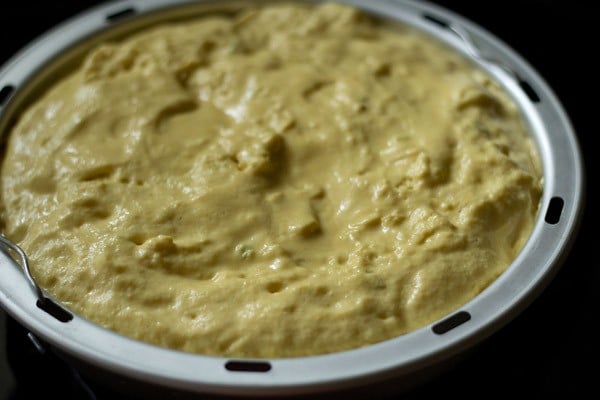
Steam Khaman
1. Place the pan in a steamer or electric rice cooker or pressure cooker. The water should already be boiling or hot when you place the pan with the khaman batter. When using a pressure cooker, remove the vent weight/whistle from the lid and cover the cooker tightly with its lid.
NOTE: I have listed the detailed directions of steaming in a pan, pressure cooker and Instant pot in the tips sections below.
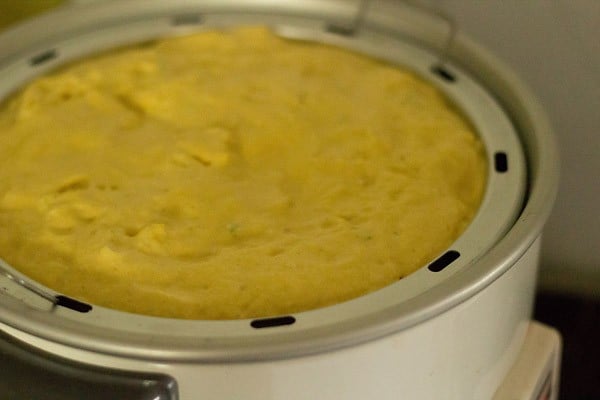
2. Steam for 15 to 20 minutes in an electric rice cooker. If using a pan or pressure cooker or Instant Pot, steam for 12 to 15 minutes on a medium to medium-high heat. In the below photo the khaman is cooked for 17 minutes using an electric rice cooker.
You can begin working on the spice and herb solution for tempering the khaman while it cooks. Continue reading for the instructions.
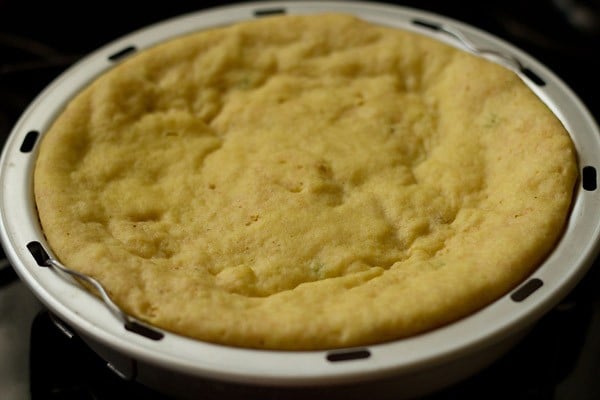
3. To check the doneness, insert a toothpick. It should come out clean if the khaman is done. If the toothpick has the batter on it, then you need to steam for another minutes or so.
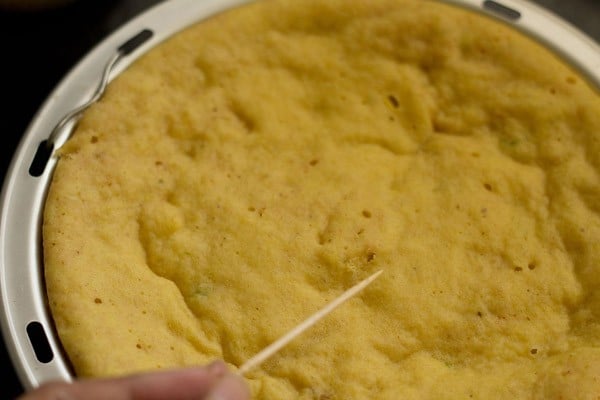
4. Let the khaman become warm or cool completely. Gently slide a butter knife along the edges to release the khaman from the pan. Place a plate or tray on top of the pan.
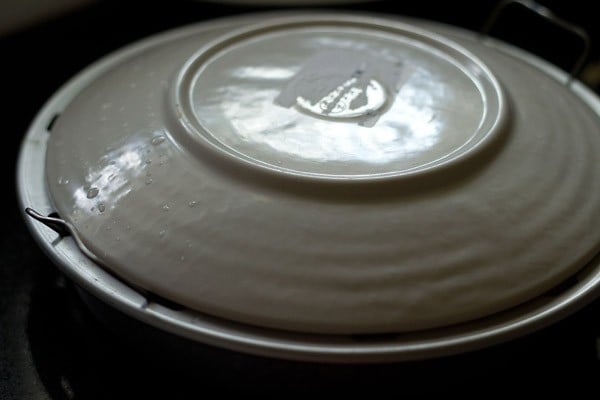
5. Then quickly invert the pan.
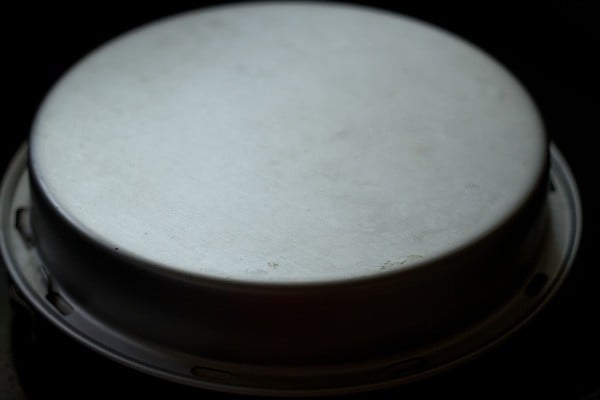
6. If greased well, the khaman will easily slide out onto the plate.
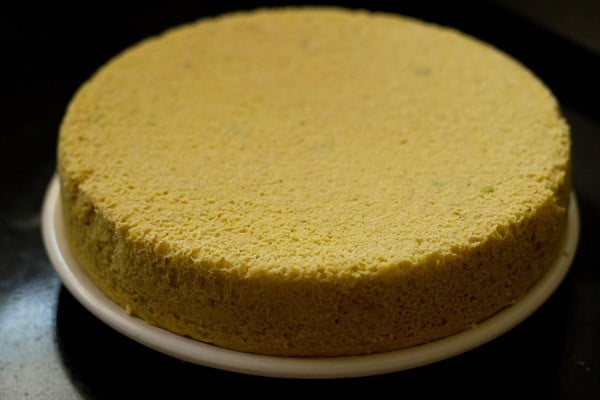
7. Use a sharp knife to slice the khaman in squares and set aside until ready to temper. Since I used a concave plate, the khaman settled down in the center. This won’t happen if you use a flat plate.
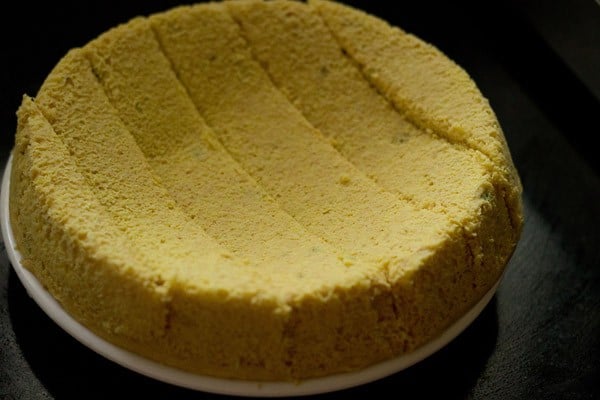
Temper Khaman Dhokla
1. Tempering is essential to infuse the khaman with flavor and add moisture to the gram flour sponge. To make the temper, first heat 2 tablespoons of oil in a small pan on the stove. Use peanut oil or any neutral-tasting oil.
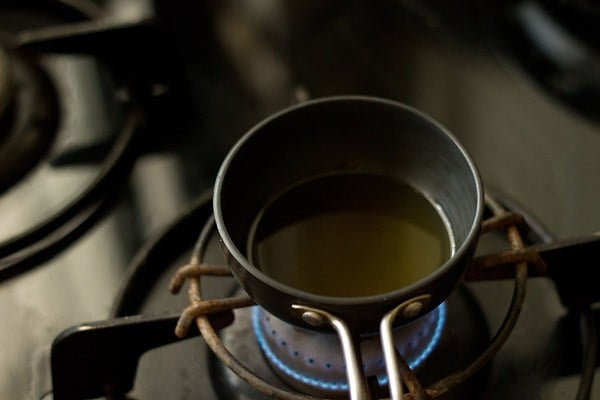
2. Add 1 teaspoon of mustard seeds and allow them to crackle.
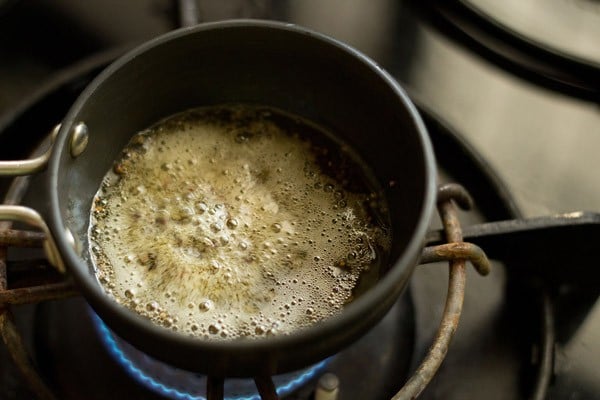
3. When the mustard seeds are crackling, add 10 to 12 curry leaves, and, if you like, 1 teaspoon of cumin seeds and 1 teaspoon of chopped green chili.
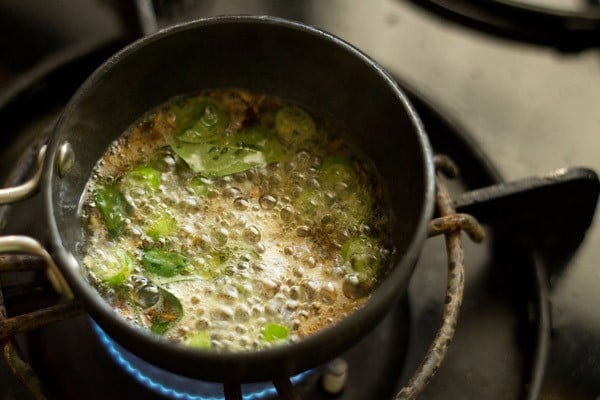
4. Stir and then add 2 teaspoons white sesame seeds.
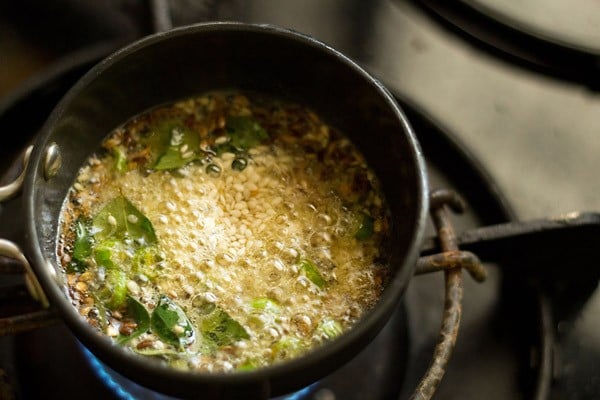
5. Fry the sesame seeds for some seconds. But don’t brown them or they’ll become bitter.
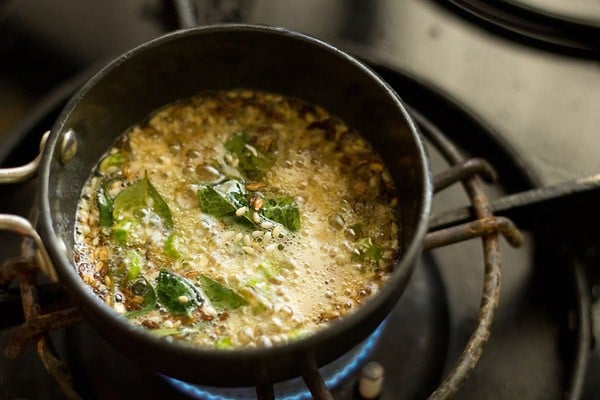
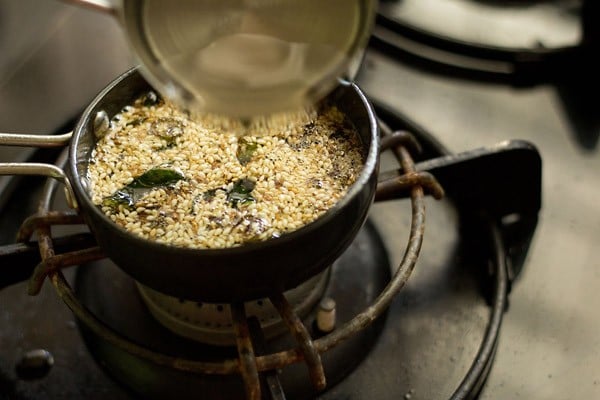
6. Next carefully add ⅓ cup of water. You can switch off the heat when adding water.
7. Then add 2 teaspoons of sugar.
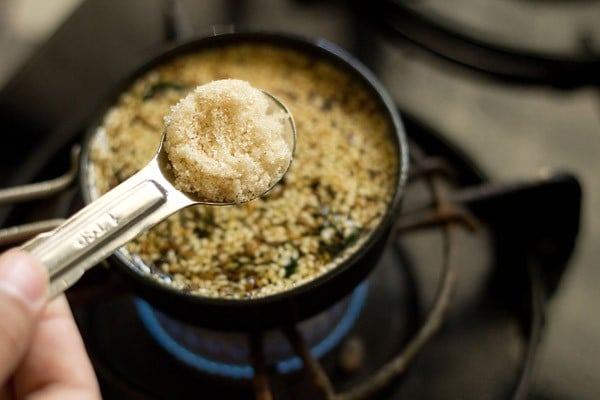
8. Stir and allow the tempering mixture to come to a boil. Make sure that the sugar is dissolved.
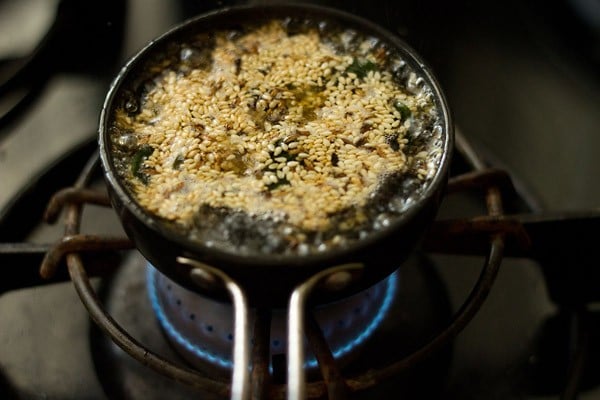
9. Remove from the heat and immediately pour this tempering mixture evenly on the khaman dhokla so that it seeps through the sliced edges.
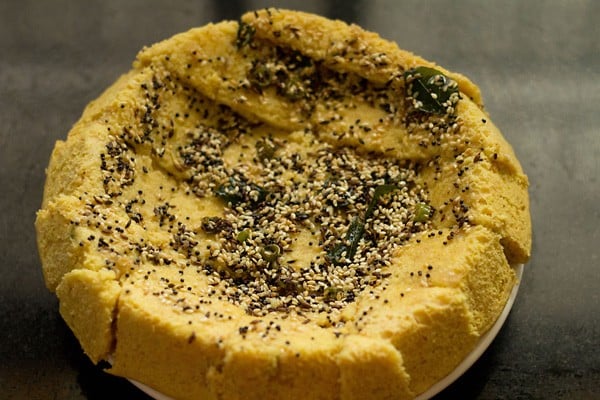
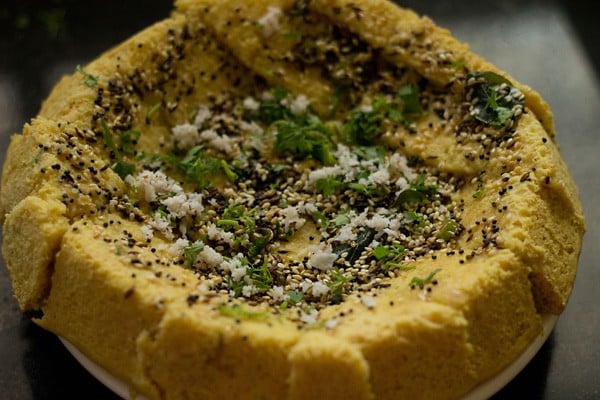
10. Garnish with 2 to 3 tablespoons of chopped coriander leaves and 2 to 3 tablespoons grated coconut, if you like.
Serving Suggestions
12. Serve the khaman dhokla straight away or you can store it in an airtight box and serve later after an hour. If enjoying khaman later after several hours, then don’t add coconut until ready to eat.
You can also refrigerate them, and then when ready to serve just sprinkle some water and heat in a microwave for a few seconds until just warmed.
What to eat with Khaman
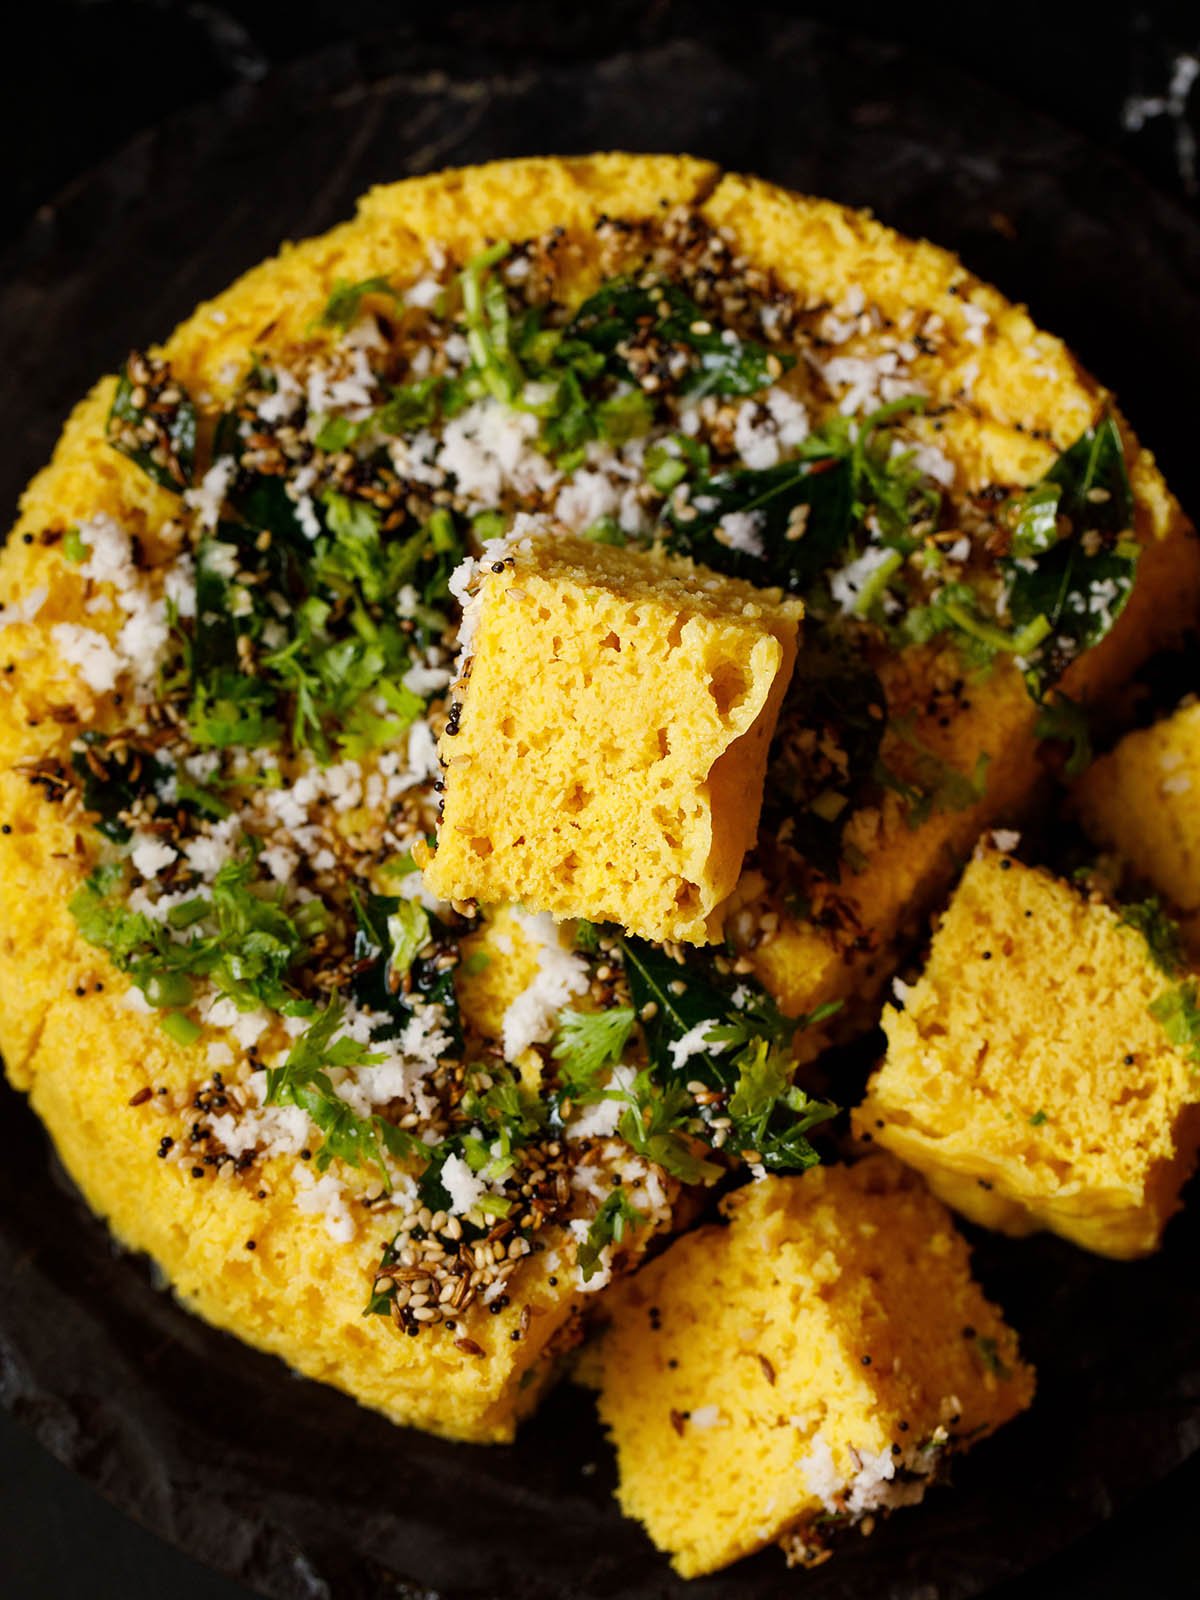
The sweet, savory, fluffy cakes pair great with our usual assortment of Indian chutneys like Papaya Chutney, Mint Chutney, or even Coriander Chutney.
We also like to pair it with Tamarind Chutney. You can also serve it as a healthy snack with your evening chai.
Storing Suggestions
If you plan to serve khaman after a few hours or next day, then I do not recommend to add coconut or coriander. Simply pour the tempering.
Refrigerate the khaman in a covered container. While serving you can warm with a sprinkling of water in a microwave or an oven.
If using the instant pot to warm, then steam for 1 to 2 minutes. While serving add the coconut and coriander leaves.
Expert Tips
Batter Consistency
The batter consistency has to be flowing but thick to medium-thick. 1 cup water with 1.5 cups of gram flour, always gives me perfect results, but you can add a few tablespoons of water if your batter looks very thick. A super thick batter will make the khaman hard and dense. A thin batter won’t hold shape and will become a mess.
Steaming
You can steam khaman in a pan, stove-top pressure cooker, or in an Instant Pot. I list below in detail on steaming khaman in each.
1. Steaming in a pan or pot
- Place a small trivet in a large steaming pan that has enough room to keep the pan with the batter. Pour 2 to 2.5 cups of water. Bring it to a boil.
- Place the batter pan as soon you mix with eno. Cover with a lid (not tight fitting) but one that has a vent or will allow some steam to pass through.
- Steam for 12 to 15 minutes on medium-high heat. The deeper the pan is in touch with the boiling water, the faster the steaming is. If it is away from the boiling water, the steaming will take a bit more time.
2. Steaming in a stove-top pressure cooker
- Place the trivet in a pressure cooker. Add 2 to 2.5 cups water. Heat the water until it begins boiling. Secure the pan tightly between tongs and carefully place it on the trivet.
- Remove the whistle (vent weight) from the lid and seal the lid tightly. Steam for 12 to 15 minutes on medium to medium-high heat.
3. Instant Pot Steaming
- Pour 2 to 2.5 cups of water in the steel insert of your IP. Place a trivet (not short or long, but kind of in between).
- Use the sauté function and let the water get heated up and start simmering.
- Using tongs or with oven mitts carefully place the pan with the khaman batter on the trivet. Do not cover with any lid.
- Cover and seal IP with its lid and keep the vent position to steam release. Press the steam button and steam on high pressure for 12 to 15 minutes.
- Keep a check of the time using a clock or watch as Instant pot does will not beep after the elapsed time and will continue to steam. Let all the pressure release and the valve fall down. Then open the lid carefully.
Pav Bhaji Recipe
How to make Pav Bhaji
Cook Vegetables
1. Rinse, peel and chop the veggies. You will need 1 cup chopped cauliflower, 1 cup chopped carrot, 3 medium sized potatoes (chopped) and ⅓ cup chopped french beans.
Note: You can also add veggies that you like, but do not add okra, eggplants, pumpkin, radish, corn, yam or green leafy vegetables.
Cabbage, broccoli, zucchini, pumpkin are some unique options that you can consider to add, but the traditional version does not include these veggies.
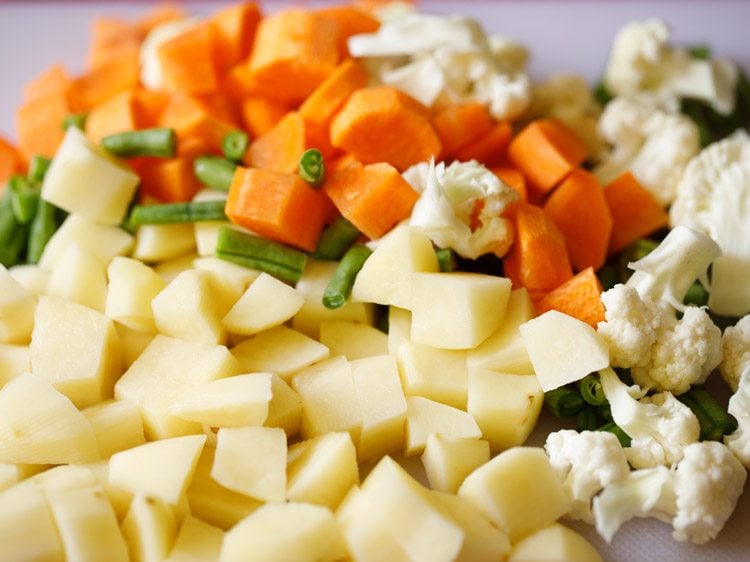
2. Add all the above chopped veggies in a 3 litre stovetop pressure cooker. Also add 1 cup green peas (fresh or frozen).
I have cooked the veggies in a pressure cooker. You can boil or steam them using a pan or in the Instant pot adding water as needed.
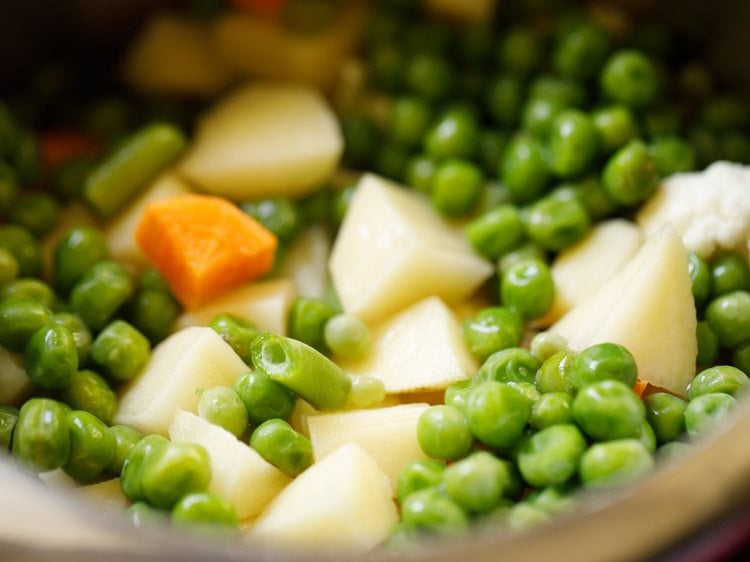
3. Add 2.25 to 2.5 cups water.
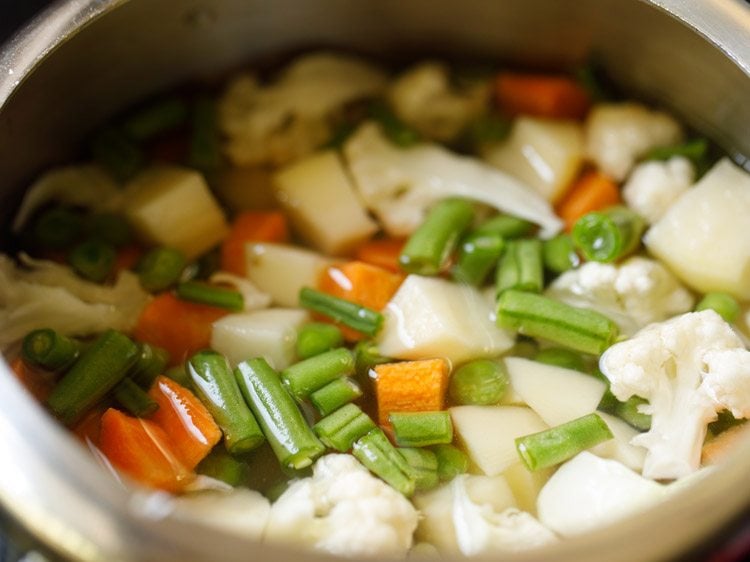
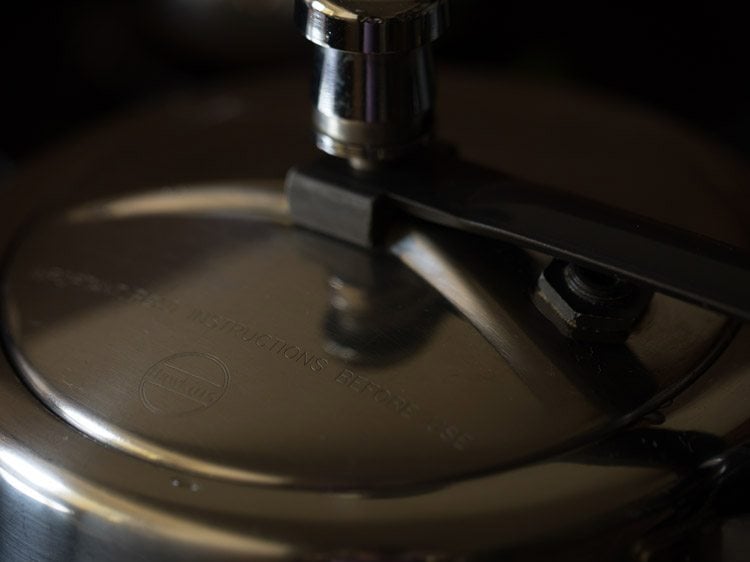
4. Pressure cook the veggies for 5 to 6 whistles or for about 12 minutes on medium heat.
5. When the pressure settles down on its own, open the cooker and check if the veggies are fork tender, softened and cooked well.
You can even steam or cook the veggies in a pan or pot. The vegetables have be to cooked completely and should not be al dente or just about cooked.
Set aside the vegetables with the cooked water (broth/stock) in the cooker itself.
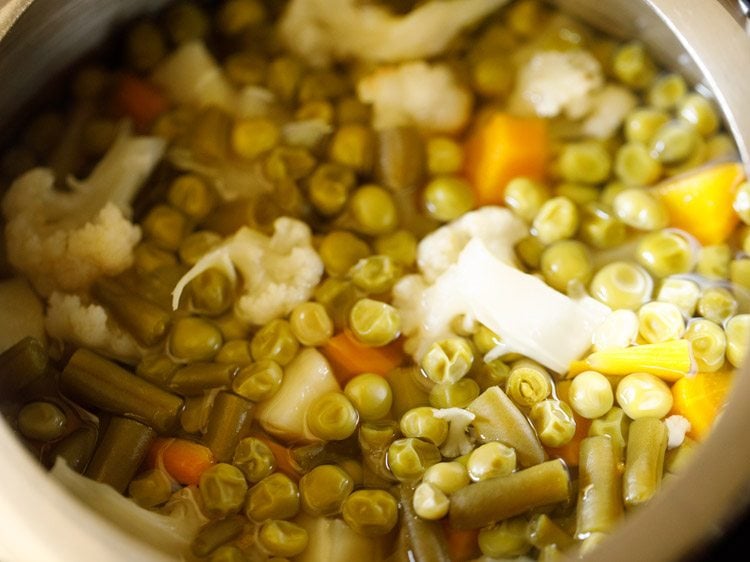
Make Onion Tomato Masala
6. Heat a frying pan or kadai (wok). You can also use a large tawa or a skillet. Add 2 to 3 tablespoons butter. You can use amul butter or any brand of butter. The butter can be salted or unsalted.
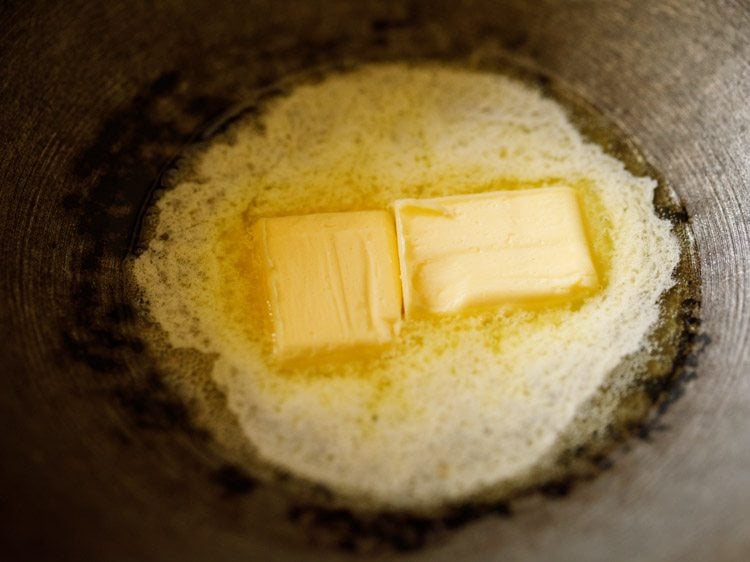
7. Let the butter melt.
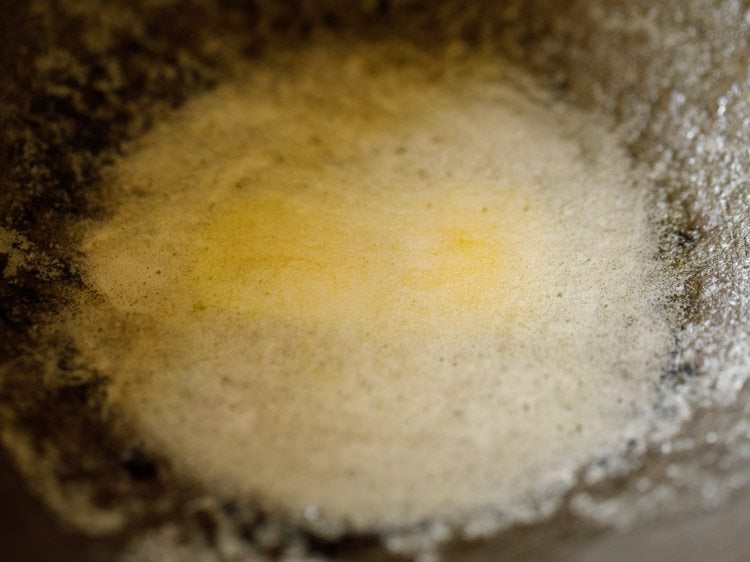
8. As soon as the butter melts, add 1 teaspoon cumin seeds.
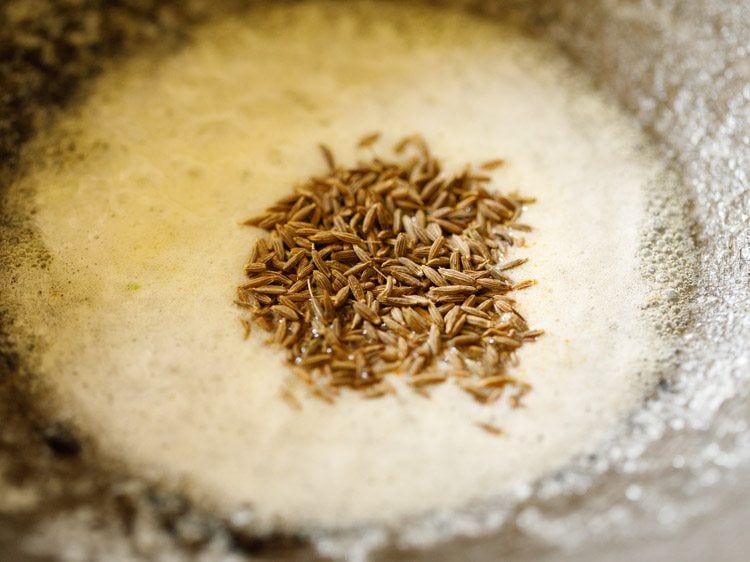
9. Let the cumin seeds crackle and change their color.
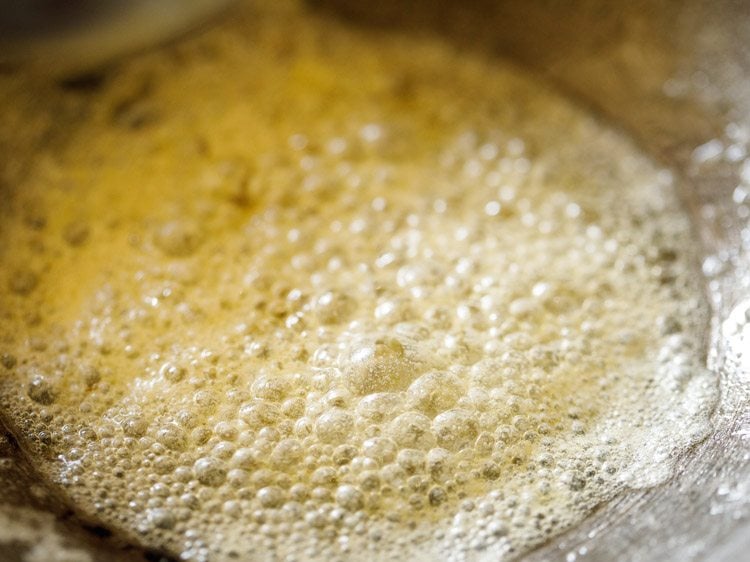
10. Then add ½ cup chopped onions.
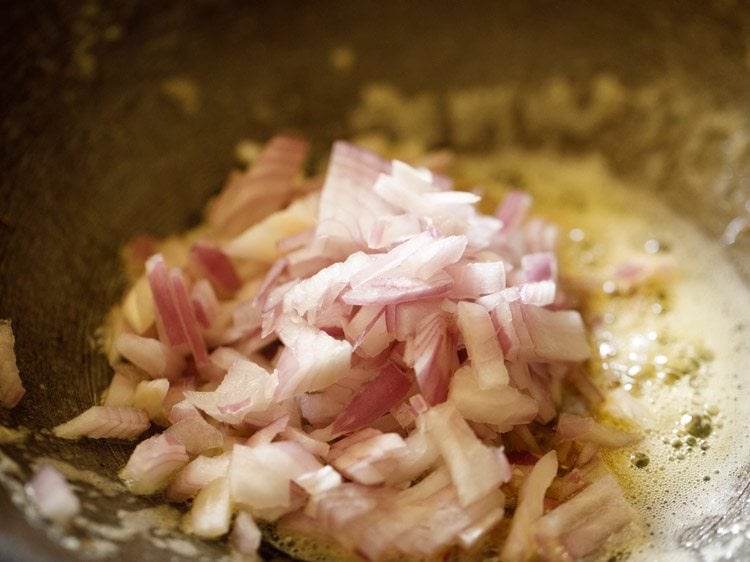
11. Mix onions with the butter and sauté on a low to medium heat.
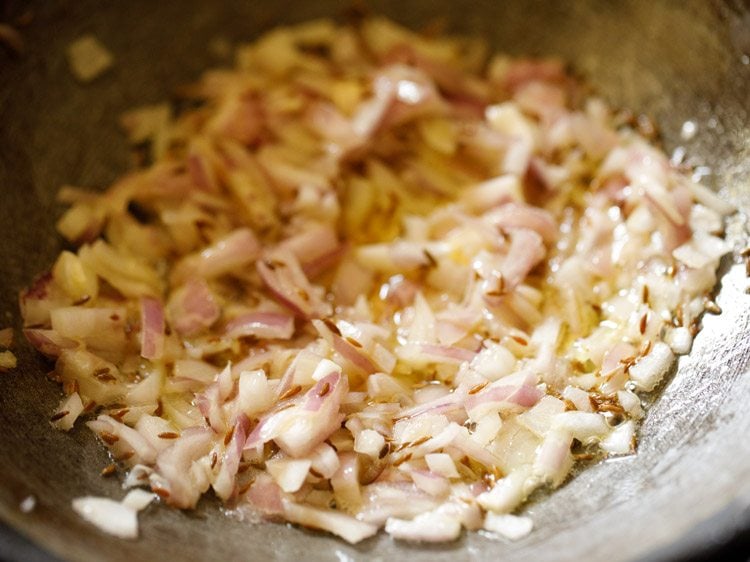
12. Sauté until the onions turn translucent.
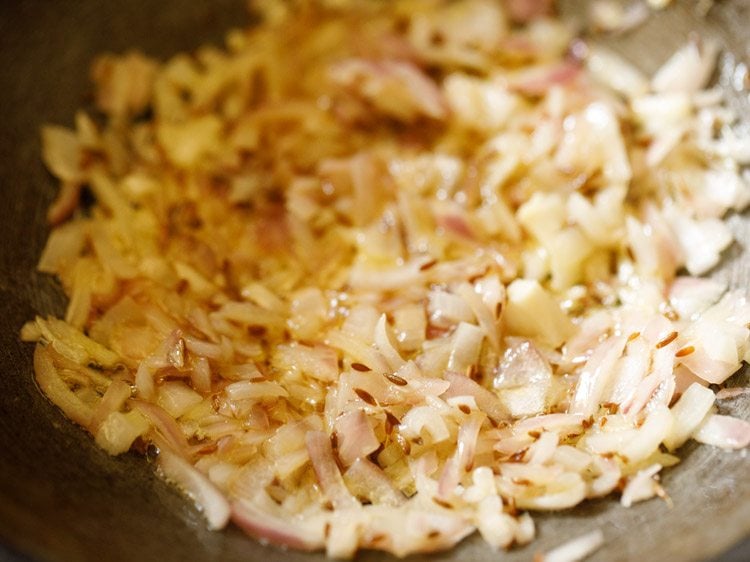
13. Add 2 teaspoons ginger-garlic paste. You can crush 1.5 inch ginger and 5 to 6 medium garlic cloves, in a mortar-pestle.
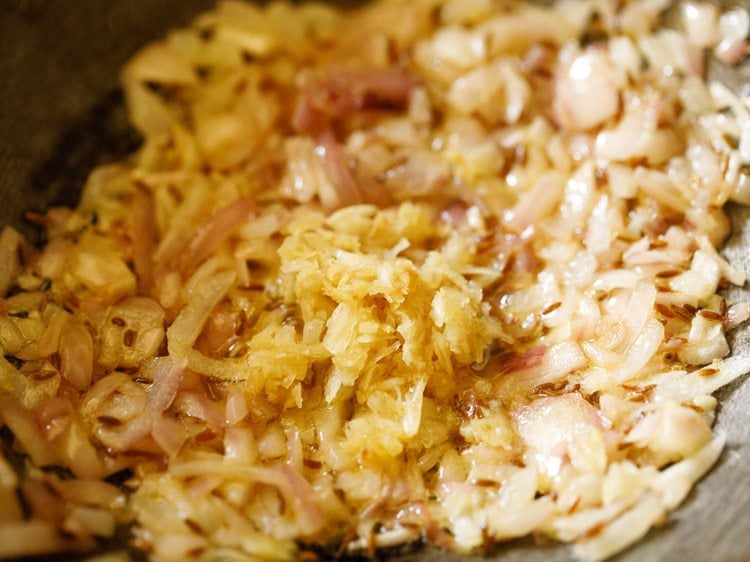
14. Mix and sauté for some seconds until the raw aroma of both ginger and garlic goes away.
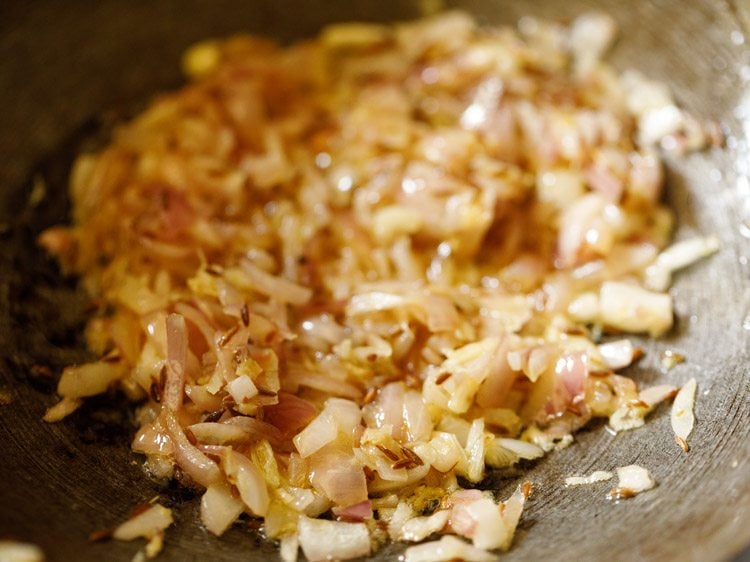
15. Then add 1 to 2 green chilies (chopped), about 1 teaspoon chopped green chillies.
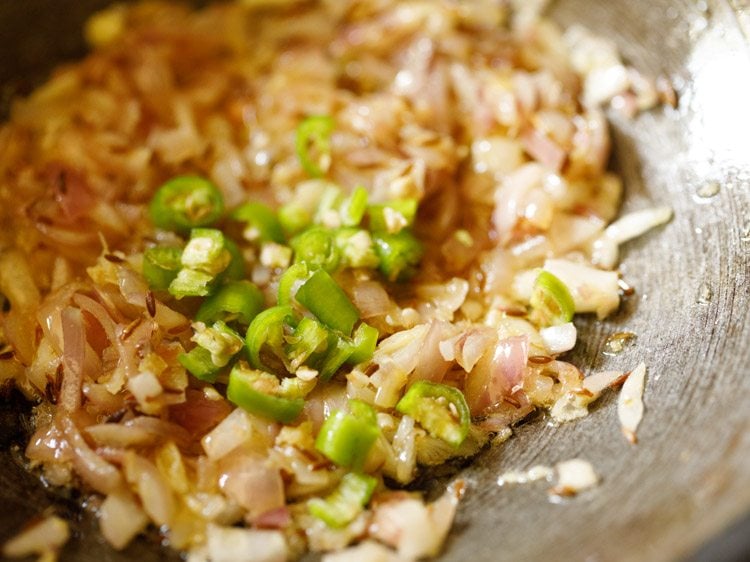
16. Mix well.
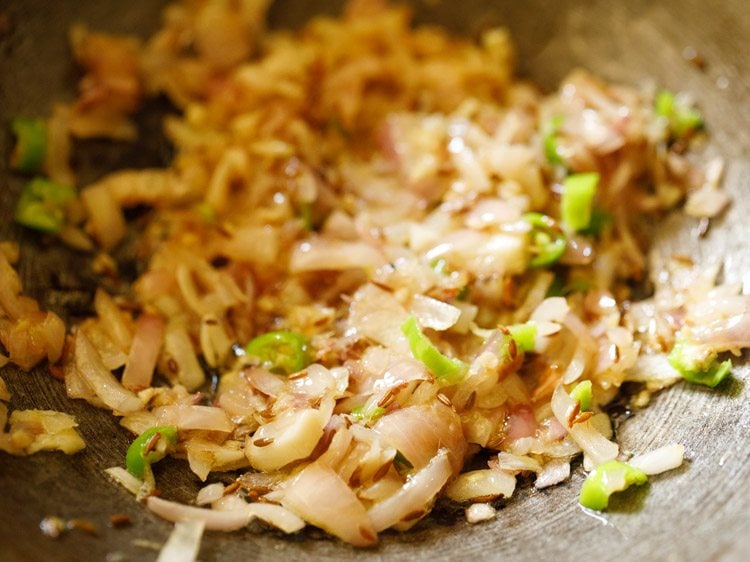
17. Add 2 cups finely chopped tomatoes. Swap canned tomatoes if you do not have fresh tomatoes.
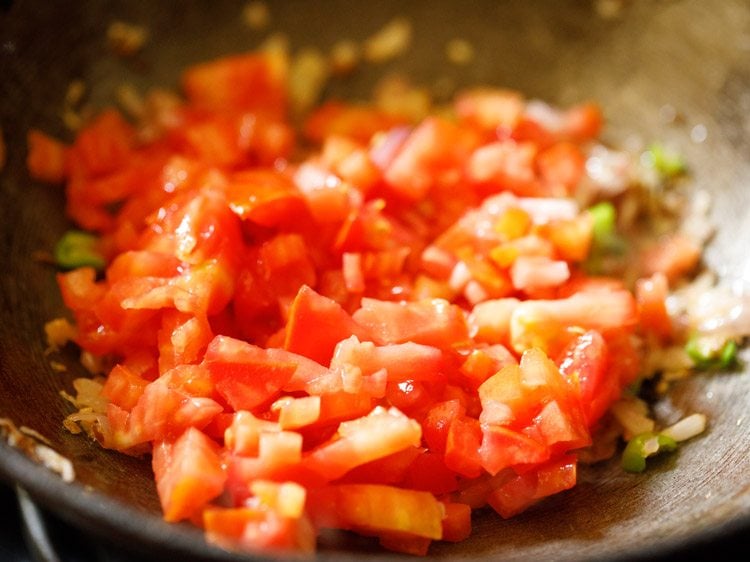
18. Mix very well.
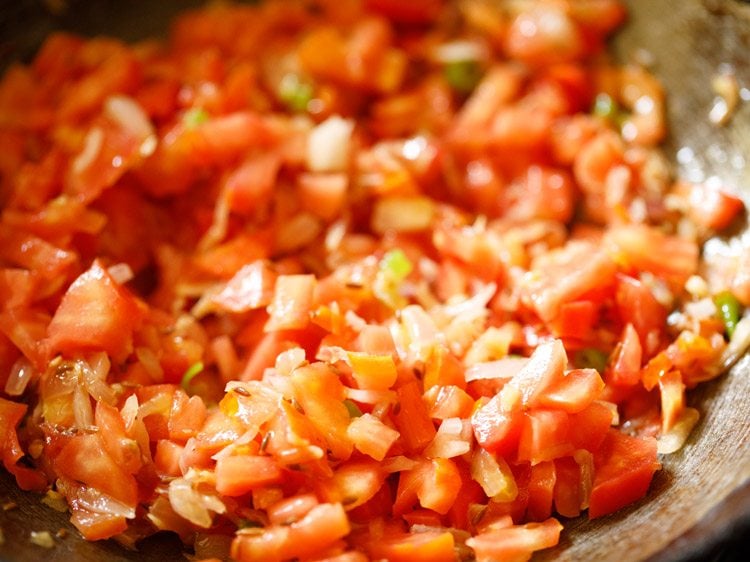
19. Then begin to sauté tomatoes on a low to medium heat.
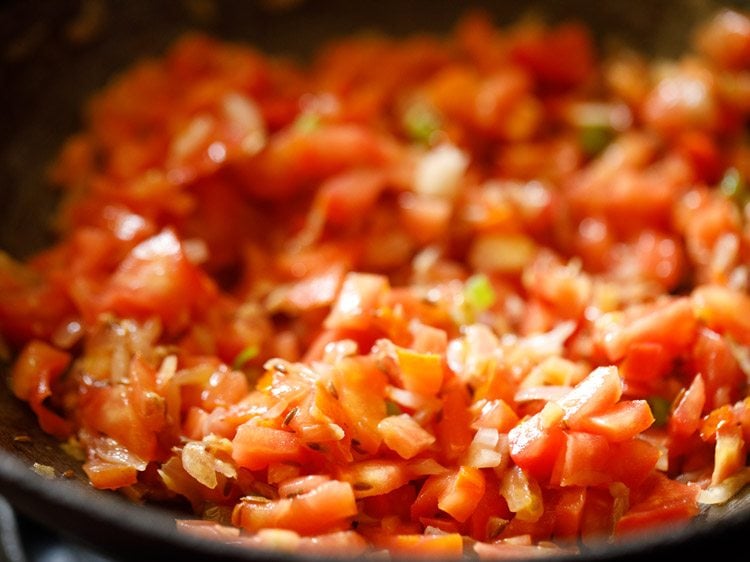
20. Sauté until the tomatoes become soft, mushy and you see butter releasing from the sides. This takes about 6 to 7 minutes on a low to medium heat.
Tip: If the tomatoes start sticking to the pan, then sprinkle some water. Mix well and deglaze the pan.
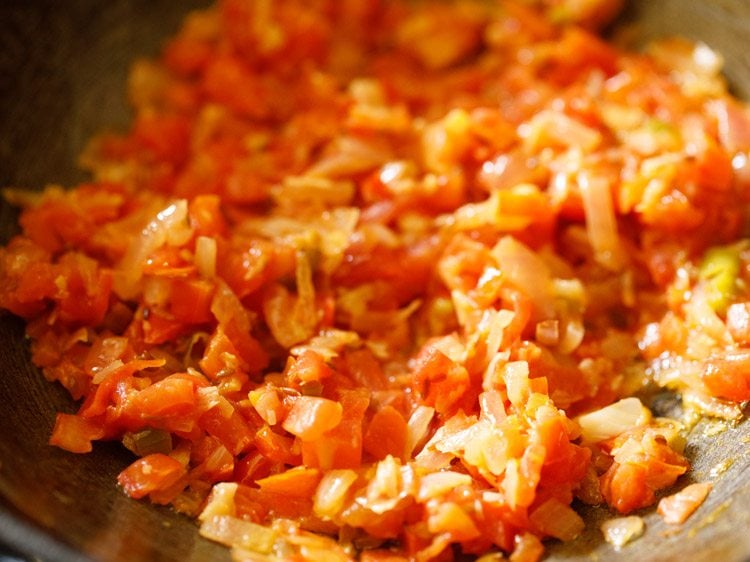
21. When the tomatoes have softened, add ½ cup finely chopped capsicum (green bell pepper). Sauté for 2 to 3 minutes.
Tip: If the mixture starts sticking to the pan, then add some splashes of water. You don’t need to cook the capsicum until very soft. A little crunch is fine in the capsicum.
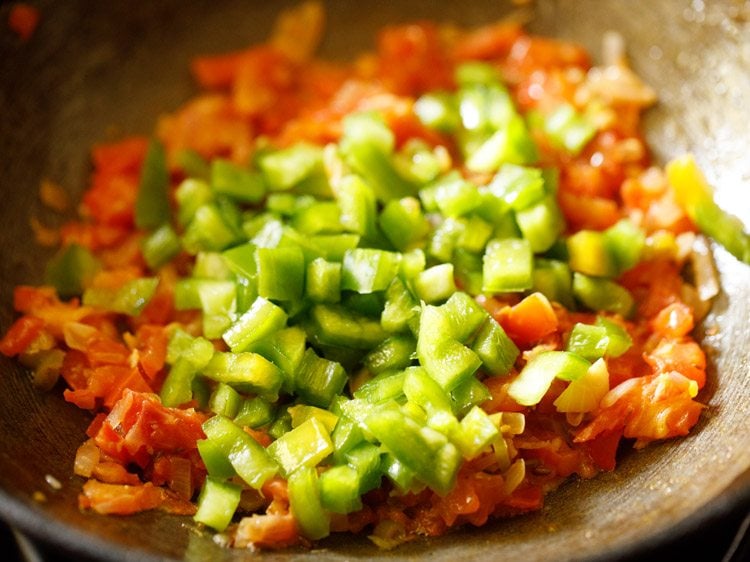
22. Add 1 teaspoon turmeric powder and 1 teaspoon Kashmiri red chilli powder.
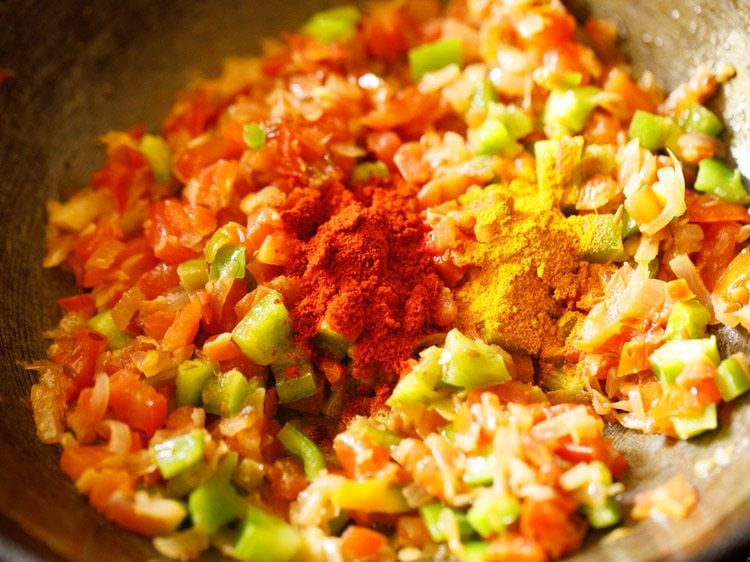
Make Vegetable Bhaji
23. Add 2 to 3 tablespoons Pav bhaji Masala Powder. Depending on how instense is the aroma and flavor of pav bhaji masala, you can add it in less or more proportions.
Add 2 tablespoons if the pav bhaji masala is strong, intense and flavorful. For a more robust and spiced bhaji add 3 tablespoons of it.
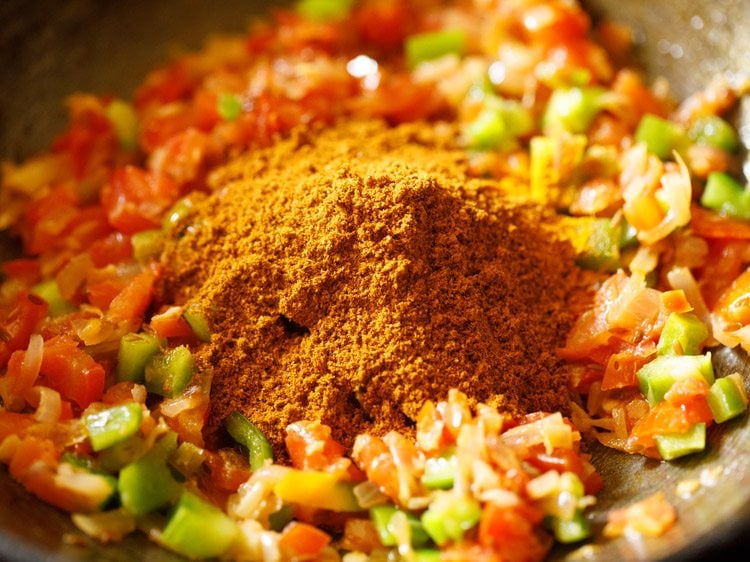
24. Mix very well.
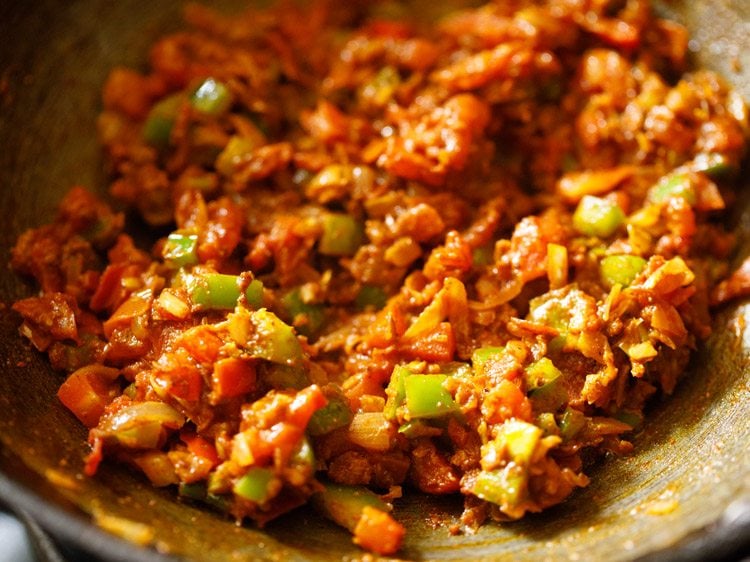
25. Add the cooked veggies. You can choose to mash the veggies before you add them in the pan or skillet.
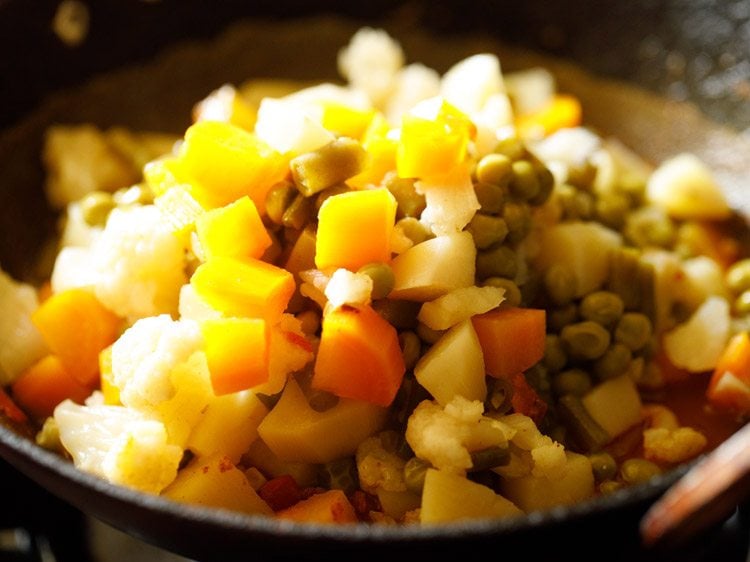
26. Mix thoroughly.
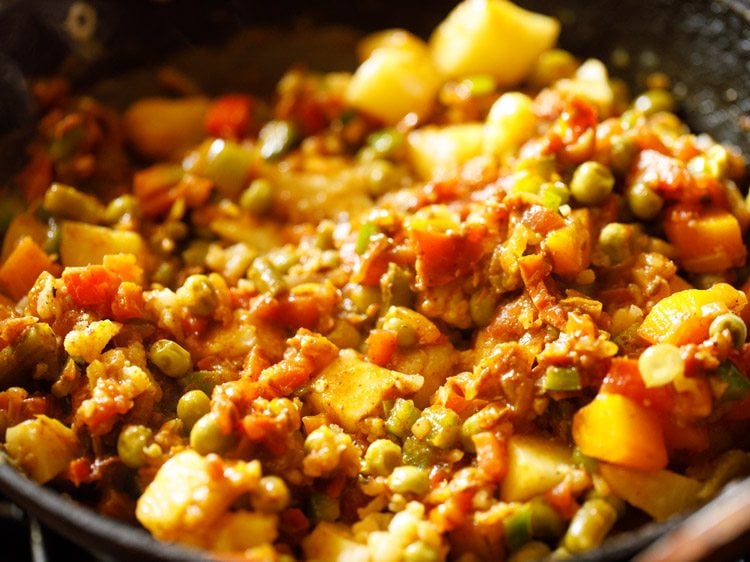
27. Add all of the stock or water from the pressure cooker in which the veggies were cooked.
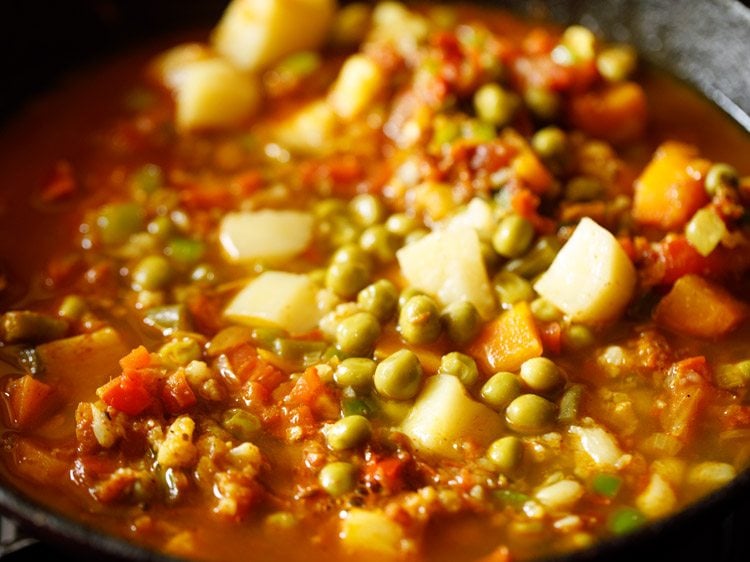
28. Combine and mix thoroughly.
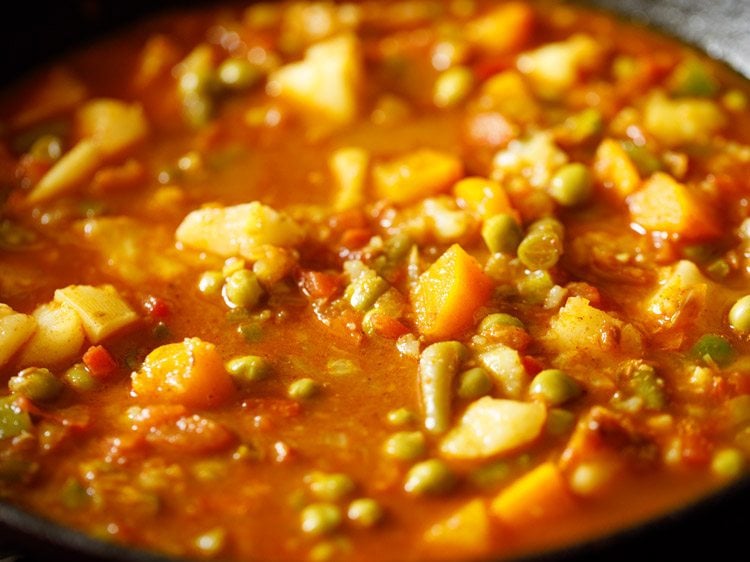
29. Season with salt according to your taste preferences and give a mix.
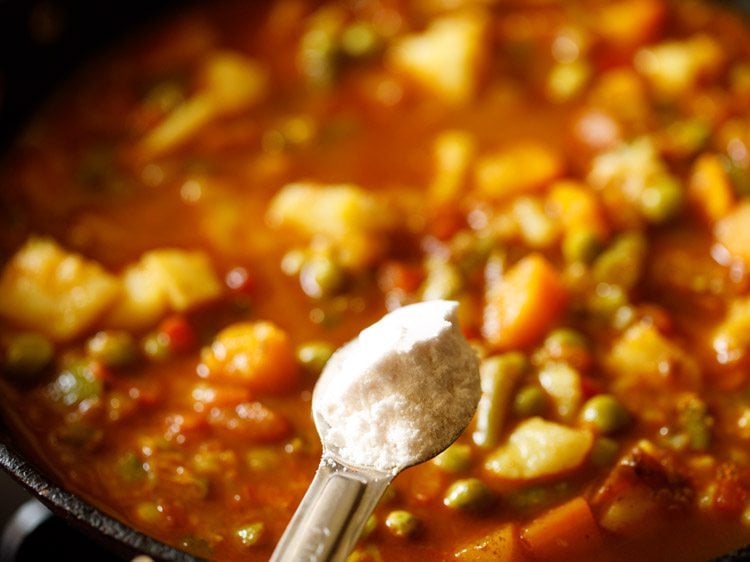
30. With a potato masher, begin to carefully mash the veggies directly in the pan.
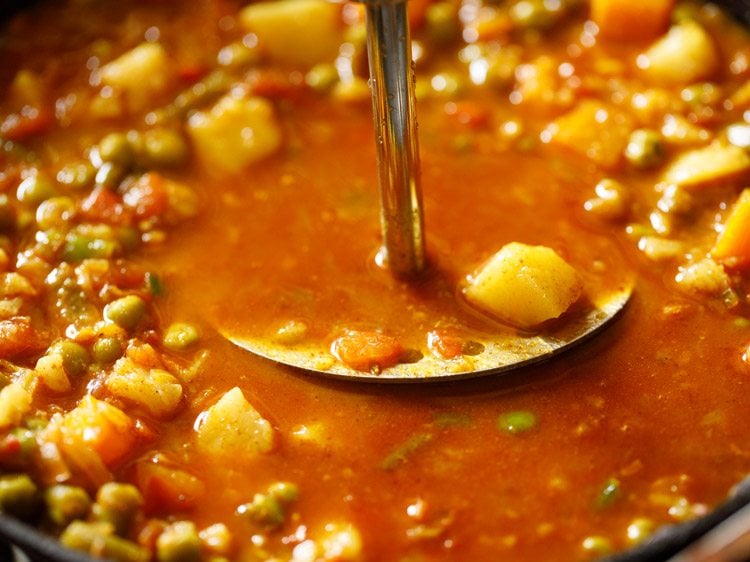
31. You can mash the veggies less or more according to the consistency you want in the bhaji.
For a smooth mixture mash more. For a chunky bhaji, mash less. Add more water if the bhaji looks thick.
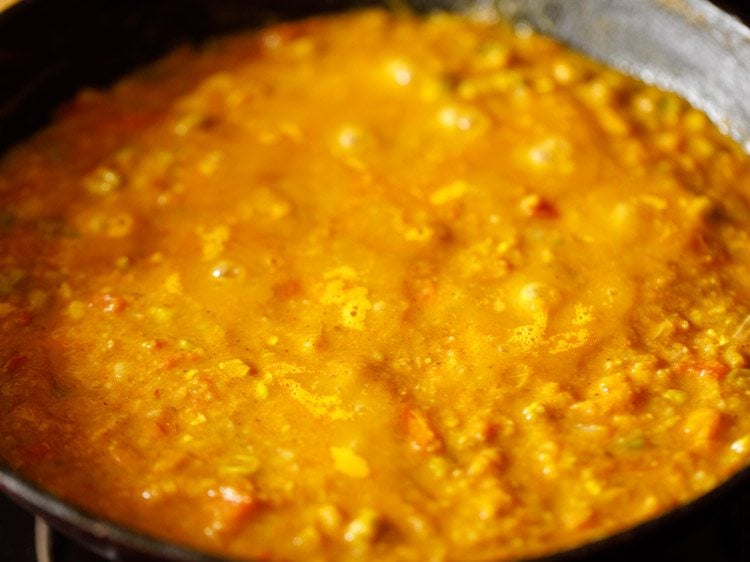
32. Keep on stirring occasionally and let the mashed vegetable gravy simmer for 8 to 10 minutes on a low heat.
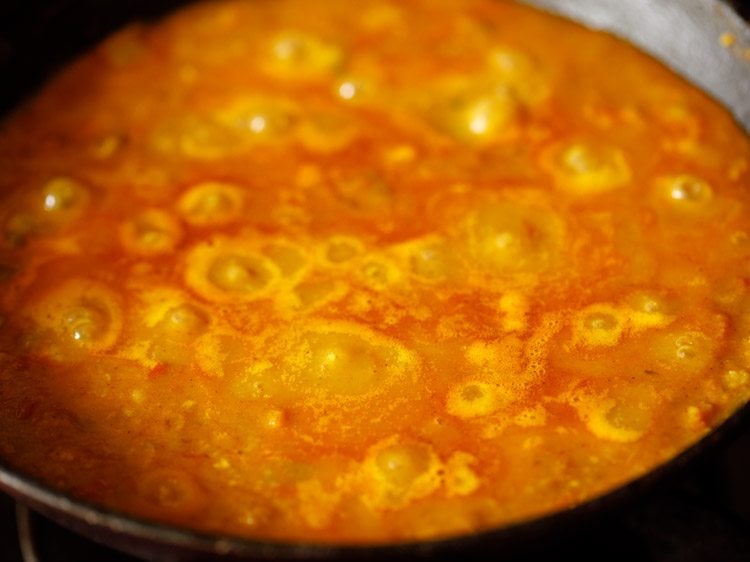
33. If the bhaji looks dry and then add some water. The consistency is neither very thick nor thin.
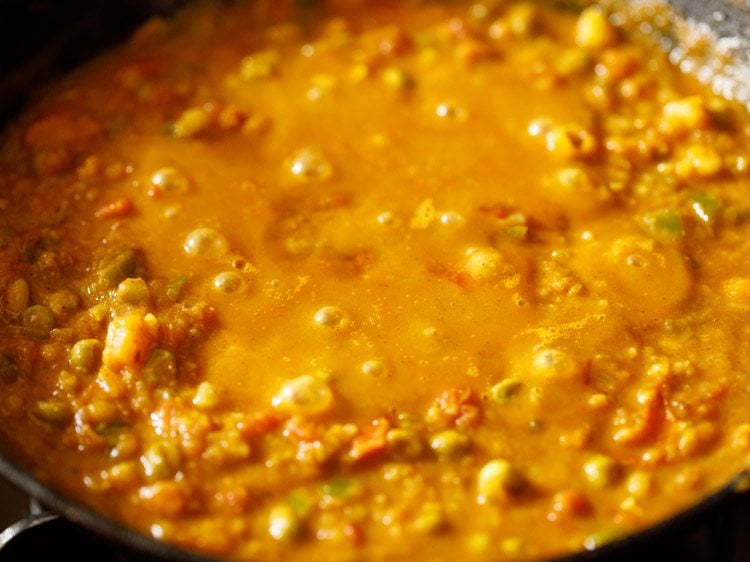
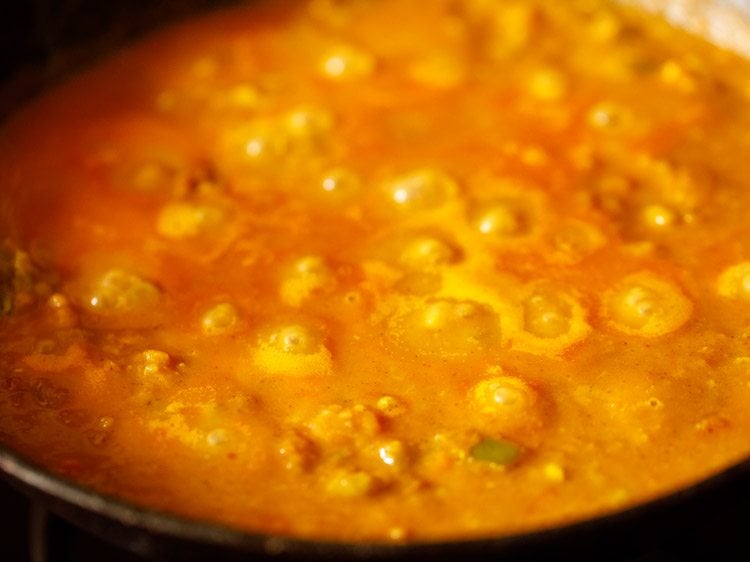
34. Do stir often so that the bhaji does not stick to the pan. When the bhaji simmers to the desired consistency, check the taste.
Add salt, pav bhaji masala, red chili powder or butter if needed.
Pan Fry Pav
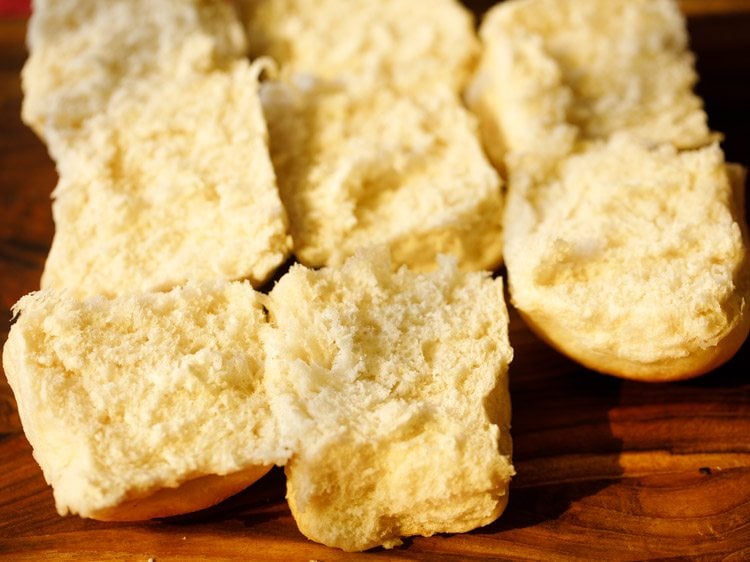
35. When the bhaji is simmering, you can pan fry the bread rolls so that you serve the pav with steaming hot bhaji. Cut through the bread roll from the center so that you get two equal halves.
36. Heat a tawa or skillet or a shallow frying pan. Keep the heat to a low and then add 1 to 2 tablespoons butter or more if you like.
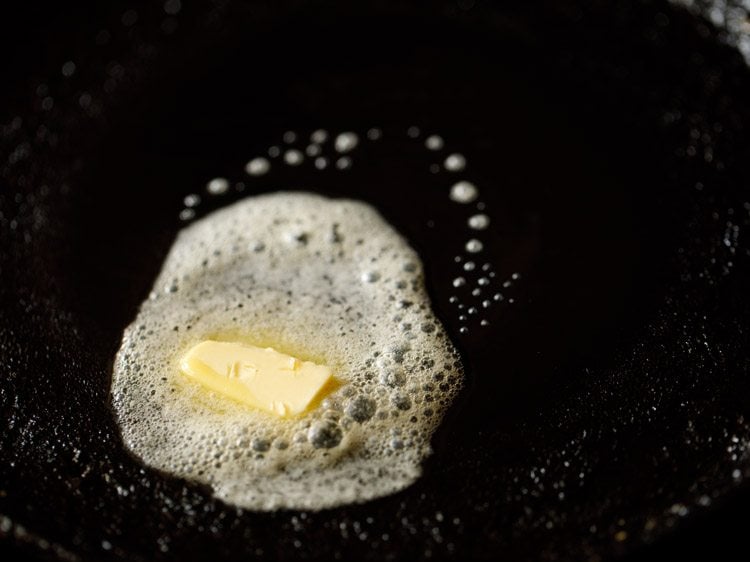
37. When the butter begins to melt, add 1 teaspoon of pav bhaji masala (for 2 to 3 pav). You can skip pav bhaji masala if you prefer.
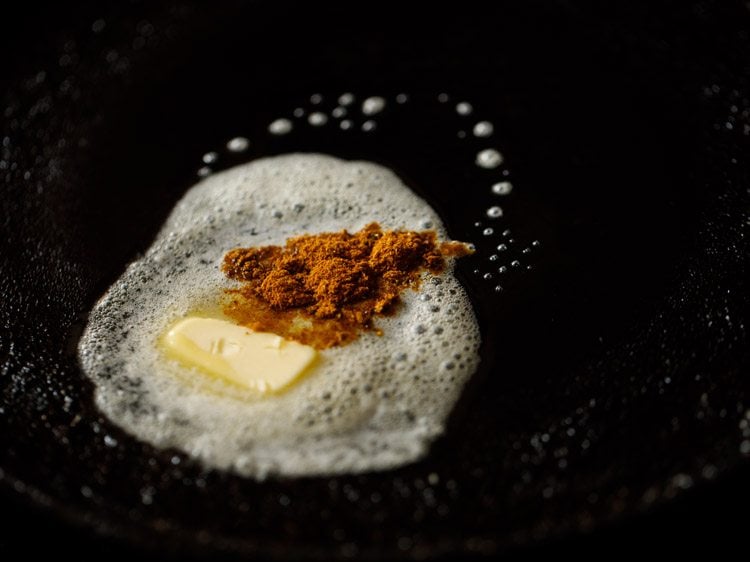
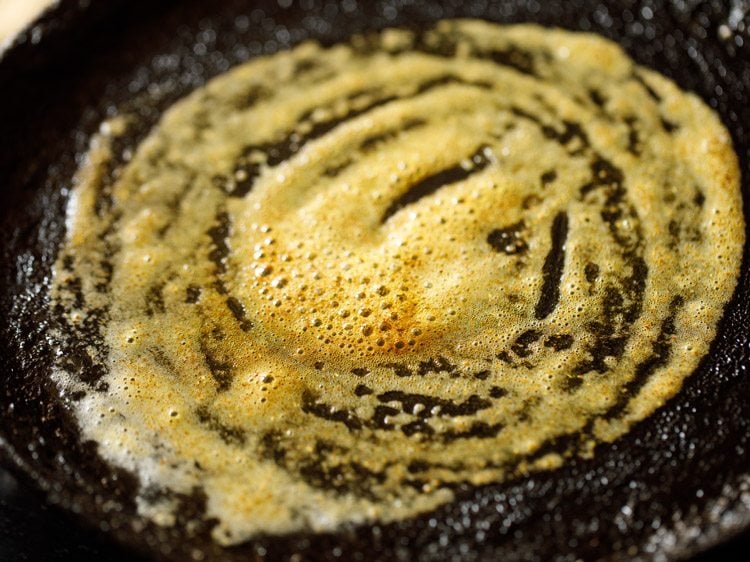
38. Mix the pav bhaji masala very well with a spoon or spatula.
39. Then place the pav on the butter.
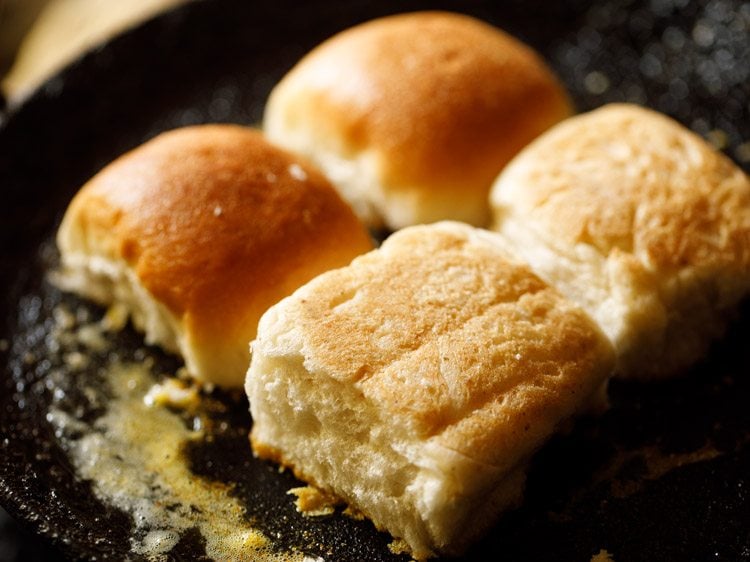
40. Press with a spatula and rotate the pav all over the melted butter so that the pav absorbs the butter together with the ground spices.
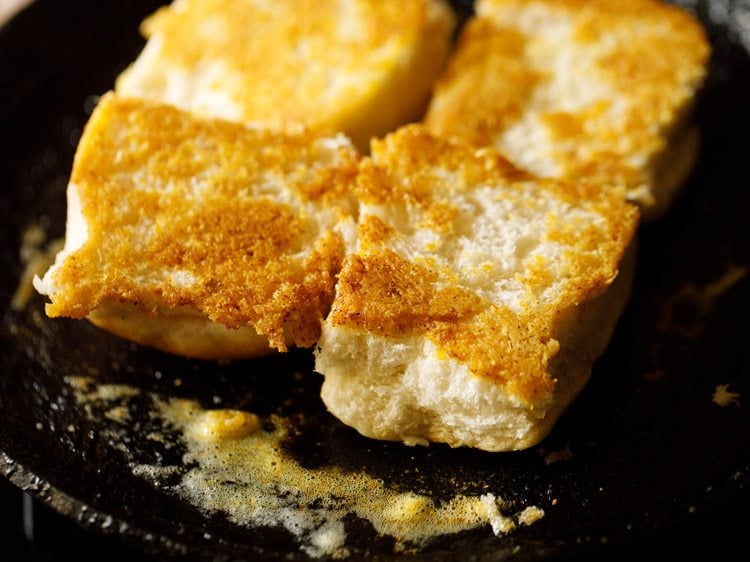
41. Now turn over the pav. Press gently with a spatula and rotate them on the tawa so that the second side absorbs the butter.
Add more butter if needed. You can turn over and toast them more if required. Then transfer the lightly pan fried bread rolls in a plate and set aside. This way fry the rolls in two to three batches.
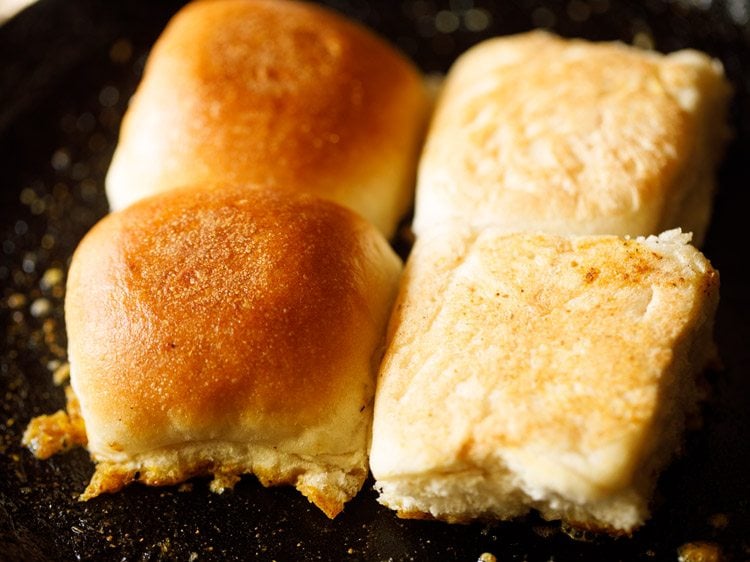
42. Serve piping hot Bhaji topped with a bit of butter paired with the lightly toasted pav and a side of finely chopped onions, coriander leaves and lemon wedges.
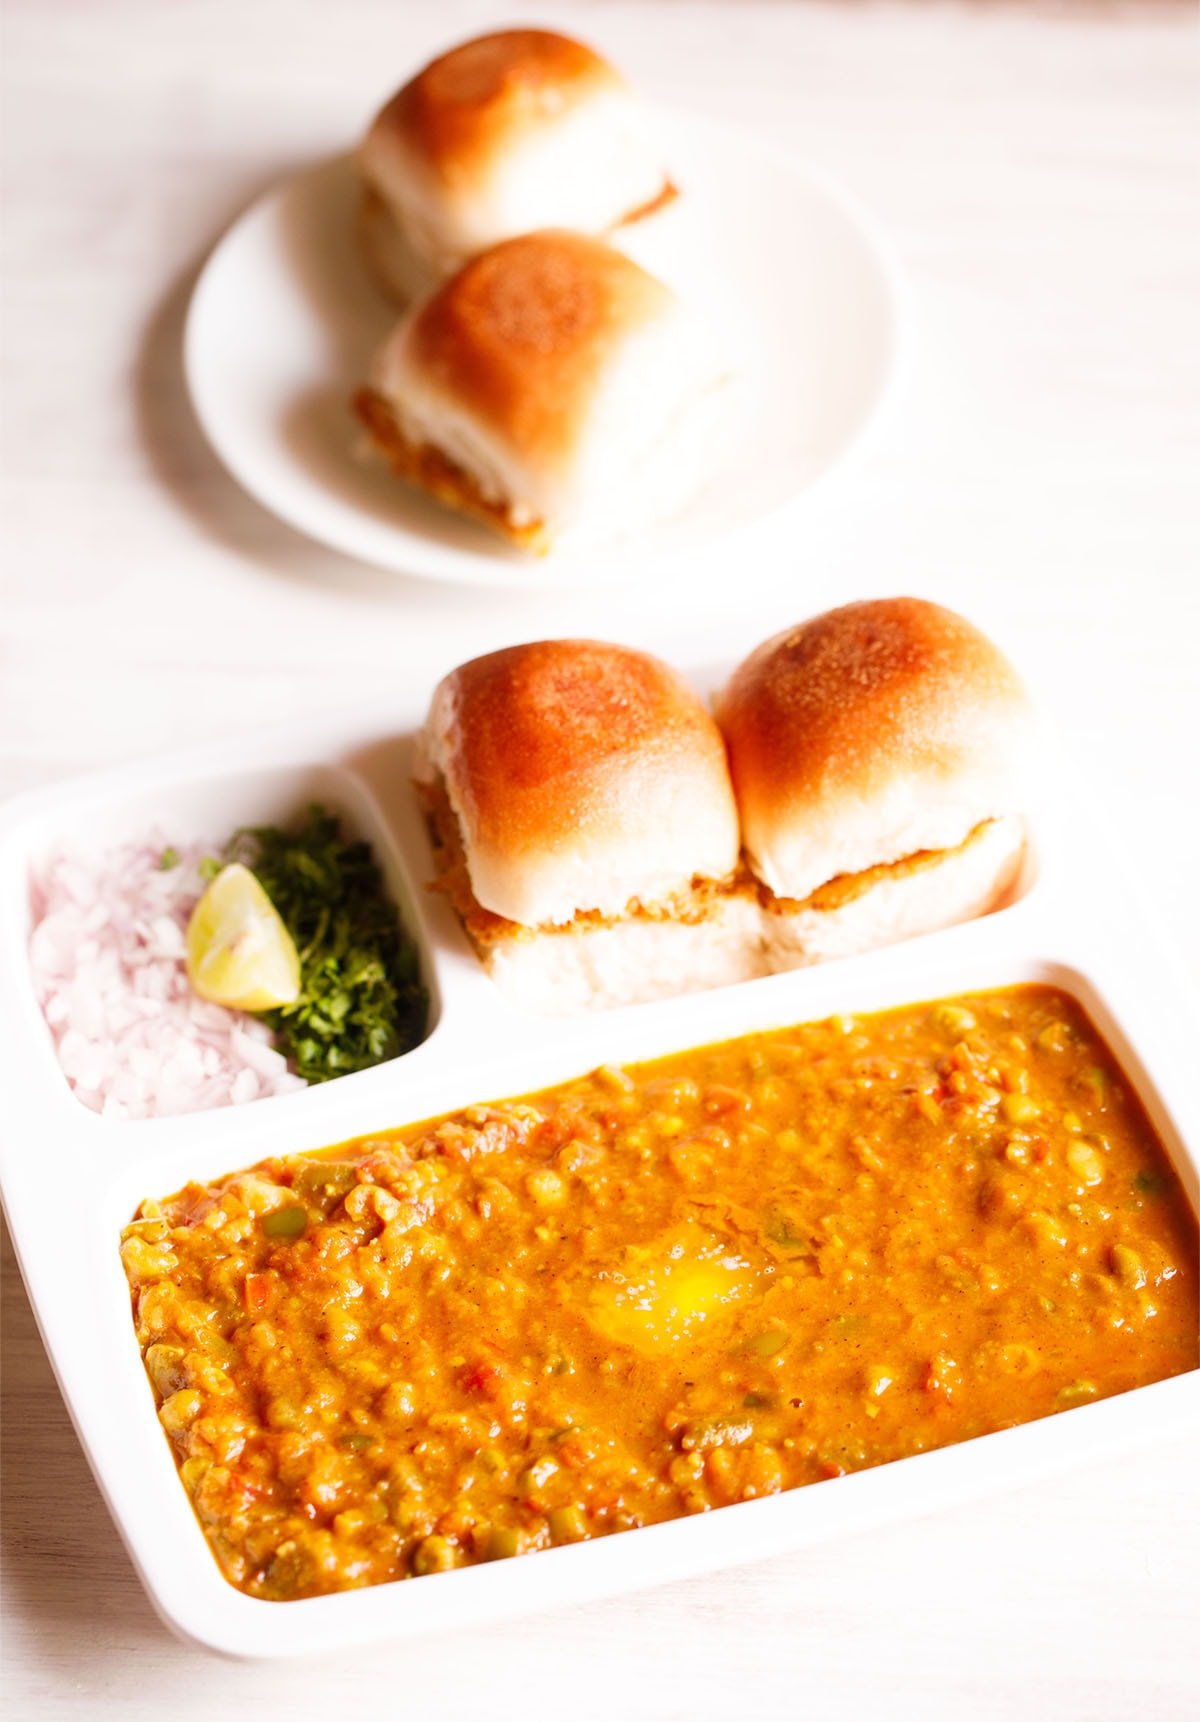
How to make Instant Pot Pav Bhaji
This is an easy and quick way to prepare the Pav Bhaji Recipe, using an electric pressure cooker or Instant Pot.
There are times when I make Pav Bhaji in the Instant Pot. Thus, sharing the same here as well. The best thing about this method is that apart from being easy, it saves time as well. When you have unexpected guests or are in a hurry, go for this procedure.
Obviously, the cooking method has to be different when using an Instant Pot. Unlike the street-side stalls, where it is made on a very large tawa (flat griddle), you can cook everything together in the Instant Pot to make it quicker.
Ingredients
2 to 3 tablespoons butter, salted or unsalted
½ teaspoon cumin seeds
½ cup finely chopped onions
2 teaspoons Ginger Garlic Paste
1 teaspoon chopped green chilies
2 cups chopped tomatoes
⅓ cup chopped capsicum
2 cups chopped potatoes
¾ to 1 cup chopped cauliflower
¾ cup chopped carrots
¼ cup chopped french beans, optional
½ cup green peas, fresh or frozen
½ teaspoon turmeric powder
1 to 1.5 teaspoons kashmiri red chilli powder
1.25 cups water
salt as required
2 tablespoons Pav Bhaji Masala
1 to 2 tablespoons butter – to add later
2 tablespoons chopped coriander leaves (cilantro)
To Serve With Bhaji
12 pav (dinner rolls) or as needed
3 to 4 tablespoons butter – for toasting pav
1 lemon or lime, chopped in wedges
1 onion – medium to large, finely chopped
3 to 4 tablespoons chopped coriander leaves – for garnish
2 to 3 tablespoons butter – for topping, add more for a richer version
Method
Prep Vegetables
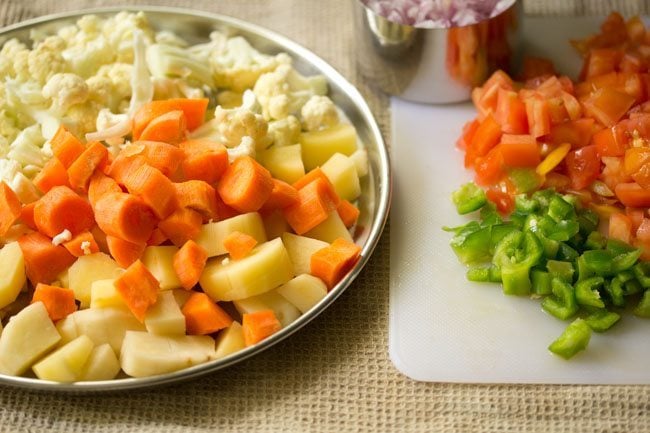
1. Firstly rinse all the vegetables. Peel the veggies which need peeling. Chop all the veggies and keep them ready.
You can add your choice of veggies. I have used a mix of potatoes, cauliflower, carrots, french beans, peas and capsicum.
Chop the carrots, beans, cauliflower, potatoes in small cubes or pieces so that they get cooked faster.
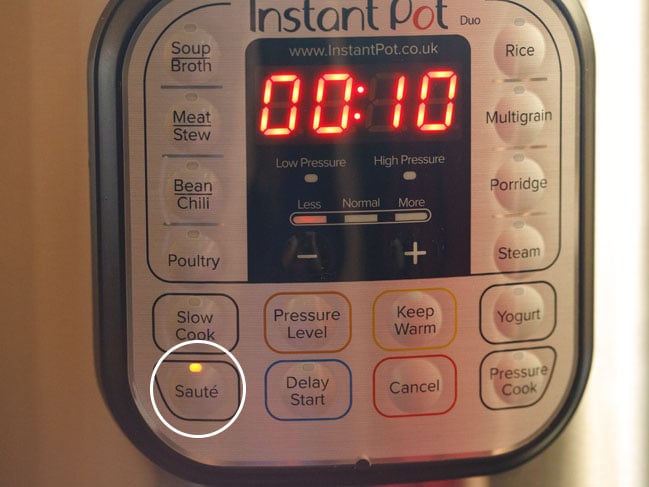
2. Switch on the instant pot. Press the saute button on less mode.
Sauté Onions, Tomatoes, Veggies
3. Add 2 to 3 tablespoons butter in the IP steel insert.
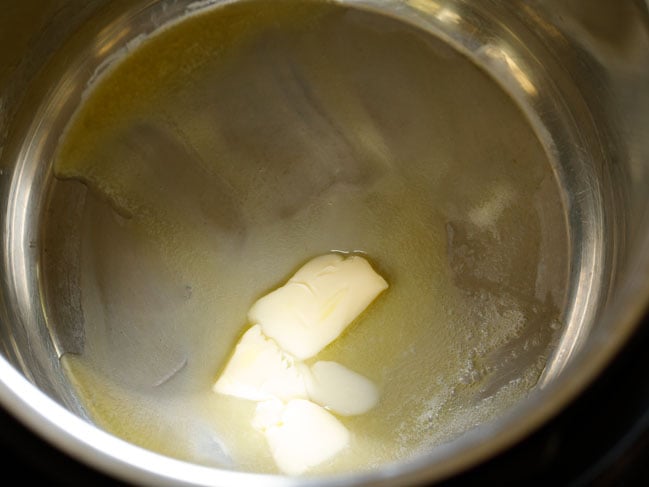
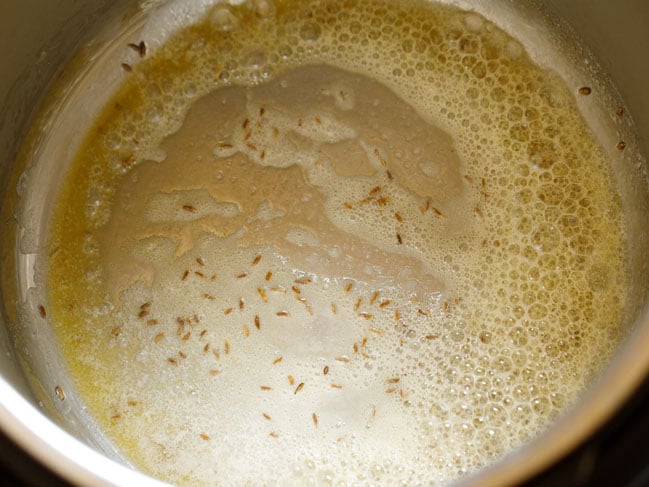
4. When the butter melts, add ½ teaspoon cumin seeds and let them splutter and change color.
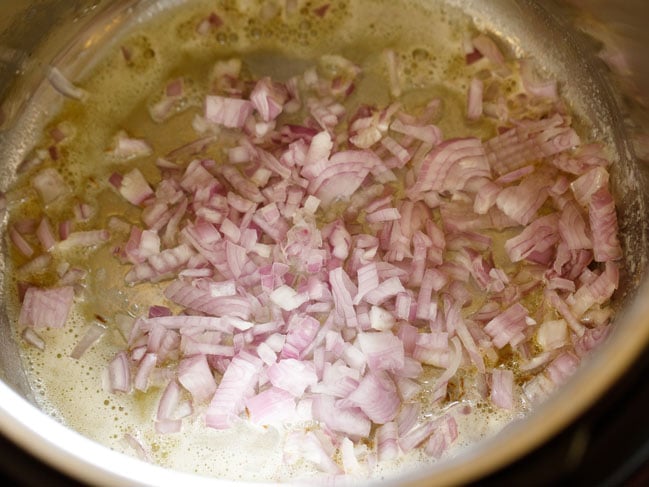
5. Then add ½ cup finely chopped onions.
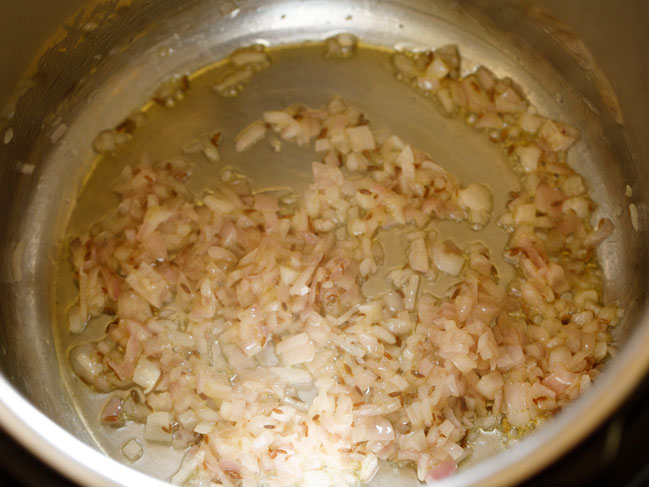
6. Sauté onions till they soften and turn translucent using the ‘less’ or ‘normal’ mode of the sauté option in the Instant pot.
7. Next add 2 teaspoons ginger-garlic paste and 1 or 2 chopped green chillies.
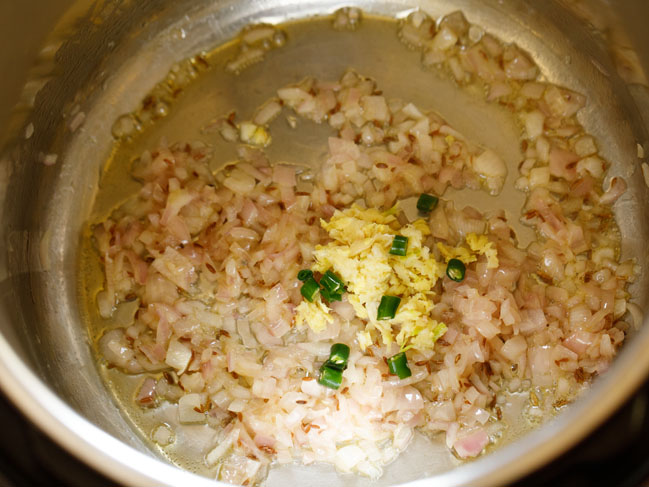
8. Stir and sauté for a few seconds until the raw aroma of ginger-garlic goes away.
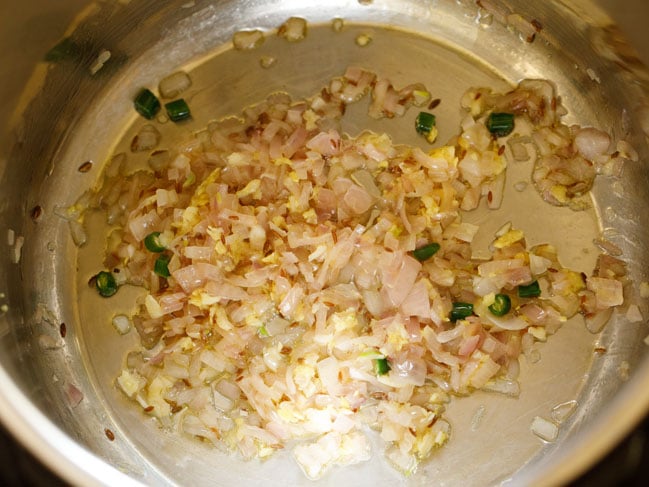
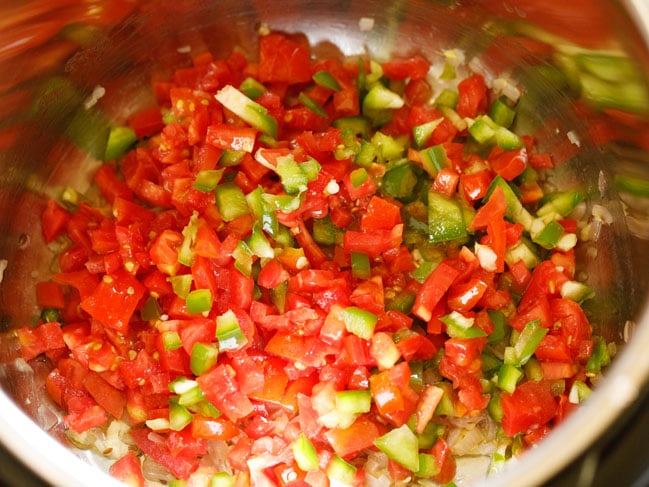
9. Then add 2 cups chopped tomatoes and ⅓ cup chopped capsicum (green bell pepper). Sauté for 1 to 2 minutes.
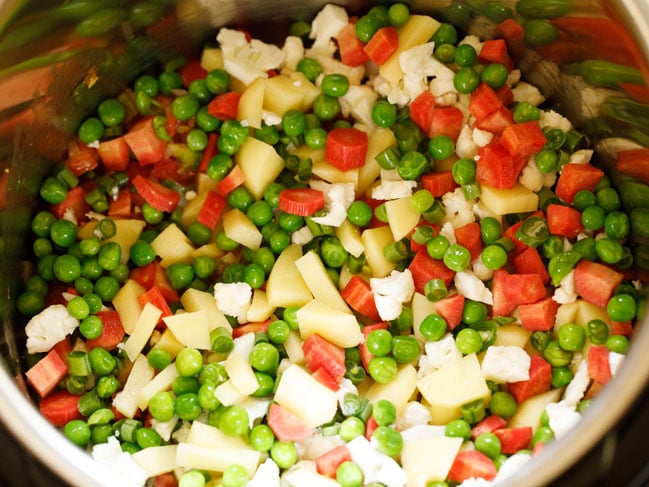
10. Add the chopped veggies and green peas.
11. Add ½ teaspoon turmeric powder and 1 to 1.5 teaspoons Kashmiri red chilli powder. If using any other red chilli powder or cayenne pepper, then you can add less of it.
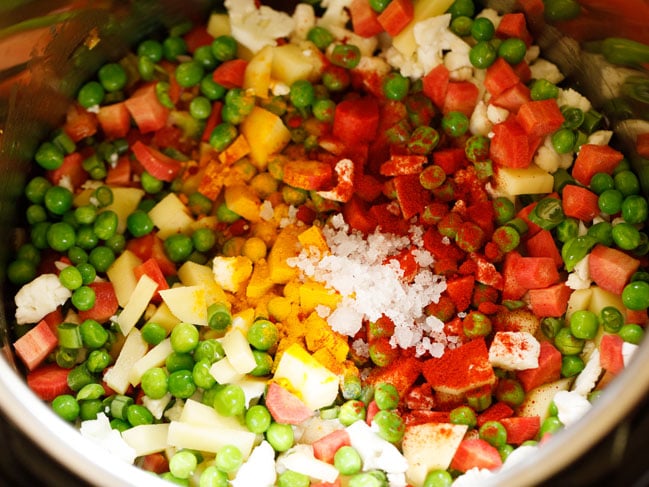
12. Mix everything very well. Deglaze while mixing so that any ingredients stuck at the bottom of the pan is removed. The moisture from the vegetables helps in deglazing.
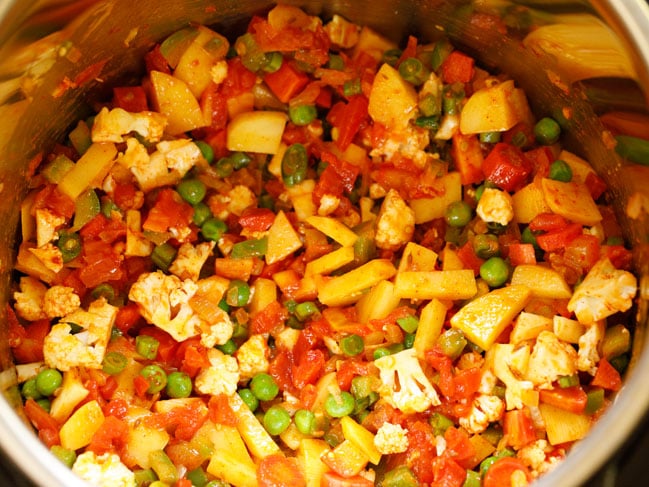
13. Add 2 cups of water. Stir again. Deglaze if required.
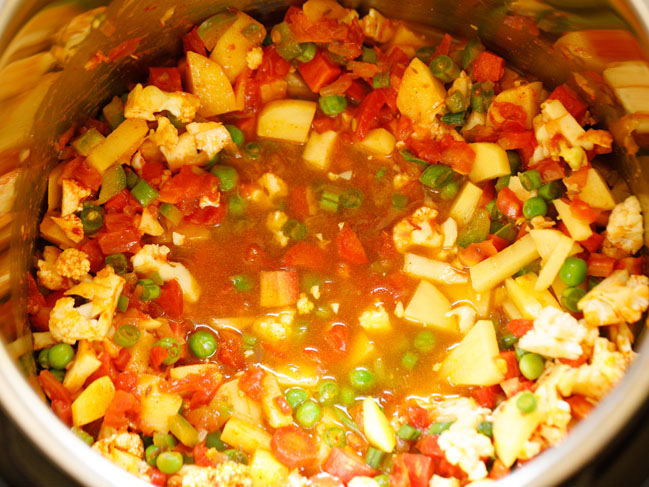
Pressure Cook Bhaji
14. Press the cancel button. Now press the pressure cooker/manual button and set time to 7 minutes on high pressure.
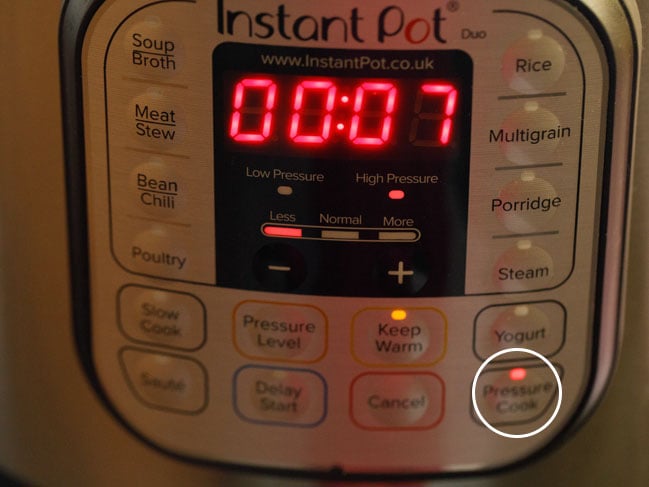
15. When the beep sound is heard and the pressure cooking is complete, do a quick pressure release (QPR). When all the pressure is released, open the lid.
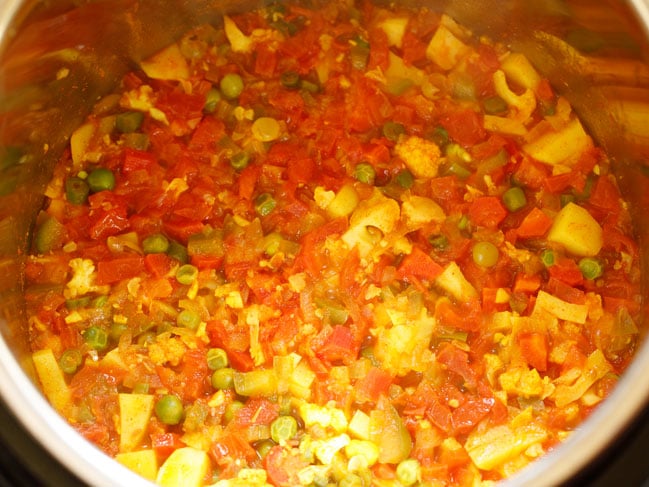
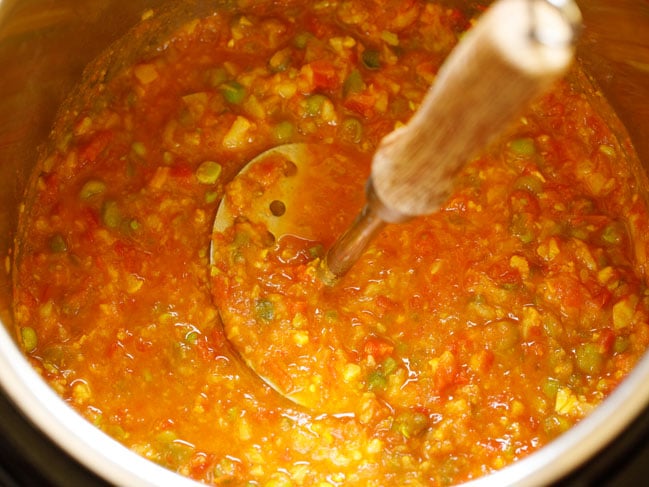
16. Using a napkin or oven mittens, remove the steel insert from the instant pot. Place it on your kitchen counter. With a potato masher, begin to mash the cooked vegetables.
Mash very well. You can even use an immersion blender and puree the veggies to a semi-fine consistency.
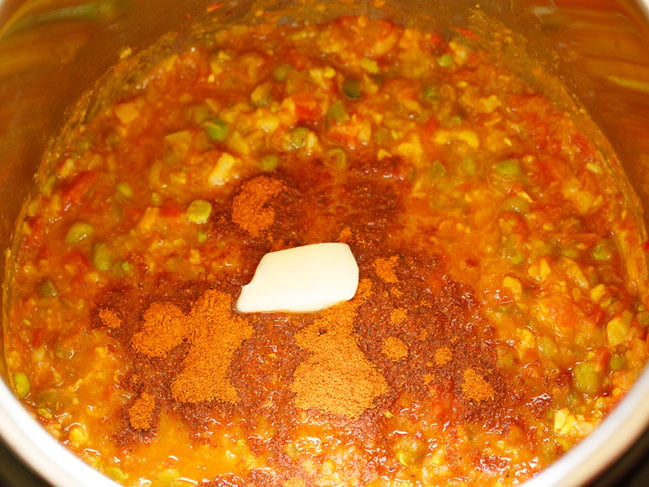
17. Now add 2 tablespoons pav bhaji masala and 1 to 2 tablespoons butter. You can skip the butter if you want. Mix very well.
18. Place the steel insert pan in the IP. Press the cancel button and then press the sauté button on normal mode. Set the timer to 3 to 5 minutes or more.
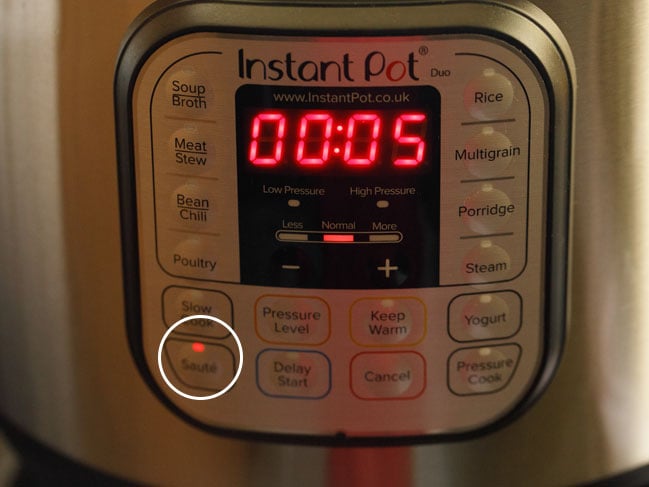
19. Simmer the bhaji for a few minutes, till it thickens a bit. Stir often, so that the bhaji does not stick to the bottom. If the bhaji looks very thick, then add some water.
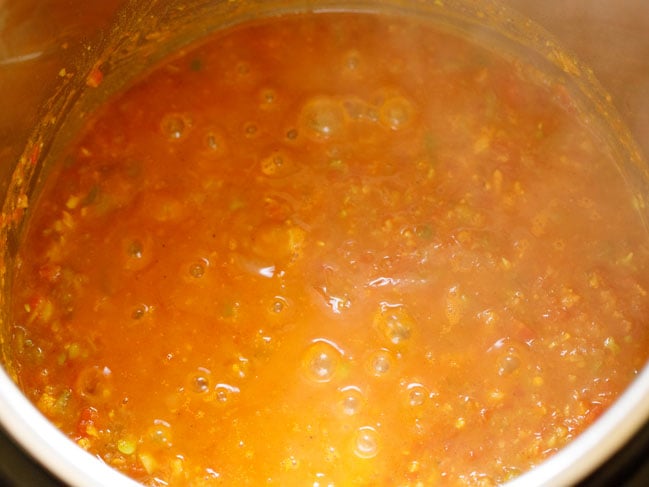
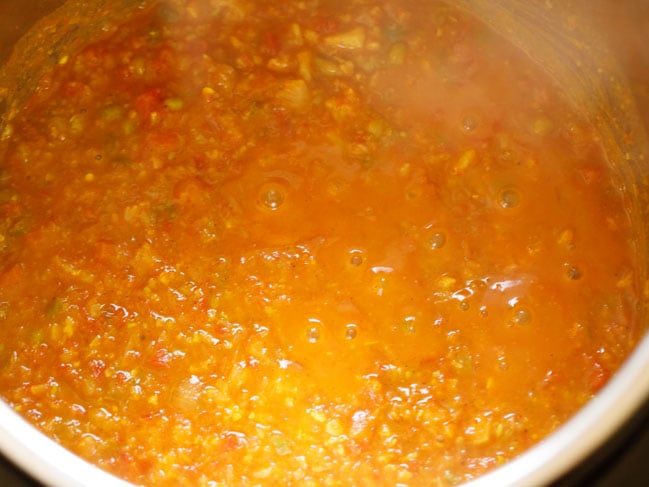
20. Simmer till you get the desired consistency.
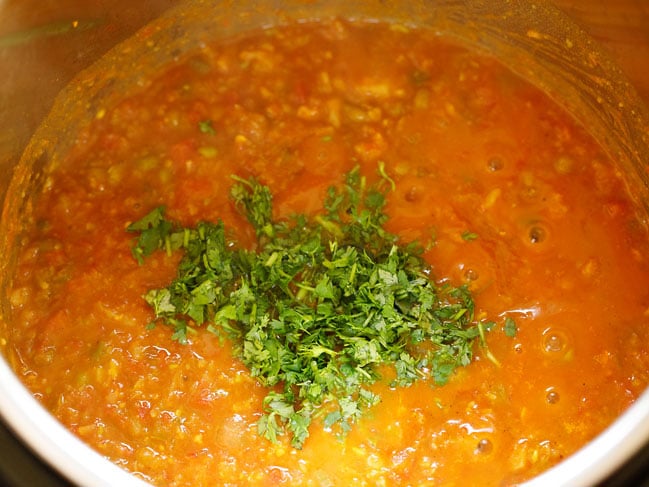
21. Sprinkle 2 tablespoons chopped coriander leaves. Mix very well.
Do check the taste and add salt, butter, Kashmiri red chili powder or pav bhaji masala if required. Cancel and keep the IP mode on warm.
Pan Fry Or Toast Pav
22. For the pav, heat a tawa or griddle and melt some butter on it. Place sliced pavs (dinner rolls) on it.
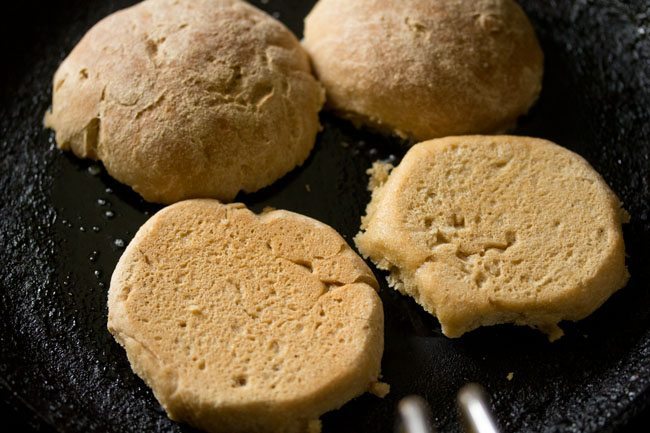
23. Let the pav soak the butter and become warm. If you want you can even lightly toast the pavs.
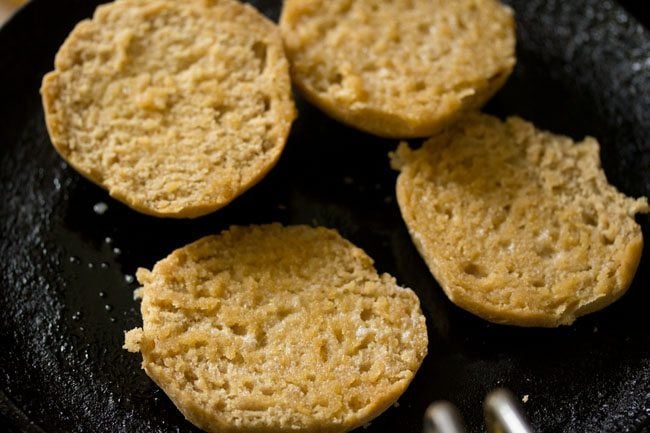
24. Serve hot Instant Pot bhaji topped with some butter paired with lightly toasted pav and a side of finely chopped onions, coriander leaves and lemon wedges.
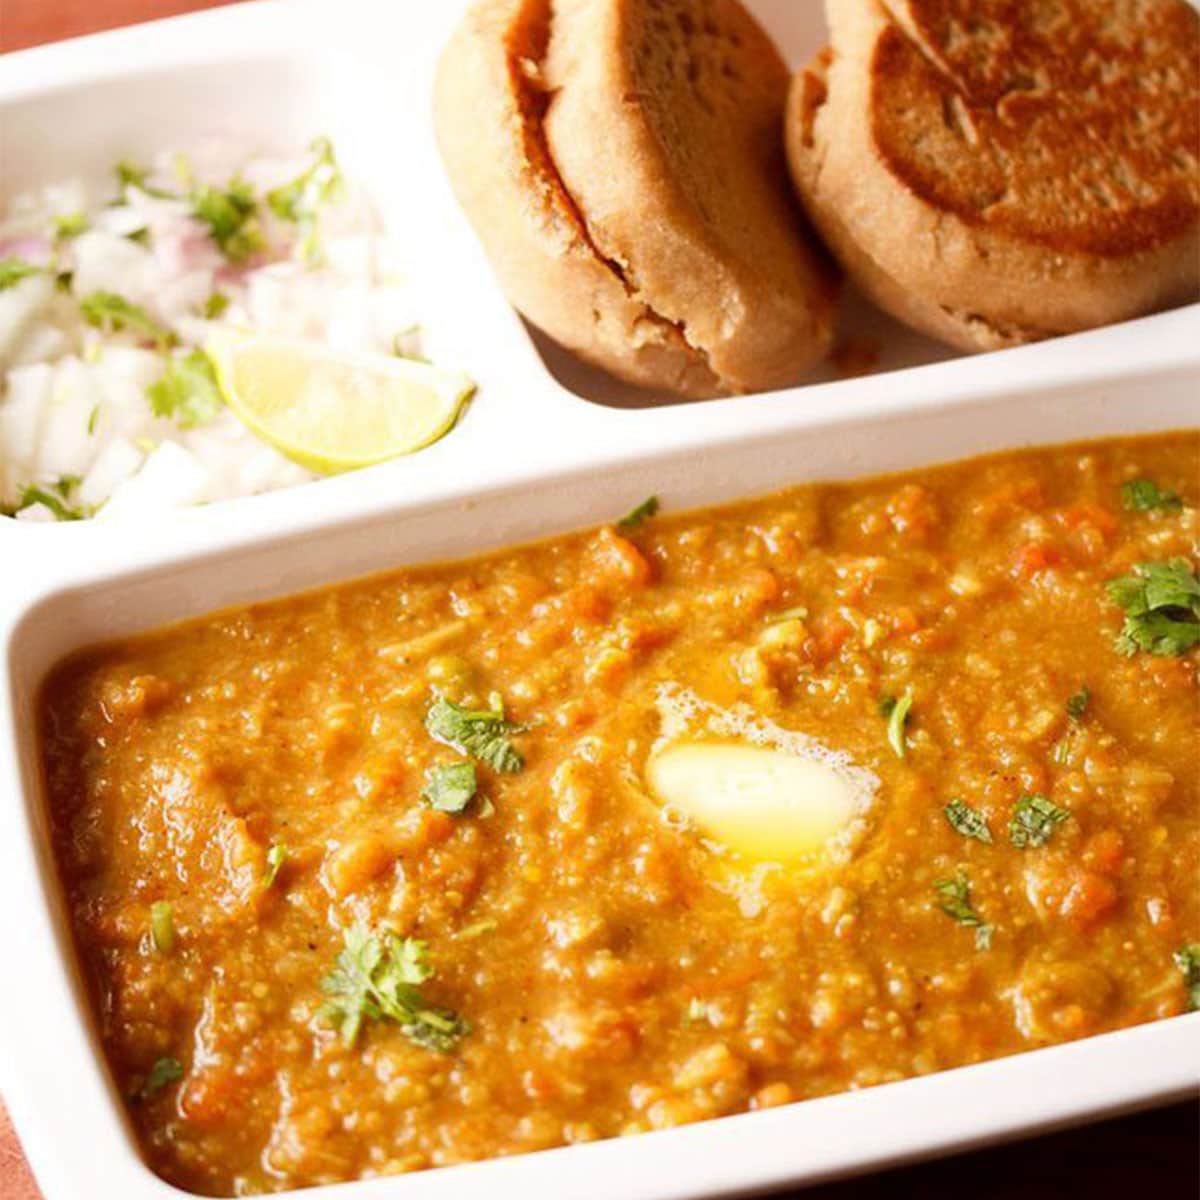
Serving Suggestions
Whether you choose to make Pav Bhaji recipe in a traditional way or using the Instant Pot, you will have to eventually serve it in a few ways to make the whole thing become a tasty experience. Serving ways are:
- Transfer the bhaji in a bowl and top with some cubes of butter. Add more or less, as you prefer.
- Add some finely chopped onions, finely chopped fresh coriander leaves and lemon wedges on the side. You can even sprinkle these directly as well. If doing so, mix them well.
- You can then proceed to enjoy the jazzed-up bhaji with butter toasted pav. To lighten up your palate, you can consider serving Pav Bhaji with a cooling Cucumber Raita.
Expert Tips
- Cook veggies: I cook the veggies in a pressure cooker for the stove-top recipe. A pan or steamer pan can also be used instead.
- Taste: The end taste and color of the bhaji will differ depending on the quantity of veggies. For instance, more carrots in the bhaji means it’ll have a mild sweet flavor. Capsicum should not be missed, as it really brings in a good taste.
- Spices: Add more or less quantities of green chilies, turmeric powder, red chili powder, etc. according to how you prefer the bhaji. To make the bhaji really spicy, add more red chili powder or use a spicy pav bhaji masala powder.
- Pav Bhaji Masala: It is paramount that you use good quality pav bhaji masala for the bhaji. So, either opt for homemade or a trusted brand. You must also always avoid using rancid pav bhaji masala. It has to be fresh.
- Vegan and gluten-free options: If you don’t want to add butter, then you can also make the recipe with a neutral tasting oil or vegan butter. While serving too, use gluten free bread or pavs.
Samosa Recipe (Classic Punjabi Samosa)
How to Make Samosa
Below is my complete step-by-step guide with photos for making the best Punjabi Samosa recipe from scratch.
You start by making the savory filling and pastry dough. Then assemble the Aloo Samosa, fry, and enjoy with your favorite dipping sauces and chutneys!
Cook the Veggies
1. The first step is to cook the potatoes and peas for the savory and spiced filling.
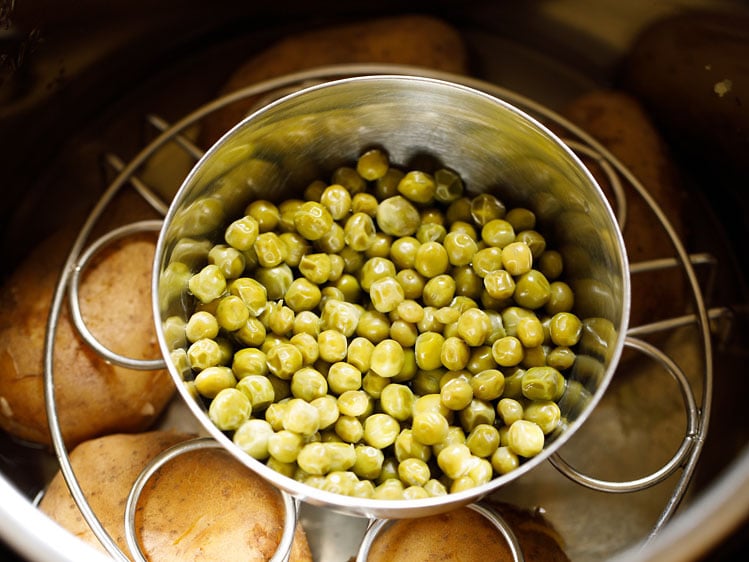
- To cook the potatoes and peas in a stovetop pressure cooker: Place 3 medium-sized whole potatoes (300 to 450 grams) and 2 to 2.5 cups water in a 3 or 4 litre pressure cooker. On top of the potatoes carefully set a small trivet and pressure cooker-safe bowl with ½ cup green peas. Pressure cook for 5 to 6 whistles or 7 to 8 minutes on medium to medium-high flame.
- If using an Instant Pot: Place 3 medium-sized whole potatoes in the steel insert of a 6 quart IP. Add 2 cups water. Place a trivet on top of the potatoes, and on top of the trivet set a bowl with ½ cup of green peas. Pressure cook on high for 20 to 25 minutes.
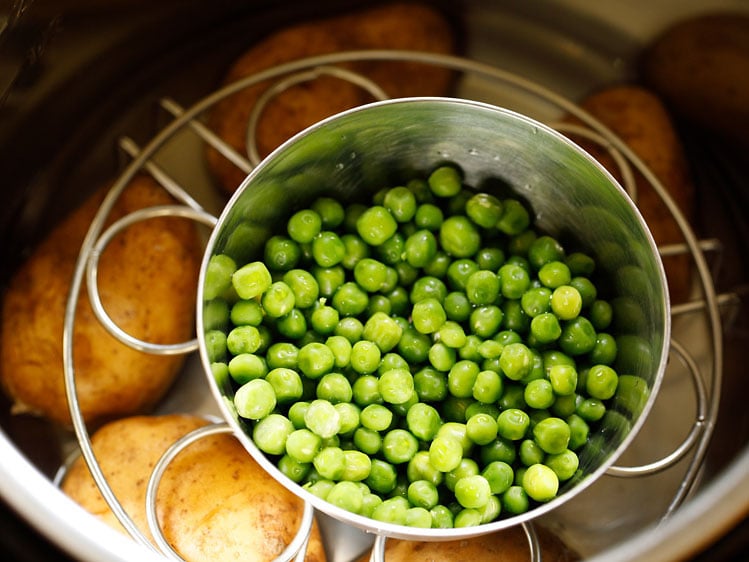
2. For the stovetop pressure cooker, remove the lid after all the pressure falls in the cooker.
For the Instant Pot, do a quick pressure release after 5 to 7 minutes. Check with a knife or fork to see if the potatoes are cooked well.
The knife or fork should be able to slide through easily if the potatoes are cooked properly.
If the potatoes are undercooked, then cook them for a few more minutes using the pressure cook function. Once done, drain the potatoes and peas in a colander and set aside to cool.
Roast and Powder Spices
3. Next, roast or toast the spices. This will help to release their flavors and should not be skipped!
To a small frying pan over low heat add the following spices:
- ½ inch cinnamon stick
- 1 clove, optional
- 1 green cardamom
- 3 black peppercorns
- ½ teaspoon cumin seeds
- ½ teaspoon fennel seeds
- 2 teaspoons coriander seeds
Heat the spices for just a few minutes until aromatic, being careful to not burn.
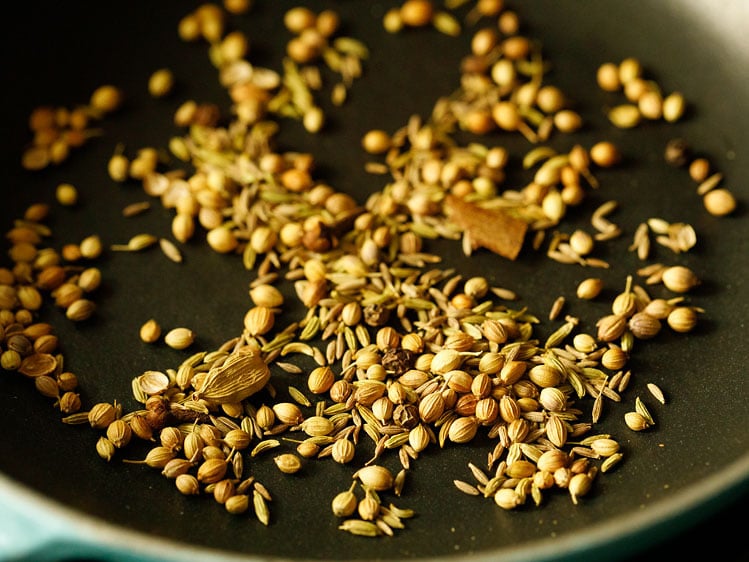
4. Remove the spices from the heat and allow to cool completely. Then, put them in a spice grinder or small mixer-grinder jar.
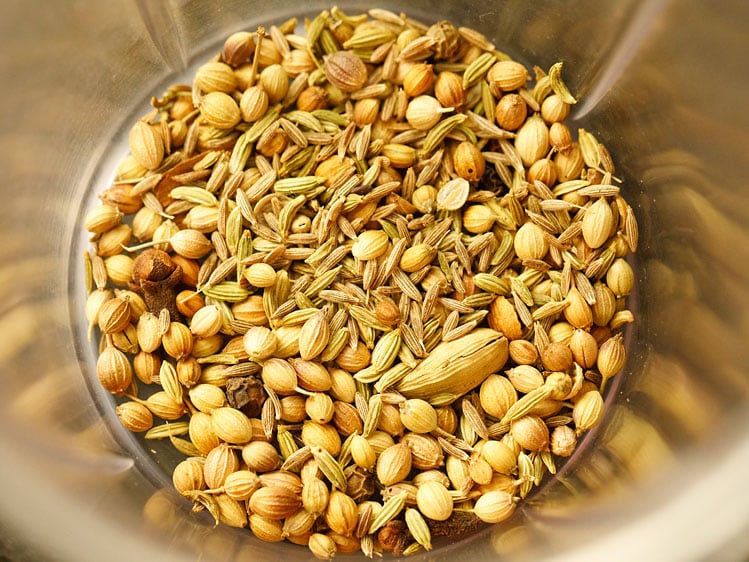
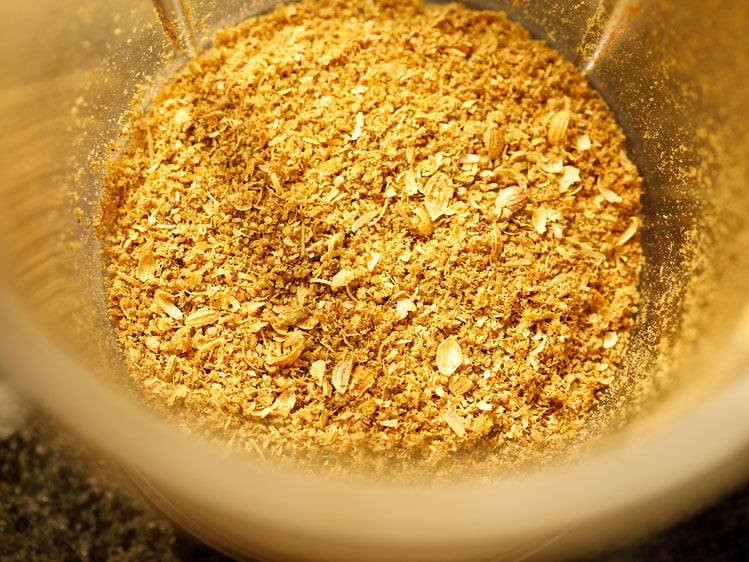
5. Grind the toasted spices to a semi-fine powder, and set aside.
Tip: If you are pressed for time to roast and grind the spices, then I have a solution for you.
Mix 2 teaspoons ground coriander (coriander powder), ½ teaspoon ground cumin (cumin powder), ½ teaspoon ground fennel (fennel powder) and ½ teaspoon garam masala powder in a small bowl.
Add this prepared spice mix at step 9 when the green peas and remaining ground spices are added.
Make Potato Stuffing
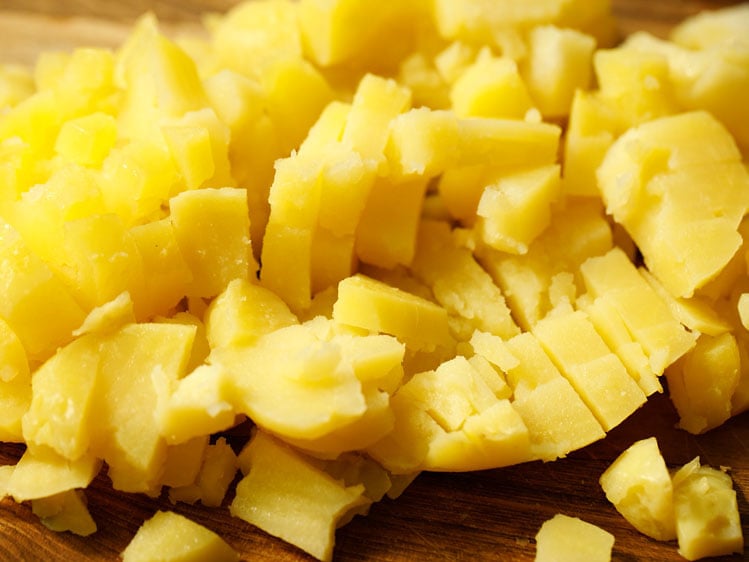
6. Peel the skin off of the cooked potatoes, and chop them in ½ to 1 inch cubes.
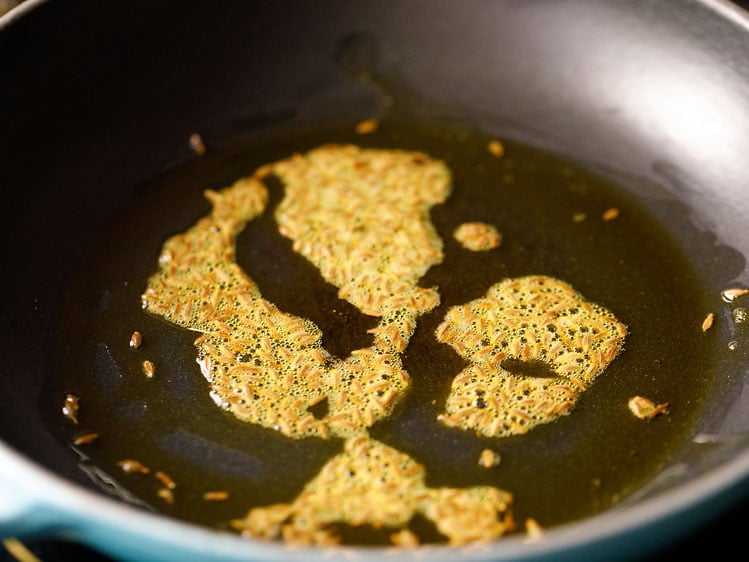
7. In a small skillet, heat 1 tablespoon oil. When the oil becomes medium hot then reduce the heat to low.
Crackle ½ teaspoon cumin seeds until fragrant. I used mustard oil as it really adds a punch in the stuffing.
You can use neutral oil like sunflower oil, safflower oil, grapeseed oil or canola oil.
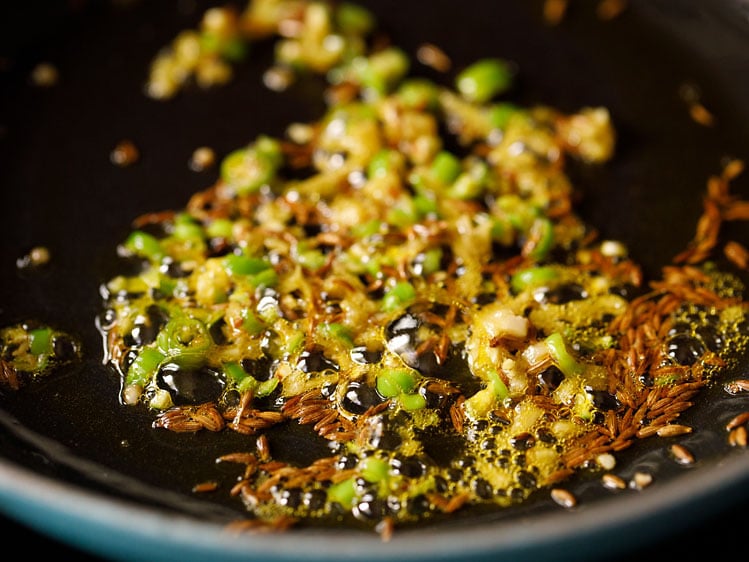
8. Keep the heat on low and add 1 teaspoon finely chopped or minced ginger and 2 teaspoons finely chopped green chillies. Sauté for a few seconds until the raw aroma of ginger goes away.
9. Now you can switch off the flame or keep flame to a low. Then add the cooked green peas, ½ teaspoon red chilli powder, 1 pinch of asafoetida (hing), the dry ground spice mix that we made and 1 to 2 teaspoons dry mango powder (amchur).
The mango powder is what gives the Punjabi Samosa filling its signature tangy flavor that balances so well with the savory, spicy flavors of the other stuffing ingredients.
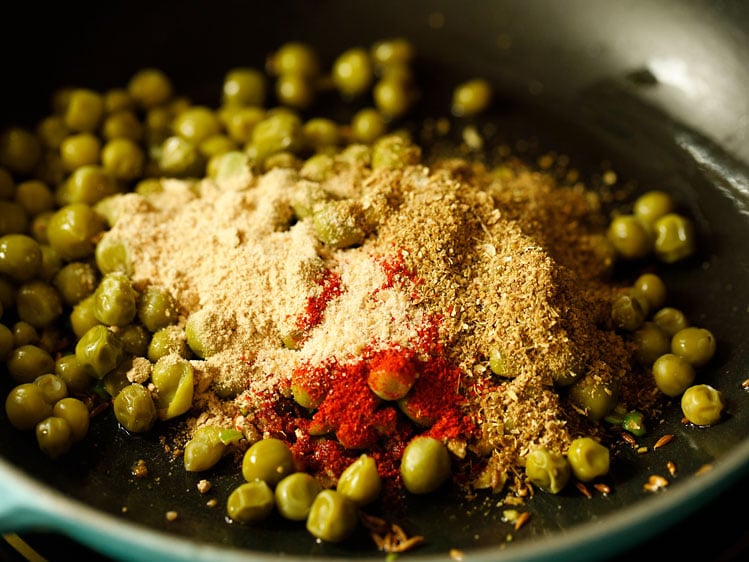
10. Stir together and sauté for a minute. You can add less or more dry mango powder depending upon personal taste.
I added 2 teaspoons as just 1 teaspoon was not quite enough sour flavor for me.
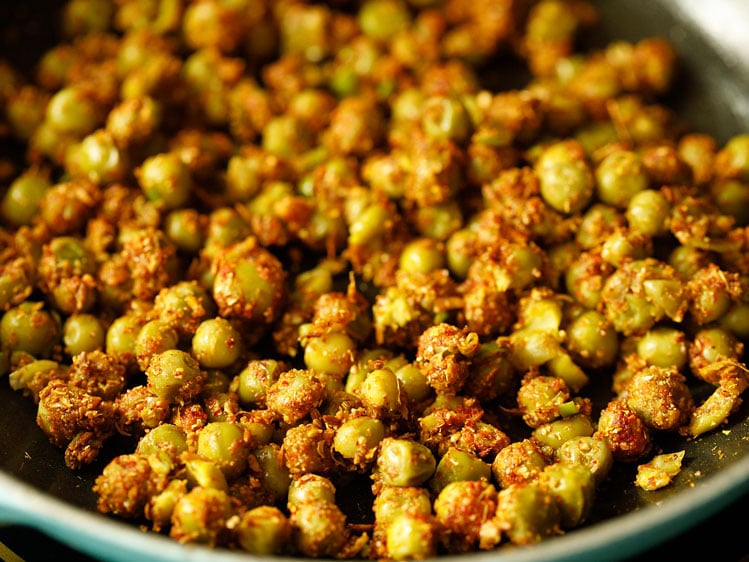
11. Next add potato cubes, salt as required and 1 tablespoon chopped coriander leaves (also known as cilantro) to the skillet.
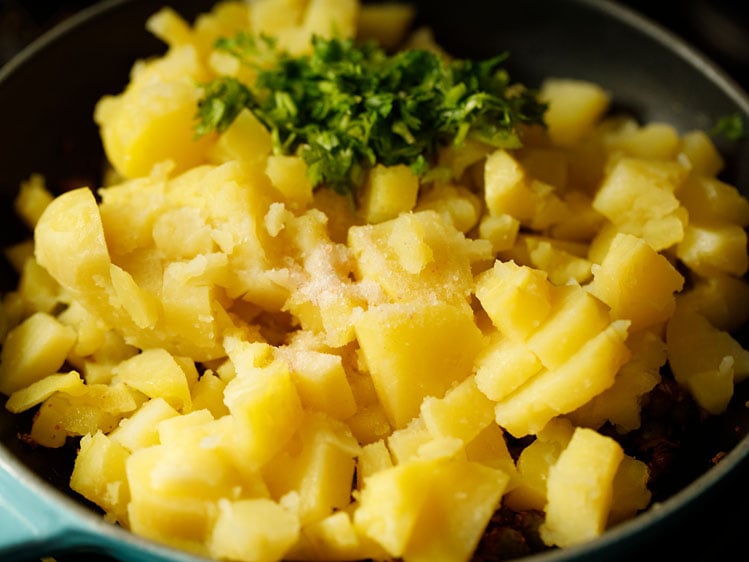
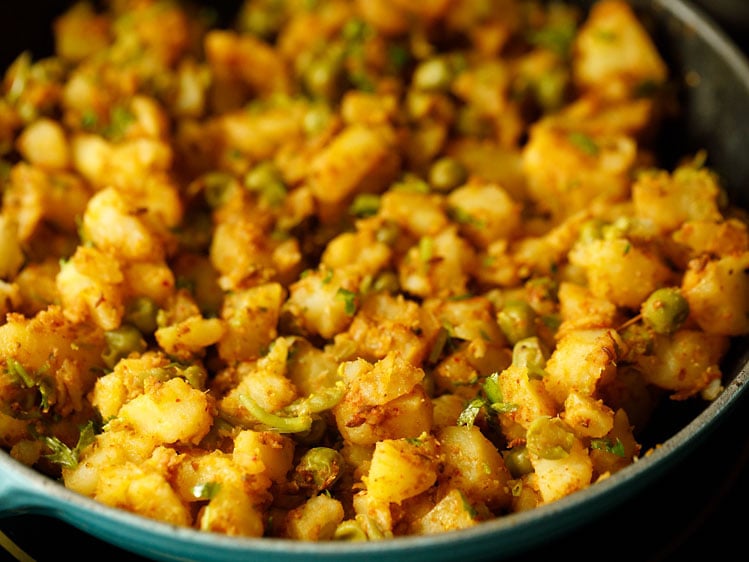
12. Mix very well and sauté for a minute. Check the taste, and add more of the spices, salt or dry mango powder if needed.
Cover and set the filling aside while you make the dough.
Make Samosa Pastry Dough
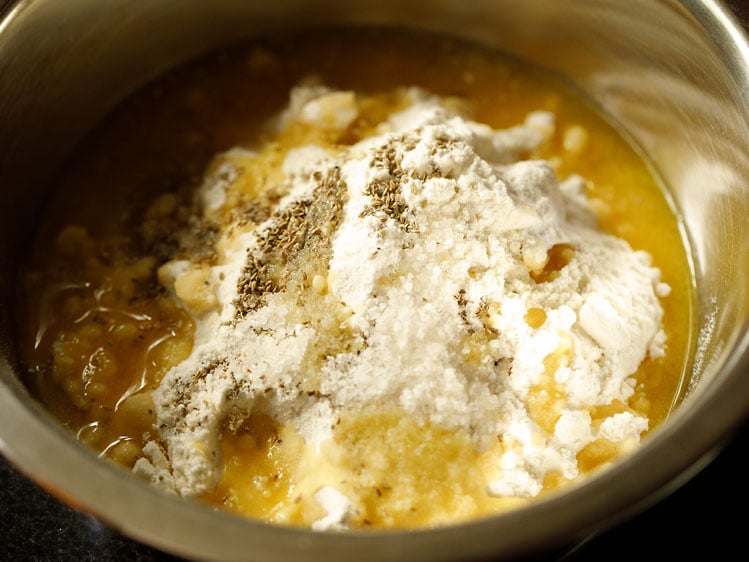
13. In a large mixing bowl combine 2 cups all-purpose flour (250 grams), 1 teaspoon carom seeds, 1 teaspoon salt and 6 tablespoons ghee (50 grams).
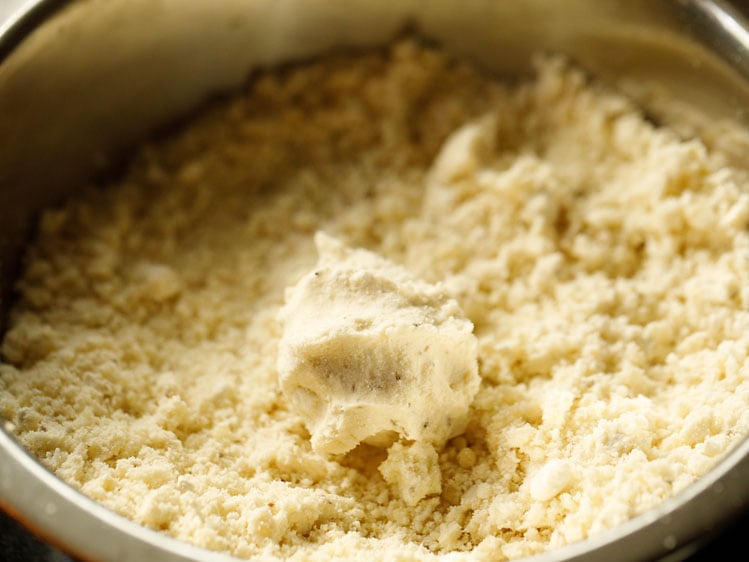
14. With your fingers, mix the ingredients together until they make a breadcrumb-like texture that holds its shape when you press a portion of the mixture.
15. Then, working just a bit at a time, add in 7 to 8 tablespoons water in parts and knead.
You can add 1 to 2 tablespoons extra water if needed if the dough looks floury or dry.
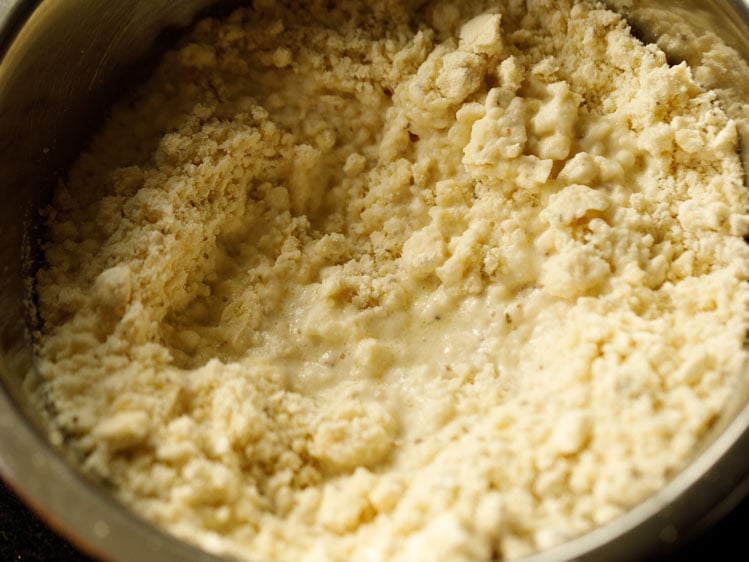
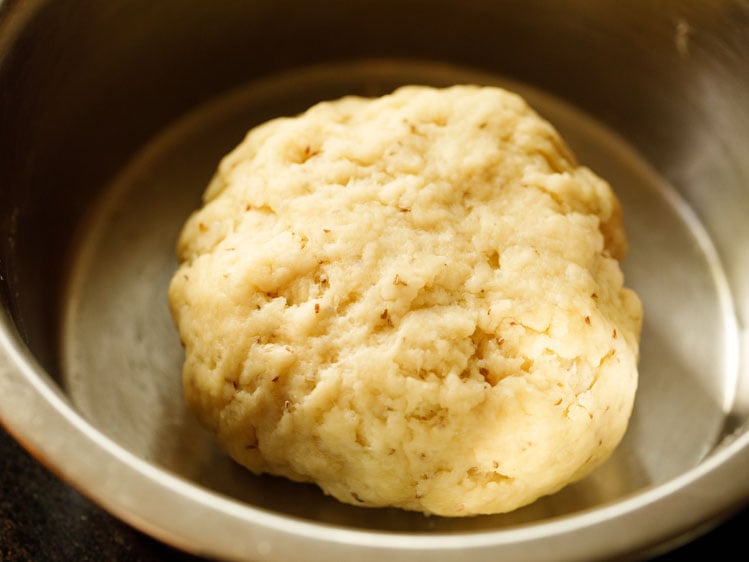
16. Continue kneading to form a firm, tight dough. It should not be soft or sticky. Cover the dough with a moist kitchen towel and let rest for 30 minutes.
In case if your dough becomes too moist or sticky then add a few tablespoons of flour. Mix and knead again to a firm dough.
Assemble and Shape
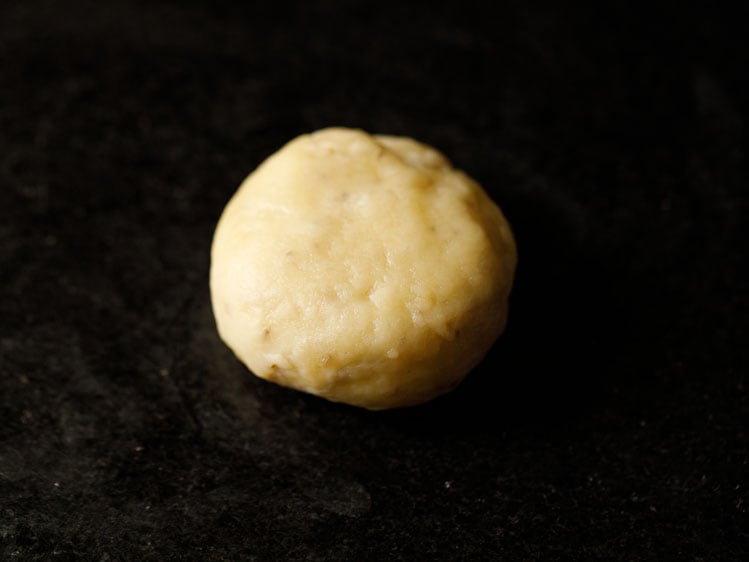
17. After the dough has rested, divide it into 6 to 7 even pieces. Take each piece and gently roll in your palms first to smooth and soften. Place it on your work surface or on the rolling board.
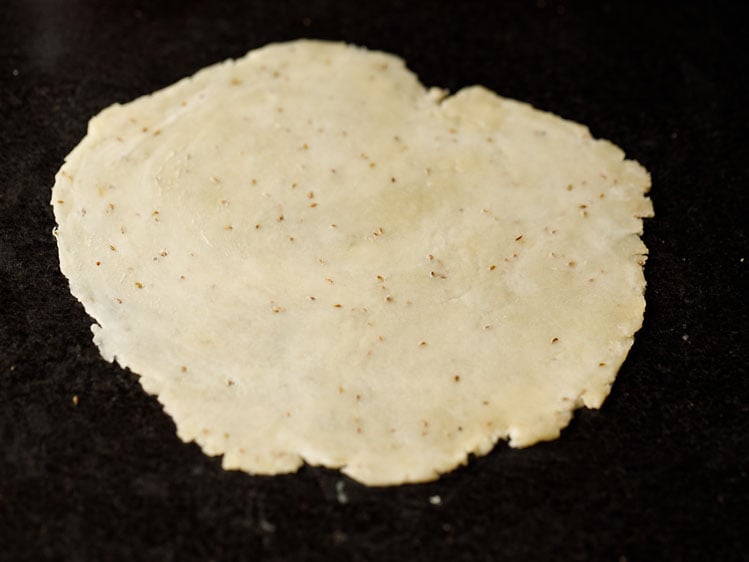
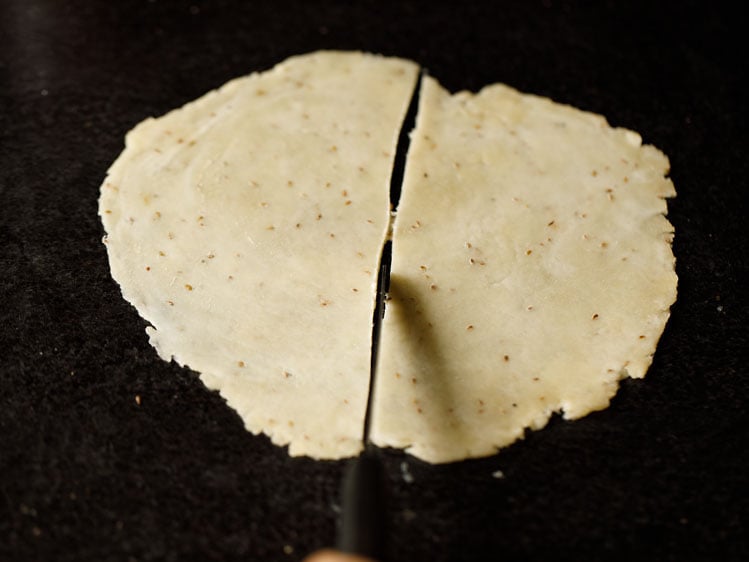
18. Then roll it with a rolling pin, being mindful to keep the thickness even at 1 mm and not too thin.
19. Cut the with a knife or a pastry cutter, right through the center of the rolled pastry dough.
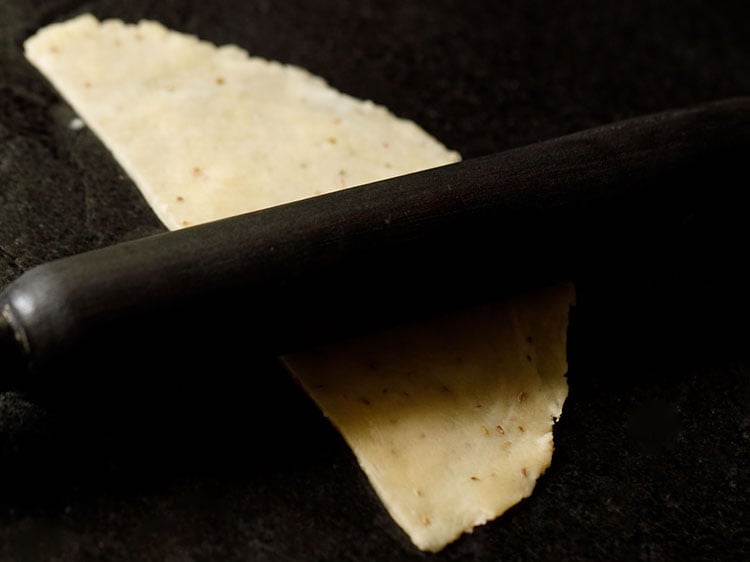
20. Use a rolling pin to gently flatten the half moon shape to make even.
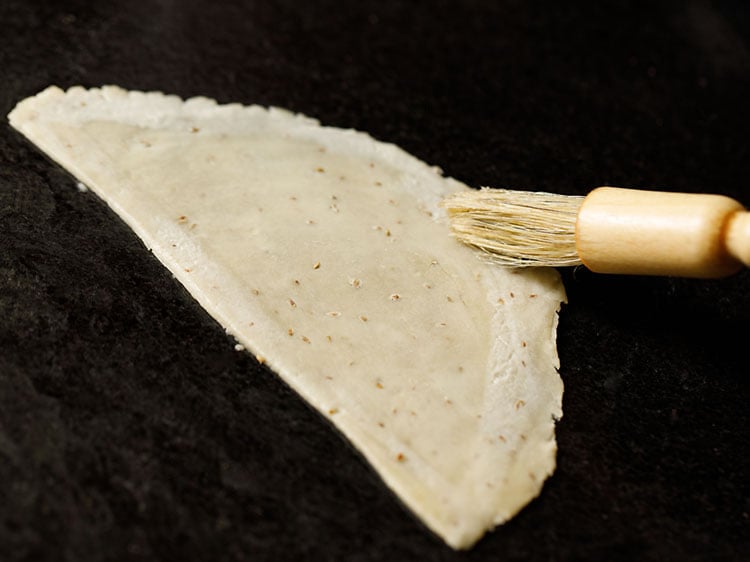
21. Use a pastry brush to lightly brush the dough with water around all of the edges.
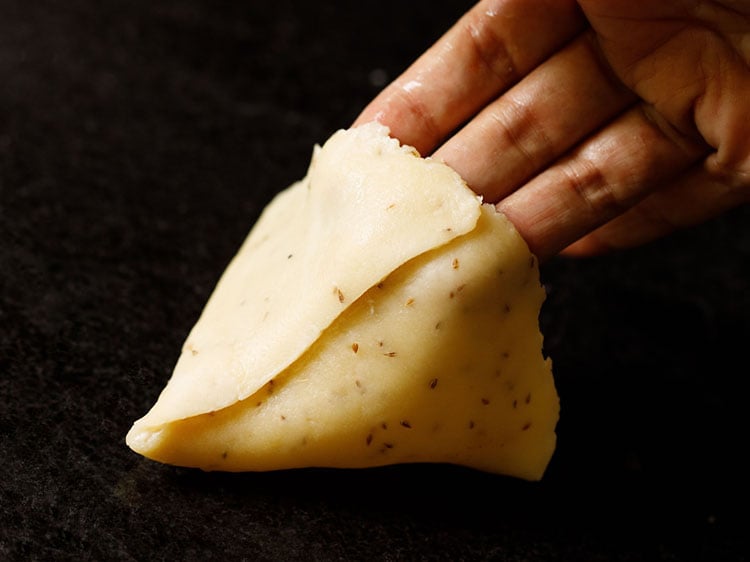
22. Next, fold to join the straight edged side together to form a cone, like shown in the photo below. Be sure to press the edges well so that they are sealed!
The cone is now ready to be stuffed with the potato and pea filling.
23. Carefully spoon and lightly pack the prepared potato and pea stuffing into the cone.
Make sure to not over or under-fill to prevent the samosa from bursting during the frying process.
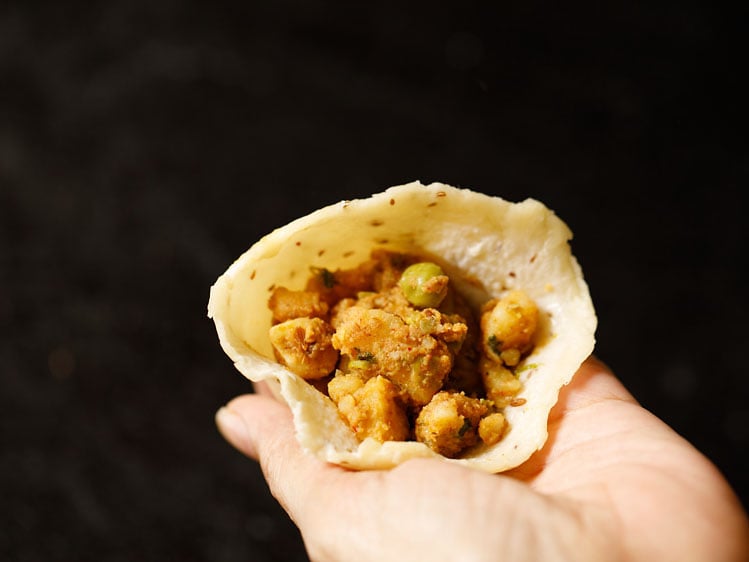
24. Crimp and pinch the edges to close as shown in photo below. This helps the samosa to stand once made.
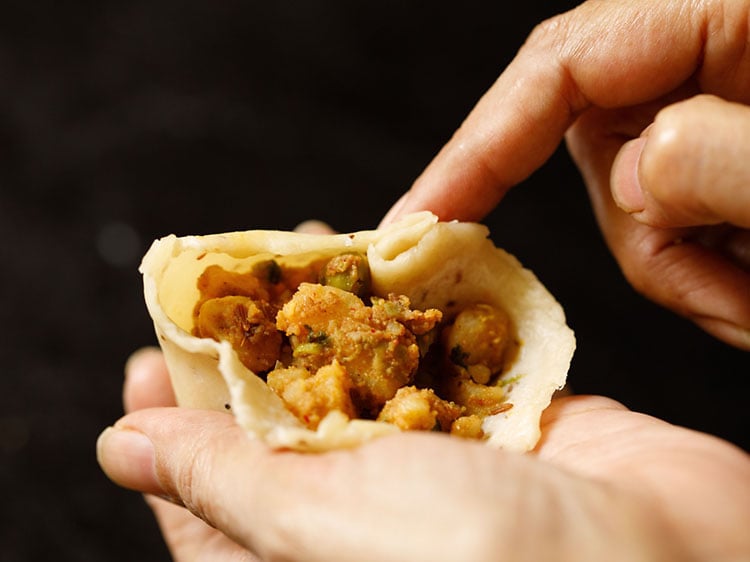
25. Evenly press all of the edges, making sure there are no cracks in the dough. The edges should be sealed very well so that the stuffing does not come out while frying.
Prepare all the samosa this way as described above, and cover with a moist kitchen napkin to keep them from drying out.
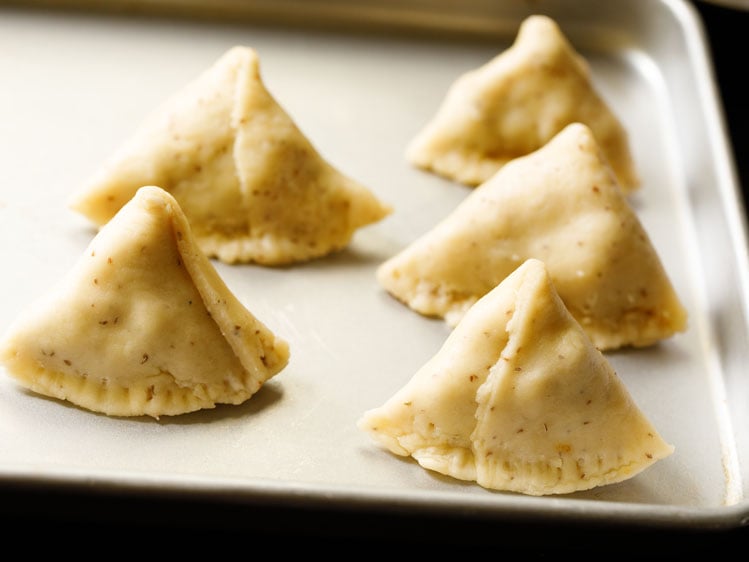
Deep Fry
The final step to making the best samosa is to fry them to a perfectly crisp golden brown.
Use any neutral flavored oil to deep fry – sunflower oil, canola oil, vegetable oil, safflower oil, grapeseed oil are some options.
26. Heat the oil for deep frying in a kadai or pan. Test the oil by adding a small piece of dough – it should come up quickly if the oil is hot enough for frying.
Once the oil becomes medium-hot, gently slide 3 to 4 of the prepared stuffed samosas into the oil, and then immediately reduce the heat to low.
Do not overcrowd the pan to ensure each one of them fries evenly!
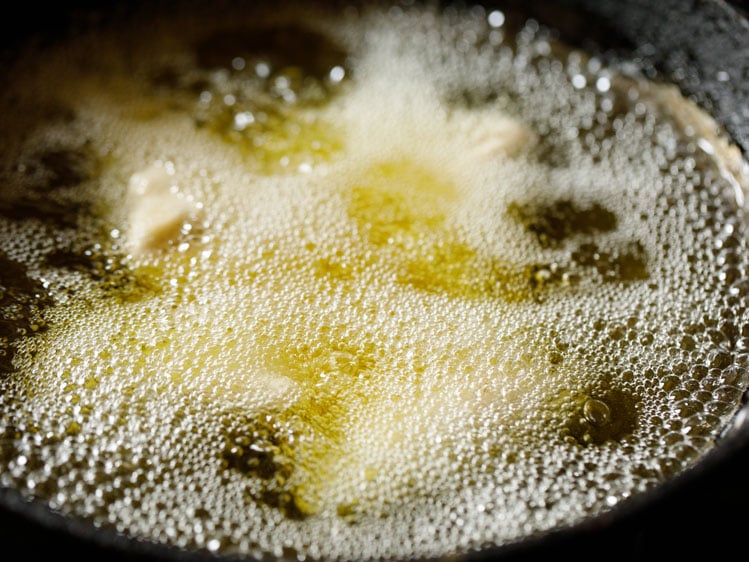
27. Fry them on low to medium-low heat, keeping an eye on them so they don’t burn.
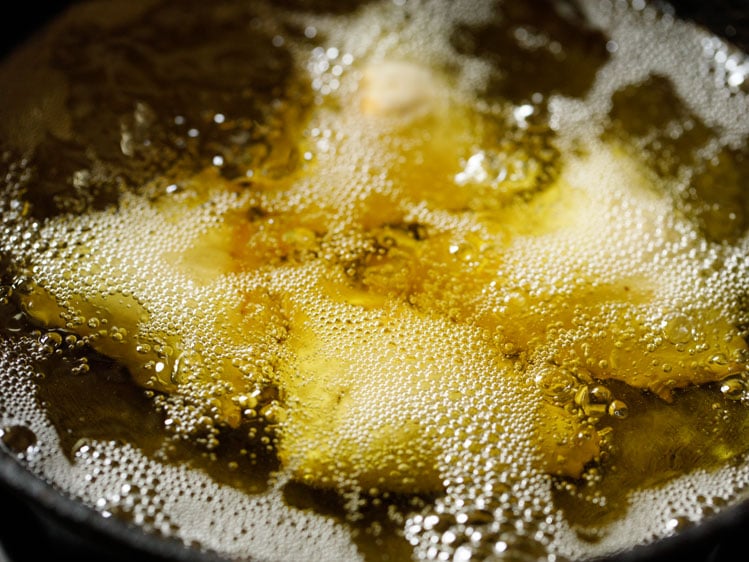
28. When one side is pale golden, use tongs or a slotted spoon or skimmer to gently turn each samosa over and continue frying.
This way you will have to turn a couple of times for even cooking. Be gentle and careful while turning them as they are heavy and oil can spill out.
Frying these take a lot of time, so you have to be calm and patient!
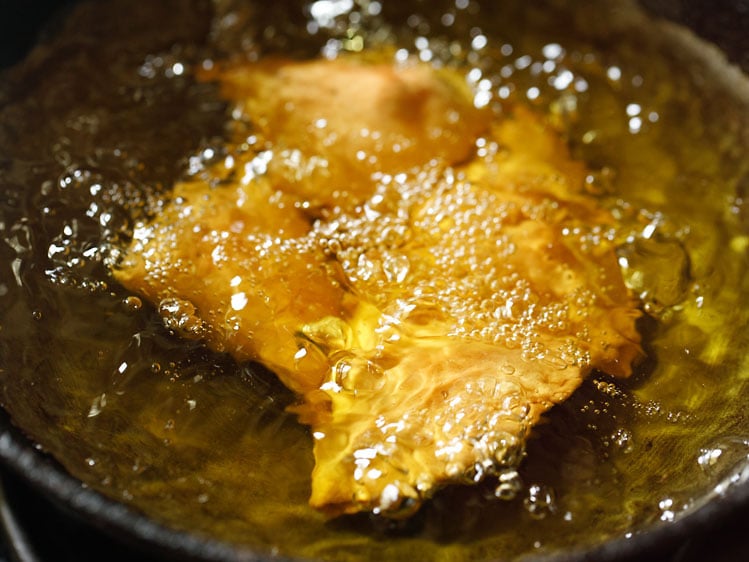
29. Fry until each aloo samosa is crisp and golden. The oil will stop sizzling once the samosas are fried well. They will become nicely crisp and golden.
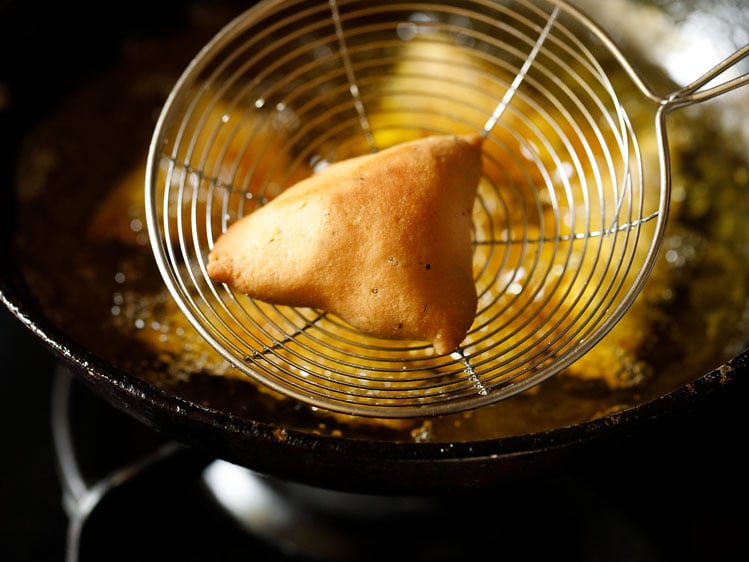
30. Use a skimmer spoon or spider spoon to carefully remove fried samosa from the oil, and place them on paper towels to remove extra oil.
Repeat the frying steps with the remaining batches of Aloo Samosa. Reduce the heat when you begin to fry the next batches. Regulate the heat as needed while frying the samosas.

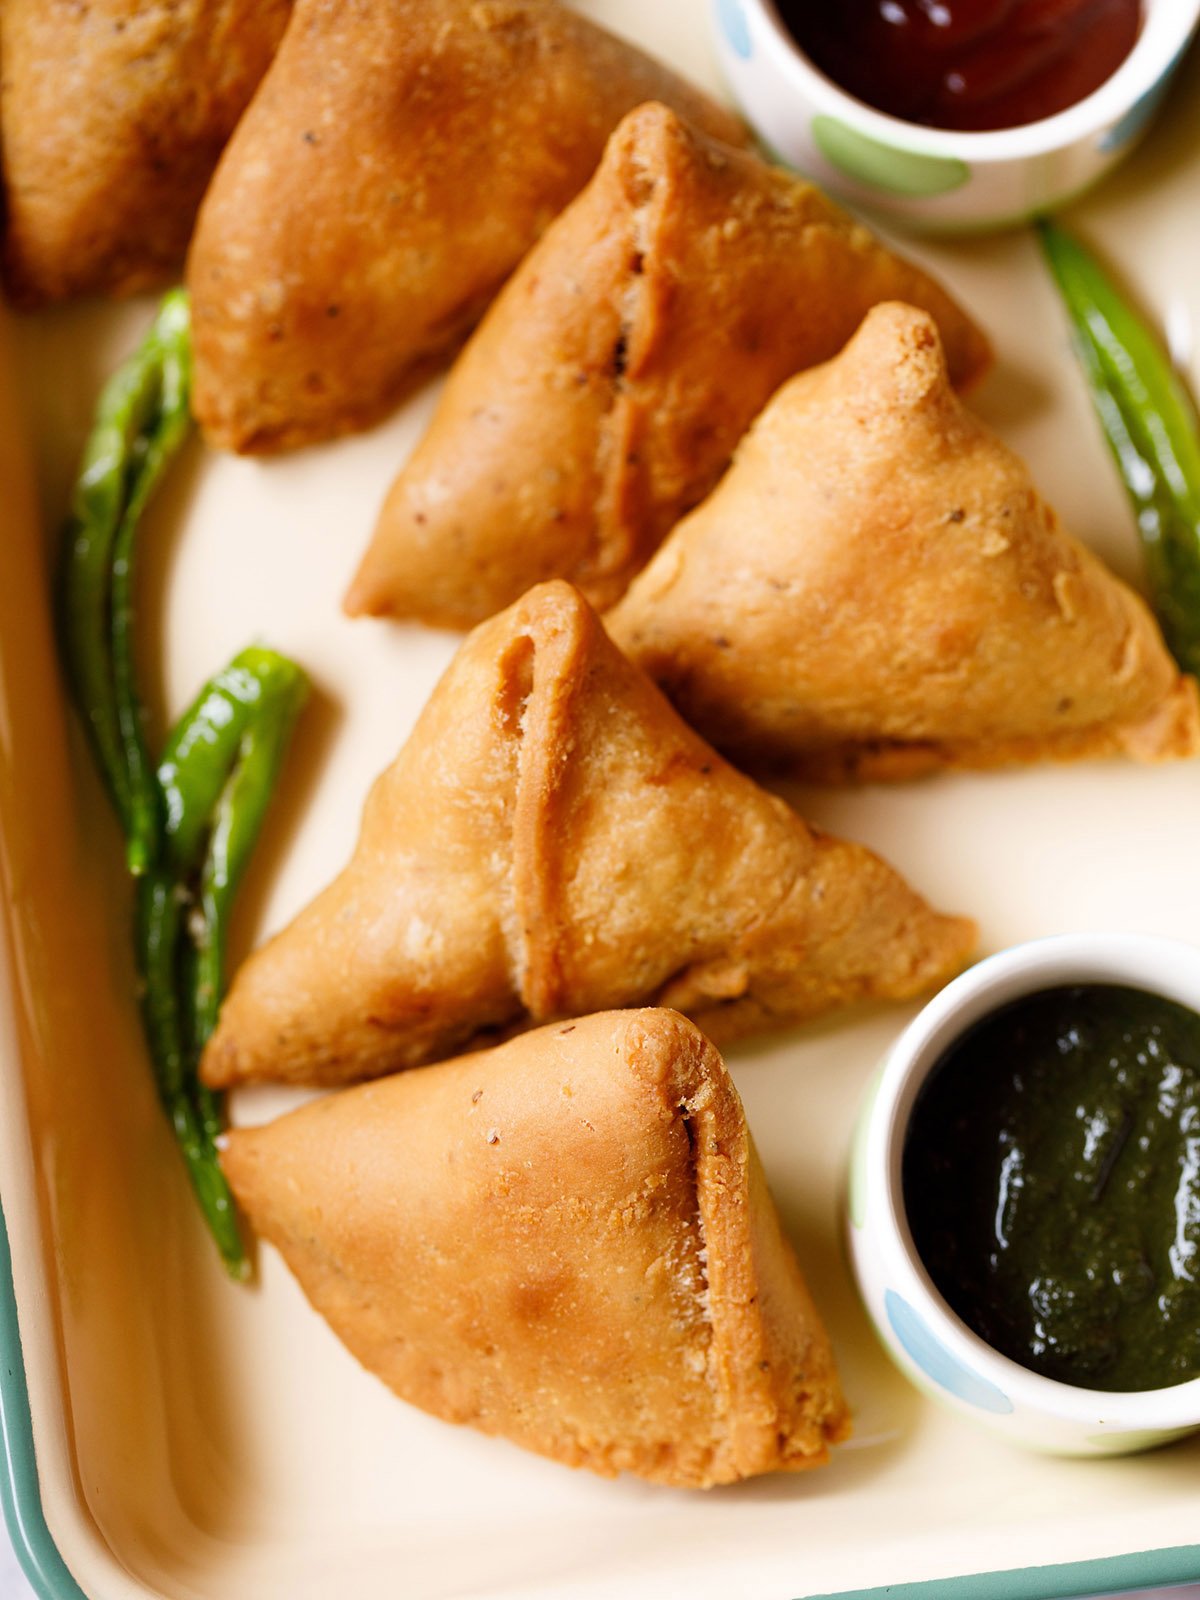
31. Serve Punjabi Samosa hot or warm or at room temperature with Coriander Chutney or Tamarind Chutney, or with a zesty tomato ketchup.
The pairing of Aloo Samosa with masala chai is irresistible and much loved in India.
You can also serve them with chana masala. This dish is popularly known samosa chole. Another popular chaat snack made with potato samosa is Samosa Chaat.
Samosa Stuffing Variations
There are many variations in a samosa stuffing depending on the region and state in India.
- In Delhi and Punjab, potatoes alone or a combination of peas and potatoes are common – where the potatoes or peas are not crushed or mashed. The potato cubes are cooked perfectly but in shape with a few green chilli pieces in the filing. There is a some sourness in this stuffing as dry mango powder or dry pomegranate powder are added. A few more spices are added as well.
- In some variations, raisins are also added which gives the samosa a sweet-sour taste. Sometimes cashews are also added for some crunch.
- In some places, the filling is totally mashed with plenty of spices added.
- If the green chilies are not added in the filling then fried green chilies are usually served separately.
- Some people also add ginger-garlic paste and on few rare occasions, I have found chopped carrots pieces also in the stuffing.
- A variation with mix vegetables is also made. Veggies like peas, carrots, cauliflower and potatoes are added.
- Onion samosa is another variation where a spiced mixture of onions and poha (flattened rice) is filled in the samosa.
- Sweet samosa is also made with a stuffing of khoya (mawa), nuts and dry fruits. This is made usually during festivals like Diwali or Holi. These samosa are also known as khoya samosa or dry fruit samosa.
- A variation is also made with paneer cubes added in the stuffing.
- Cocktail samosa is a small sized samosa stuffed with a dry filling of spices, nuts and dry fruits.
Expert Tips
So you must be wondering what should be the perfect proportions of ingredients in the pastry dough and the correct frying method – to get that flaky and crispy crust in the aloo samosa recipe. I break it down for you in detail.
1. Proportion of fat
The amount of fat (which we call as “moyen or moyan” in Hindi) has to be in the correct proportion in a samosa pastry dough. One of my culinary expert friend always suggests to add ⅕ of fat to 1 part of flour in weight.
Example: For 1 kilogram of flour, you have to add 200 grams of fat. In this recipe, I have kept the same ⅕ proportion of fat – which is 50 grams for 250 grams of flour.
2. Proportion of water
A samosa crust dough has to be kneaded to a tight and firm dough. The dough should not be soft like a bread or roti dough. So you need to add less water when kneading. The amount of water that will be added depends on the quality of the flour. Thus add water in parts when you knead the dough.
3. Rolling samosa pastry
You have to roll the crust evenly keeping 1 mm thickness all over. Do not roll the crust too thick. A thick crust will take up plenty of frying time resulting in a hard texture.
Do not roll the dough too thin. It won’t be able to contain the potato stuffing and burst in oil. So do keep in mind these tips while rolling the dough.
4. Two frying techniques
There are two frying techniques to get that perfect crispy flaky crust in a samosa.
1. Frying at a low temperature
In this method, firstly heat the oil at a medium or medium-high temperature. Then add the samosa into the hot oil. As soon as you add them to the hot oil, reduce the heat to a low or medium-low and fry samosa on a low heat.
This ensures that they do not absorb too much oil. If you directly put the samosa in a less hot oil, they soak up too much oil. If you fry samosas in a very hot oil, then tiny air bubble pockets can form on the crust and the inside part of the crust will be undercooked.
2. Frying twice
This is a little lengthy method and the one which I will suggest you to try while making samosas if you have plenty of time. In this method initially you have to lightly fry the samosas not allowing them to become golden – just that the dough should look cooked.
Add the samosas in hot oil and remove them when the crust has become opaque and creamish white. Fry until lightly fried so that when you remove them they will not break. Set them aside. Then lower the heat of oil and fry the samosas again until they are golden.
With both the methods, the final samosa will be crisp & flaky from outside and cooked well from inside – like the one you get in the Indian sweet stores and there will be no air pockets on the crust.
How to make Aloo Samosa in an air fryer
If you have an air fryer then do try making samosa in it. You will be pleasantly surprised with the texture of the air fried samosa. They do taste similar to the fried ones, minus the extra oil.
For air-frying, preheat air fryer at 180° C/356° F for 10 minutes. Brush them lightly with oil and air-fry at 180° C/356° F until the samosas are golden.
Bhel Puri Recipe – Zesty Chaat Mumbai Style
How to make Bhel Puri
Cook Potatoes
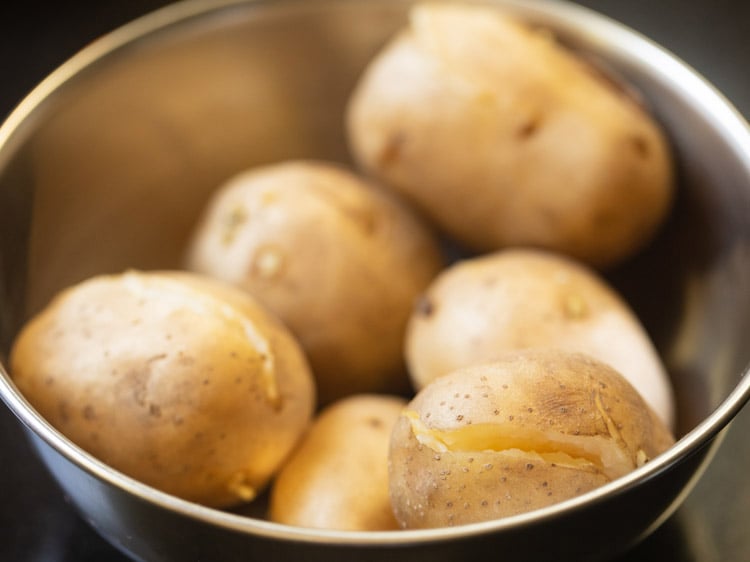
1. Rinse the potatoes very well in fresh water. Then boil 1 large potato or 2 medium sized potatoes in a 2-litre pressure cooker or in a pan with enough water.
If using a pressure cooker, then pour water just about covering the potatoes. Sprinkle ¼ teaspoon salt and pressure cook for 4 to 5 whistles.
Once the pressure settles down on its own in the cooker, then only open the lid. Drain the water and place the potatoes in a bowl.
Let them cool or become warm. I was making some other snack as well, so I cooked more potatoes.
Make Green Chutney
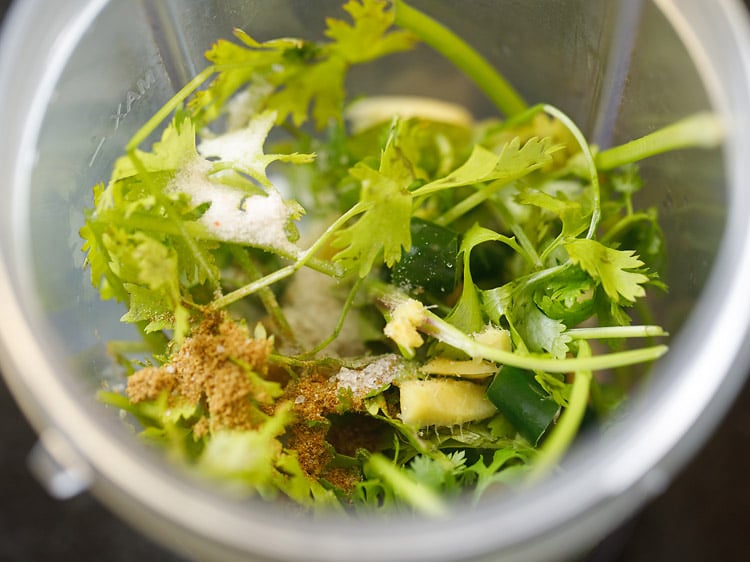
2. Rinse and roughly chop ½ cup fresh coriander leaves (or ¼ cup mint leaves + ¼ cup coriander leaves). Place the coriander leaves in a small grinder jar.
Also add ½ inch ginger (peeled and roughly chopped), 1 to 2 green chillies, ½ teaspoon chaat masala and ¼ teaspoon salt or as required.
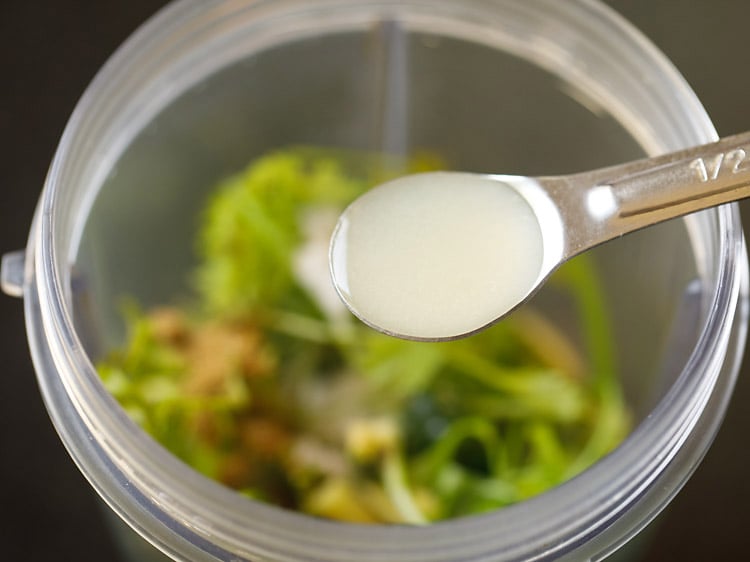
3. Add ½ teaspoon lemon juice for a tangy taste in the chutney.
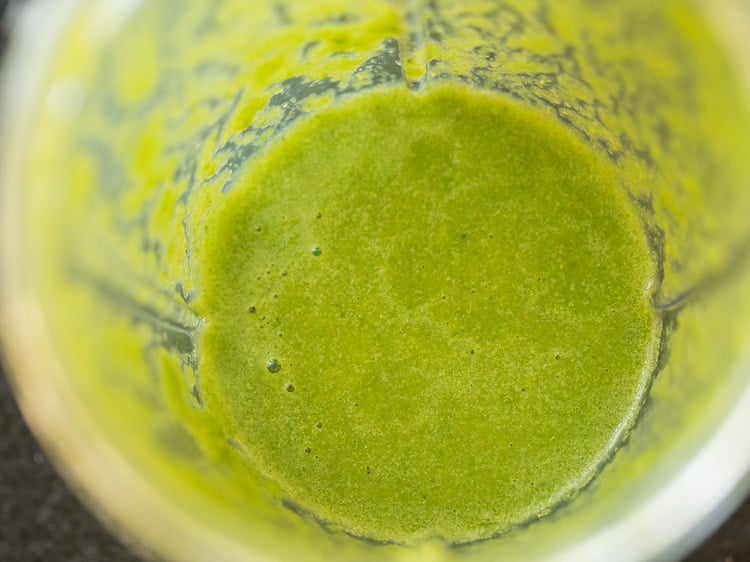
4. Add 2 to 3 tablespoons water or as required and grind or blend to a smooth chutney. Don’t make the green chutney thin. Remove the chutney in a bowl and keep aside.
Make Spicy Red Chutney
5. Peel 16 to 18 medium to large sized garlic cloves. Rinse them with water and place in the same grinder jar.
Also sprinkle 2 teaspoons Kashmiri red chili powder and ¼ teaspoon salt or according to taste.
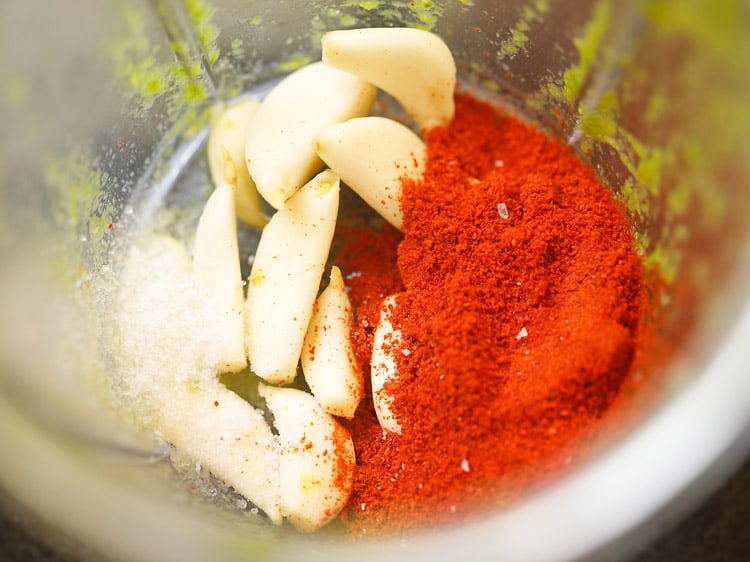
6. Add 2 to 3 tablespoons water or as required and grind or blend to a smooth consistency. Remove red chutney in a bowl and keep aside.
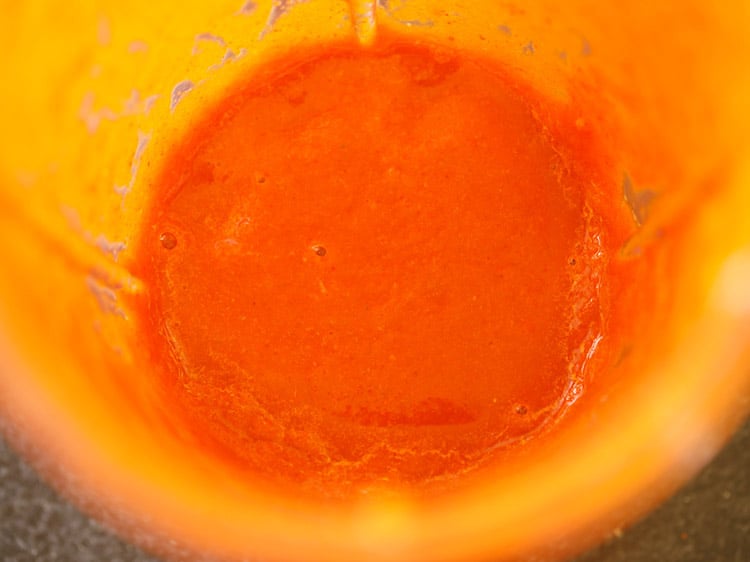
Make Sweet Chutney
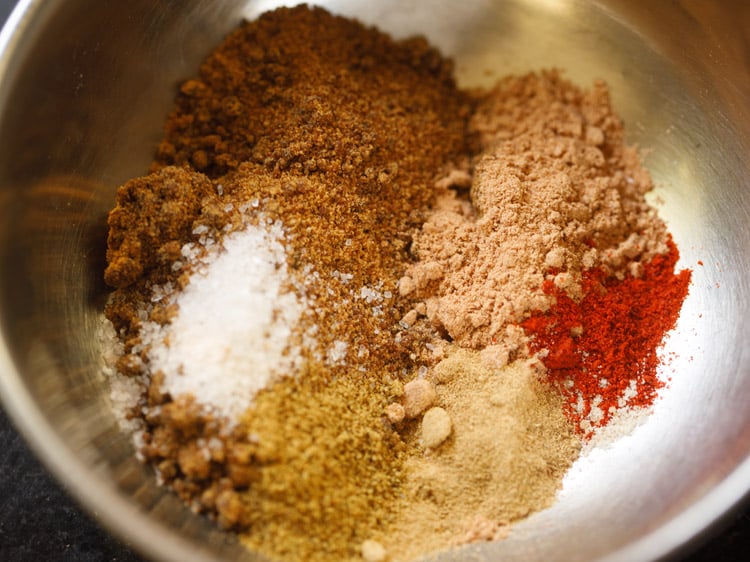
7. In a small pan take the following ingredients:
- 3 tablespoons jaggery
- 3 teaspoons amchur powder (dry mango powder)
- ¼ teaspoon Kashmiri red chilli powder
- ¼ teaspoon roasted cumin powder
- 1 to 2 pinches dry ginger powder (optional)
- 1 to 2 pinches black salt or regular salt or as required
8. Add 3 tablespoons water.
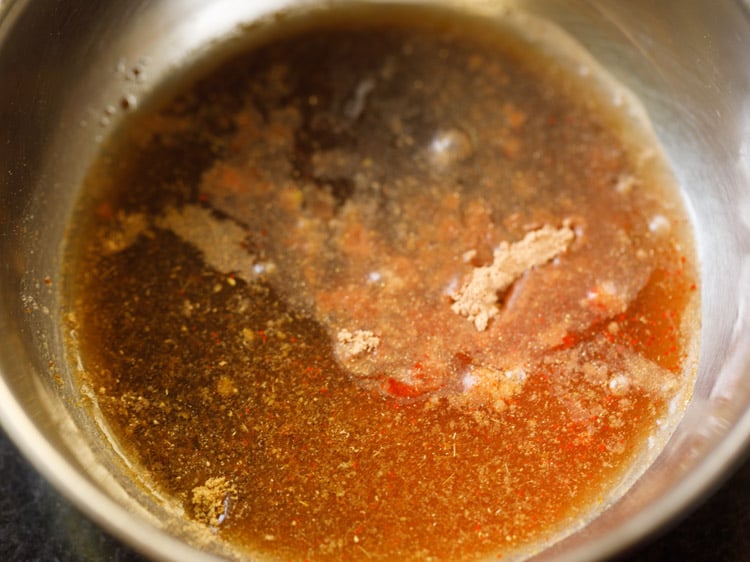
9. Stir and mix very well.
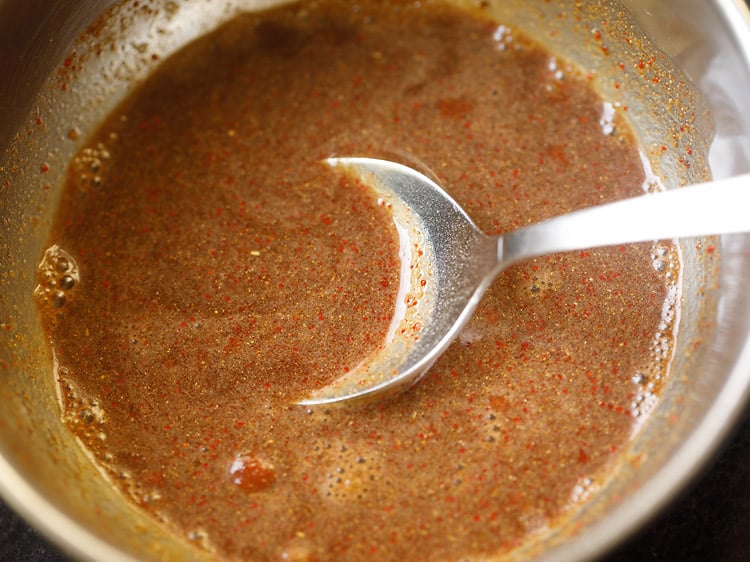
10. Keep this pan on the stovetop and heat on a low flame.
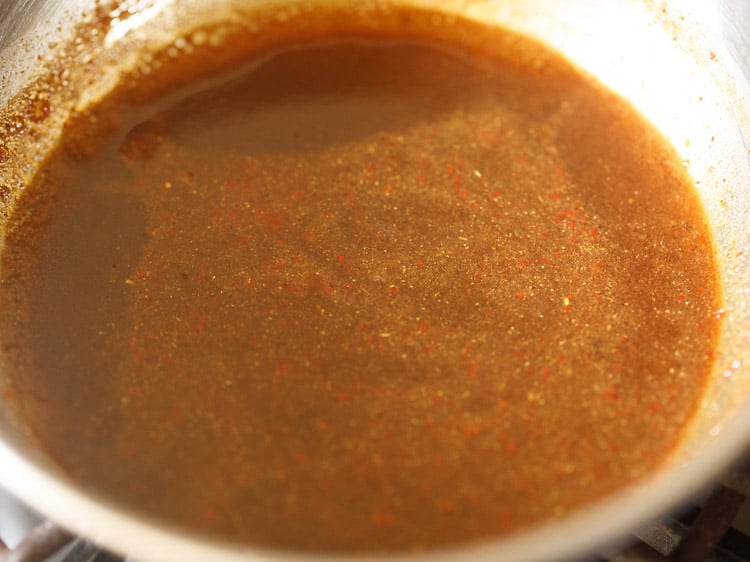
11. Let the mixture gently heat on a low flame.
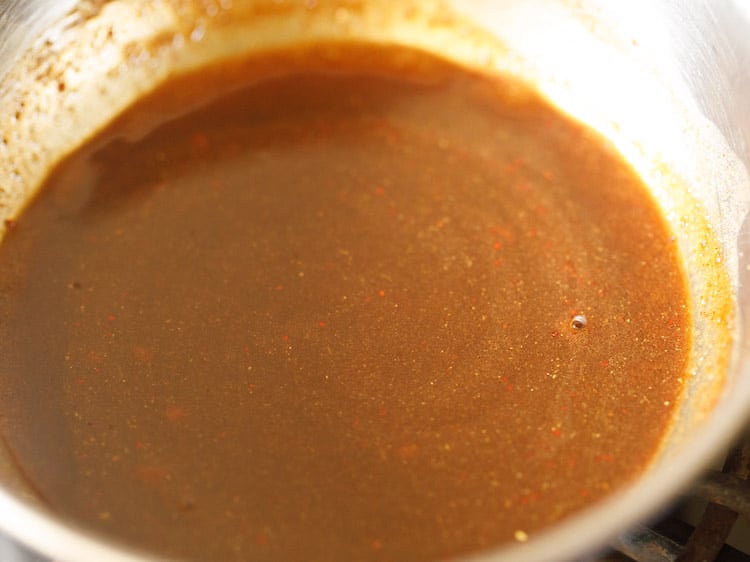
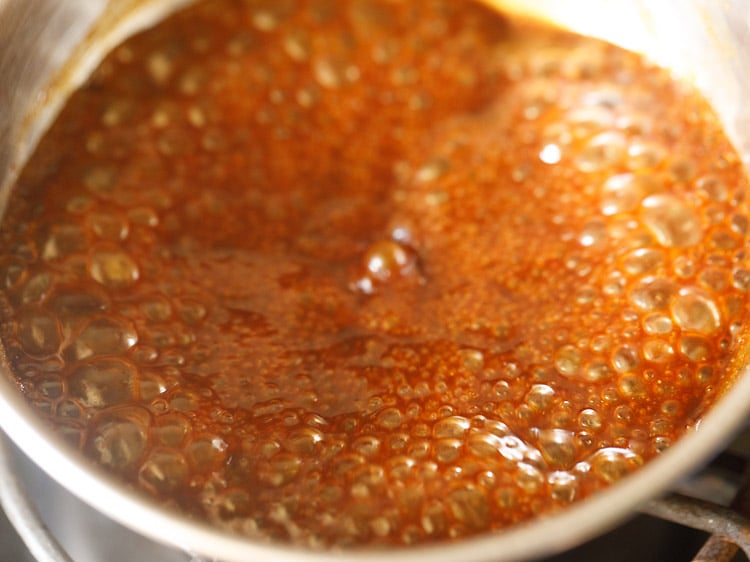
12. When the mixture comes to a boil and thickens slightly, then switch off the heat. Keep aside. Check the taste and if required you can add more jaggery or mango powder if required.
More Prep
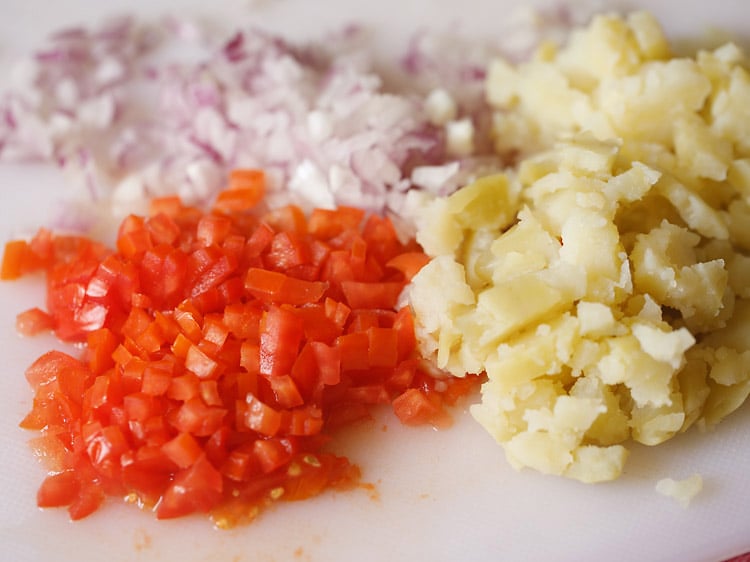
13. Peel and chop the potatoes into small cubes. Finely chop 1 small to medium-sized onion and 1 medium-sized tomato.
You can also chop 1 green chilli if you want. Chop some coriander leaves too.
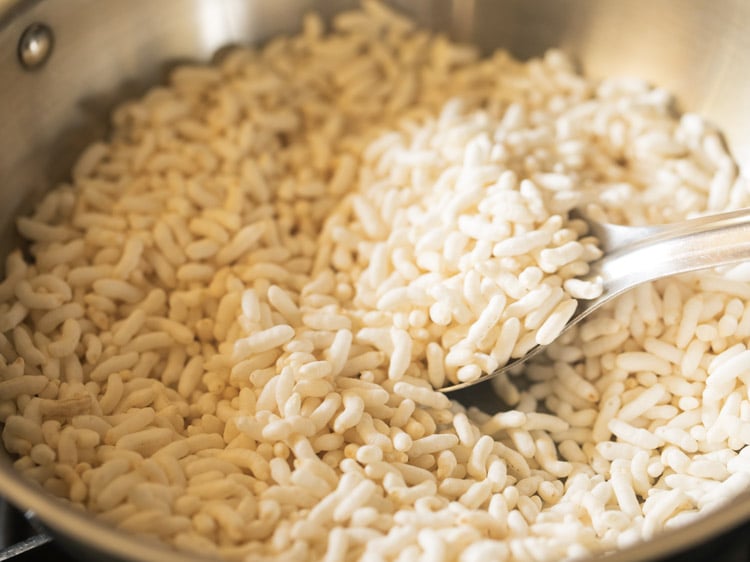
14. Take 2 cups puffed rice (murmura, pori, mandakki) in a pan. On a low heat stirring often dry roast the puffed rice.
This is not an essential step and you need to roast the puffed rice if they are not crisp. If they are crisp and crunchy, then you do not need to roast them.
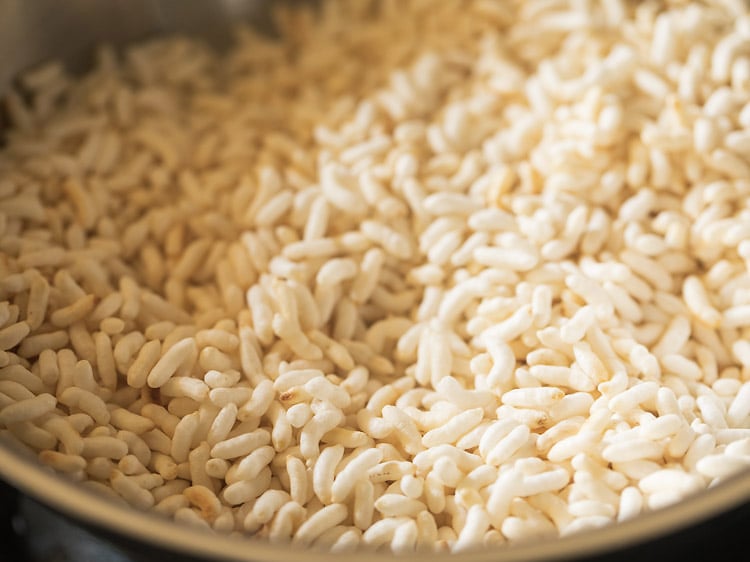
15. Roast the puffed rice stirring often for 2 to 3 minutes till they become crisp. You don’t need to brown them. Let the puffed rice cool at room temperature.
Make Bhel Puri
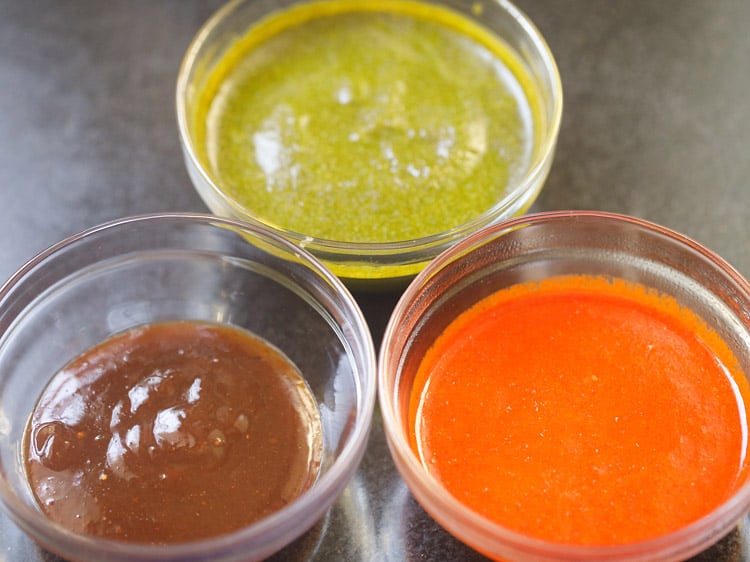
16. Assemble everything before you begin. Keep the chutneys in a bowl. These chutneys stay well for about a week in the fridge. So you can keep the leftovers in the fridge.
17. In a bowl now take the chopped boiled potatoes, onions and tomatoes. You can also include some boiled moong beans or steamed moong bean sprouts at this step.
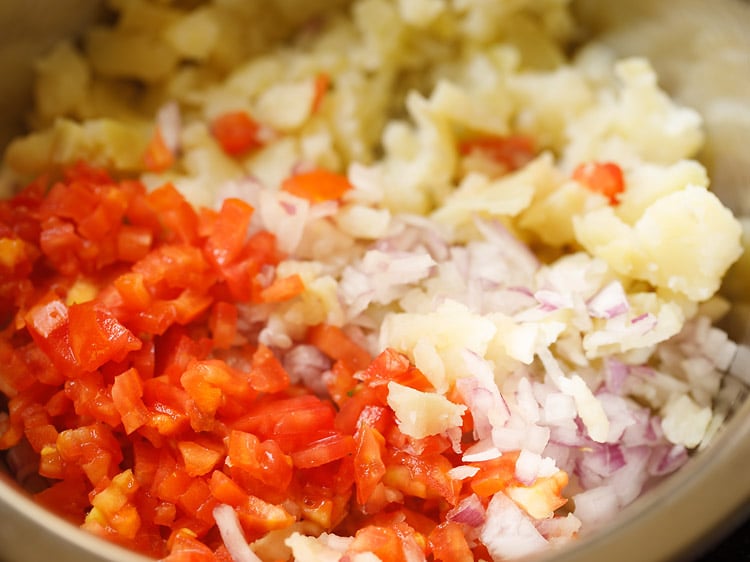
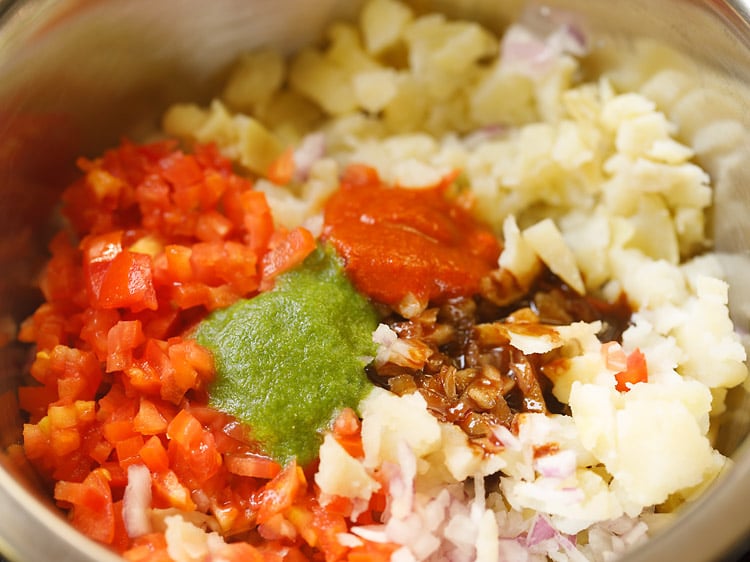
18. Add sweet chutney, green chutney and red chutney. You can add the quantity of chutneys as per the taste you want in a bhel puri.
For a spicy bhel puri recipe, include more of the red chutney and green chutney. For a sweet taste add more of the sweet chutney.
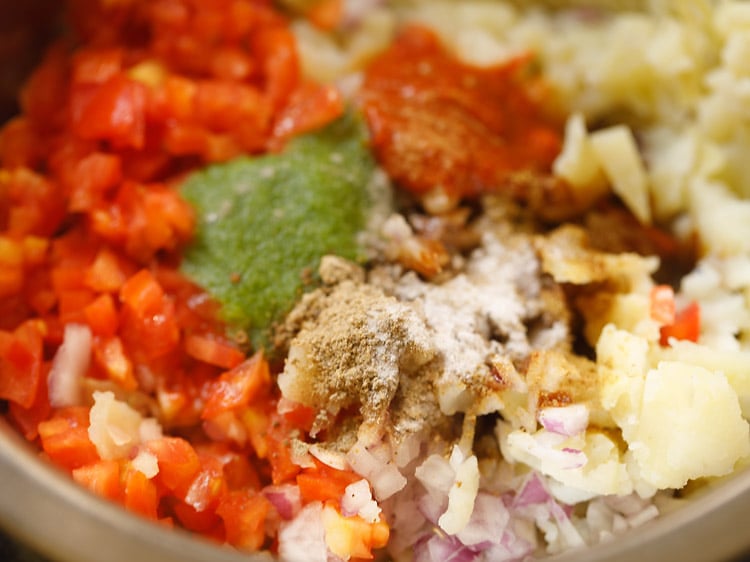
19. Sprinkle ½ to 1 teaspoon chaat masala and ½ teaspoon roasted cumin powder. Also, sprinkle some black salt as per taste.
If you do not have black salt, then use pink salt, edible rock salt or regular white salt.
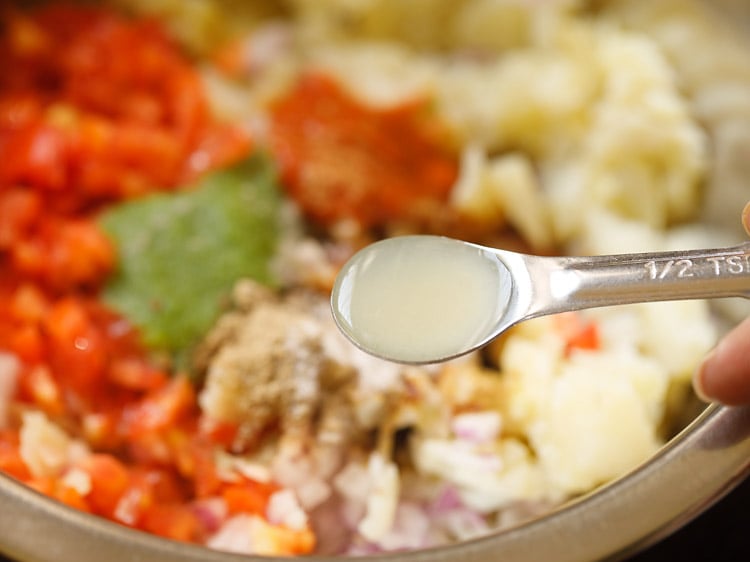
20. Drizzle ½ to 1 teaspoon lemon juice or according to taste.
21. Stir and mix very well.
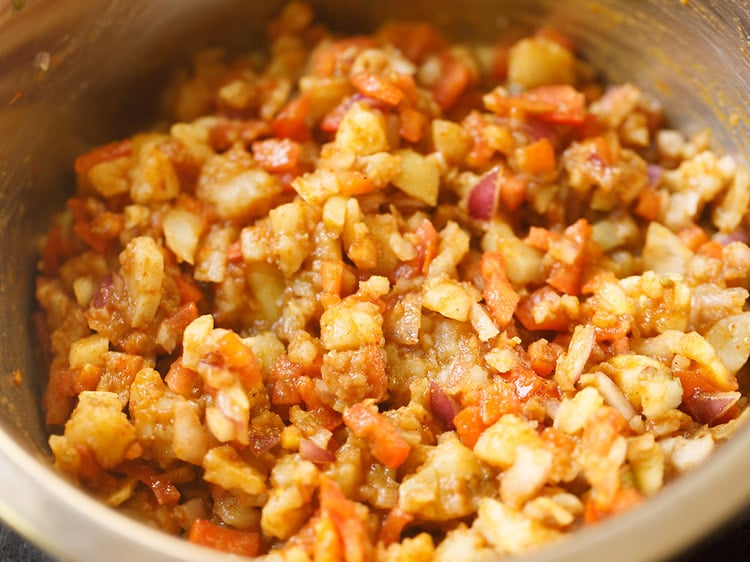
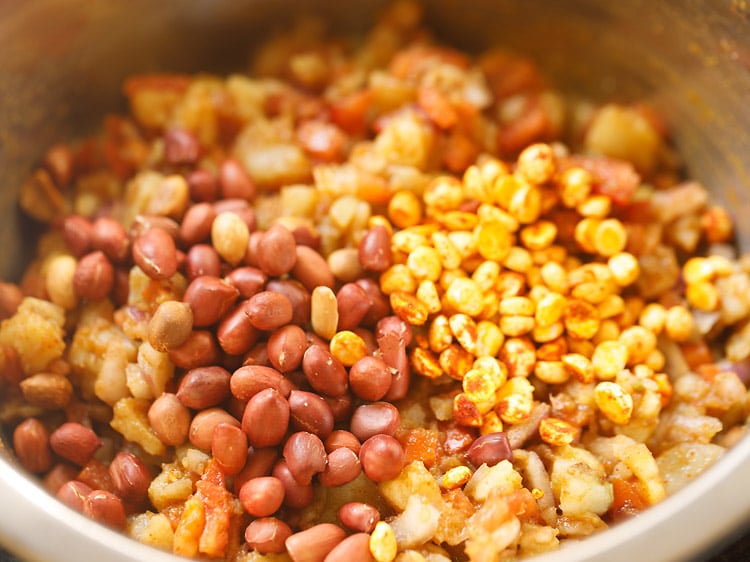
22. Now add 1 tablespoon masala chana (optional) and 2 tablespoons roasted peanuts (optional). At this step, you can also top up with some crushed puri or papdi.
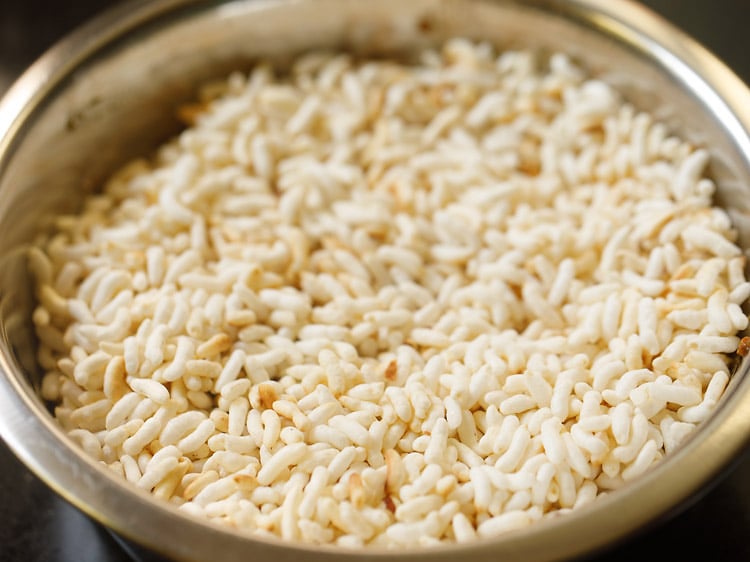
23. Add puffed rice.
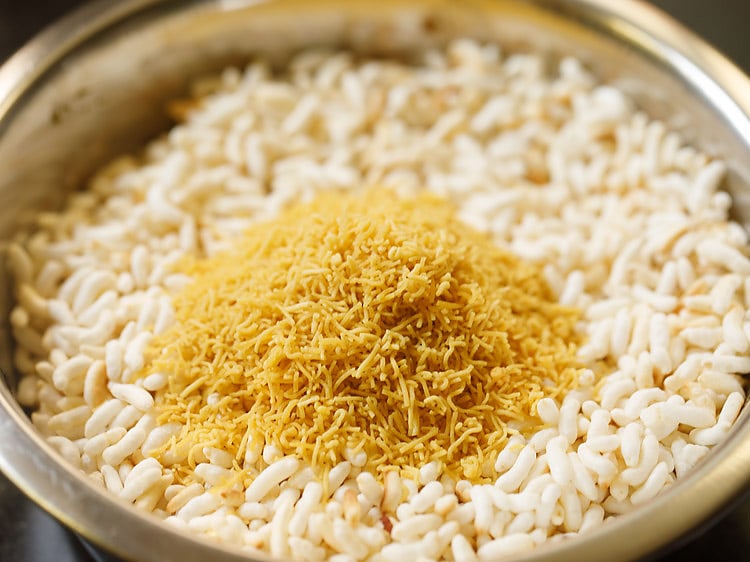
24. Add ¼ cup sev (fried gram flour vermicelli).
25. With a spoon, just swirl the whole mixture together well and be quick.
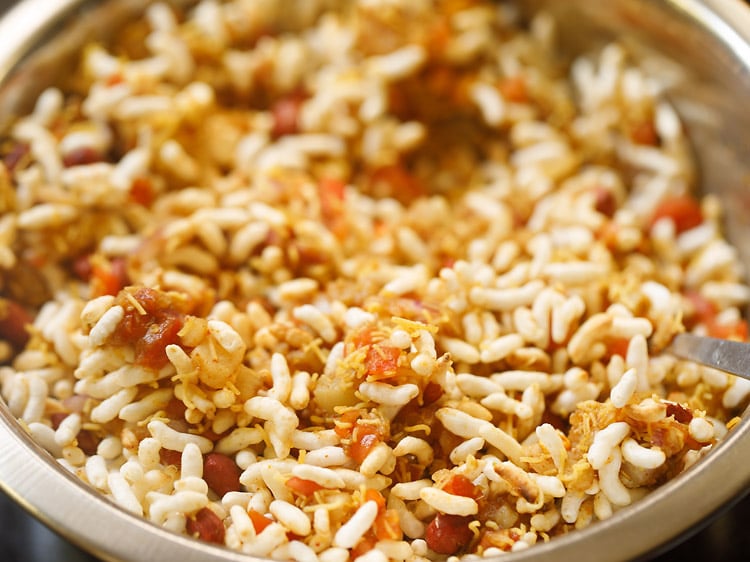
26. Serve bhel puri immediately in individual bowls or plates. Top up with some sev, puri or papdi and more coriander leaves if you want.
If you don’t serve bhelpuri immediately then the puffed rice will become soggy and you won’t enjoy it. So be quick in serving. Assemble this dish only when you want to serve or eat it.
If there is any leftover chutney then refrigerate them for 1 to 2 days. Enjoy them as a dipping sauce with any Indian snacks.
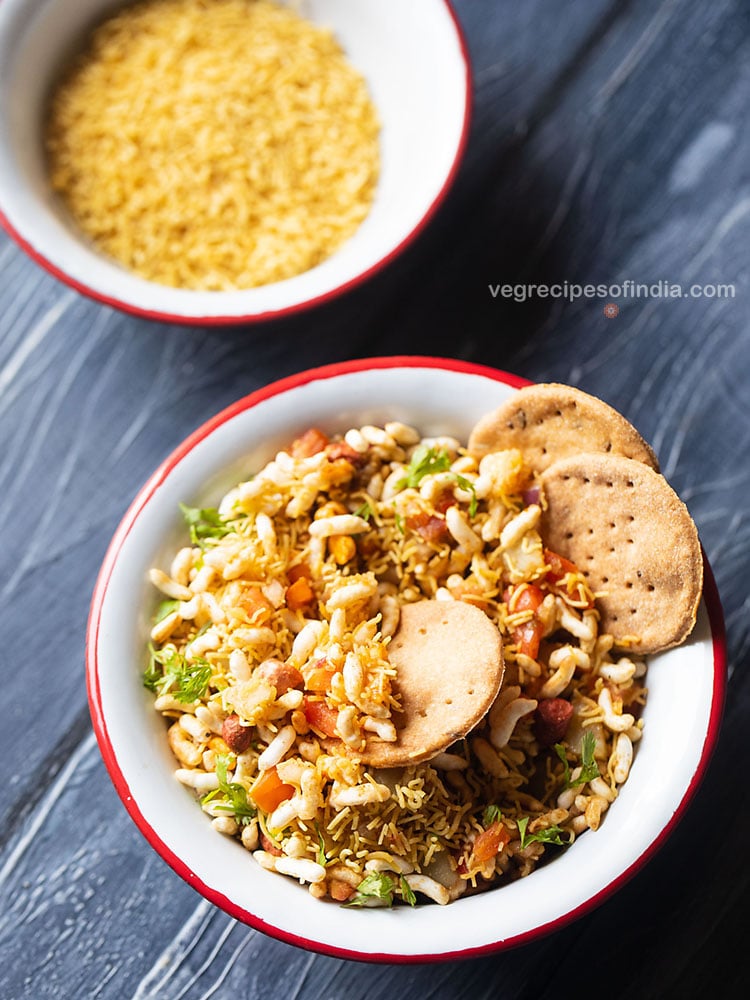
Expert Tips
- Soggy bhel: Bhel poori has to be served as soon as it is made and immediately. Serving even after a couple of minutes will make the whole bhel puri mixture soggy and you won’t enjoy it.
- Assembling: Keep all the ingredients ready before you start mixing everything for making bhel puri.
- Roasting: The puffed rice should be crisp. If not crisp then roast them for some minutes in a pan on a low heat till they become crisp.
- Variations: You can even include grated vegetables like carrots and beetroot. When raw mangoes are in season then you can even include them. Adding raw mangoes gives a very nice tangy taste and crunch.
- Spicing: Spice powders and the chutneys can be adjusted as per your taste buds. You can make chutney at home or even use readymade ones. Best is to use homemade chutneys as you can make them as per your taste and they are fresher.
Aloo Tikki Chaat
How to make Aloo Tikki Chaat
Make Potato Tikki mixture
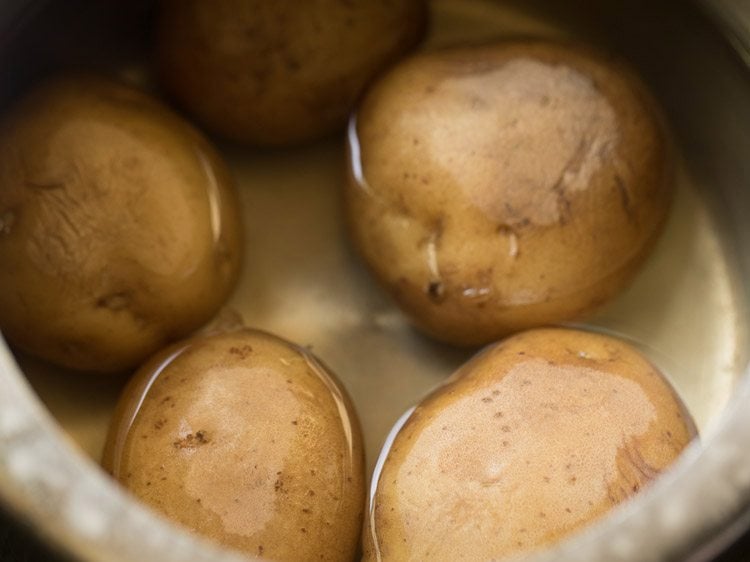
1. Rinse and take 4 medium potatoes in a 2 liter stovetop pressure cooker. Add ½ teaspoon salt and enough water just about covering the potatoes.
Pressure cook on medium heat for 4 to 5 whistles or till the potatoes are softened and develop a mashable consistency.
When the pressure drops naturally in the cooker, then only open the lid. Carefully drain all the water thoroughly and set aside the cooked potatoes to cool.
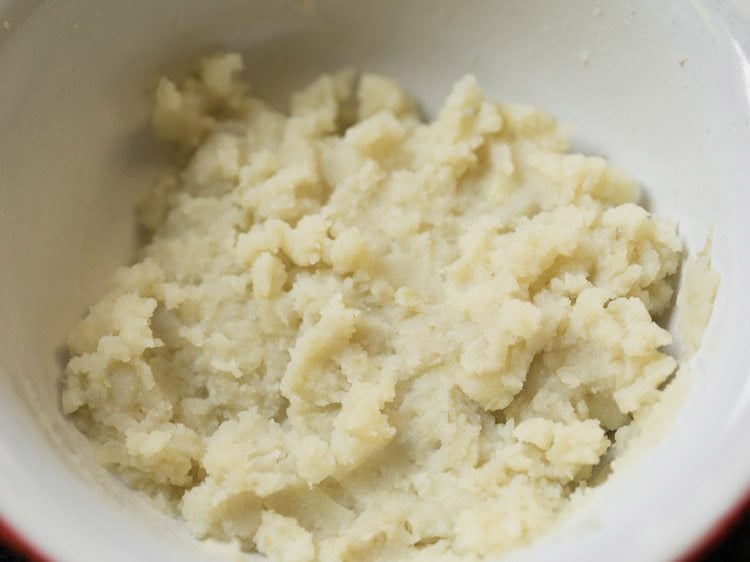
2. When the potatoes become warm, peel and mash well. Let the mashed potatoes cool completely.
3. Once the mashed potatoes cool, add the following listed ground spices:
- ¼ teaspoon turmeric powder
- ½ teaspoon ginger powder
- ½ teaspoon cumin powder
- ½ teaspoon Kashmiri red chili powder
- ½ teaspoon chaat masala
- ½ teaspoon dried mango powder
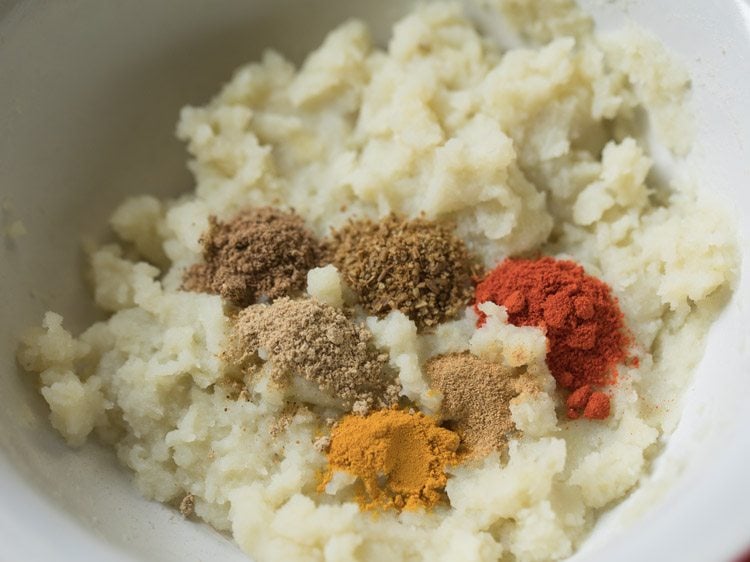
4. Then, add ¼ cup chopped coriander leaves and salt as per taste.
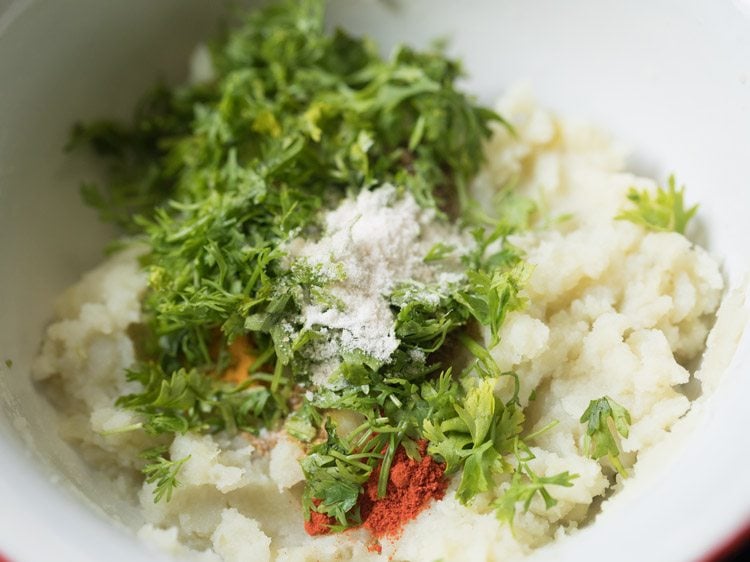
5. Add 4 to 5 tablespoons rice flour. You could also use bread crumbs, cornstarch instead of rice flour.
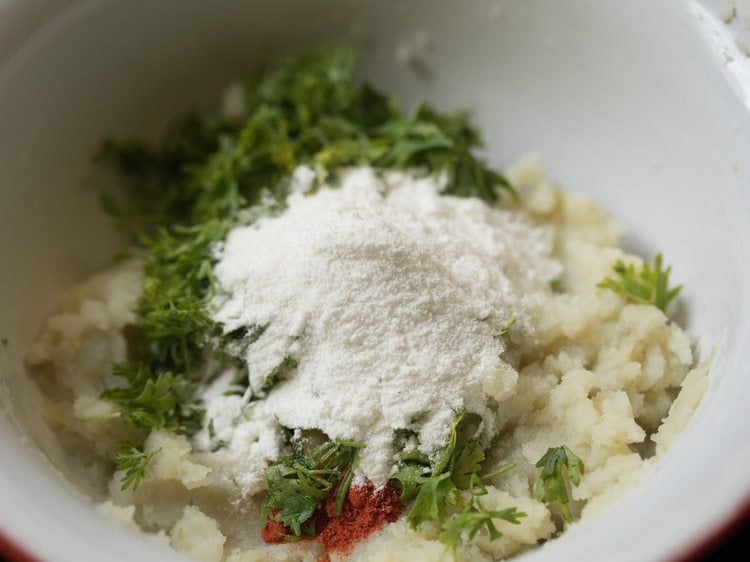
6. Mix very well. Check the taste and add more chaat masala, red chili powder, dried mango powder or salt, if required.
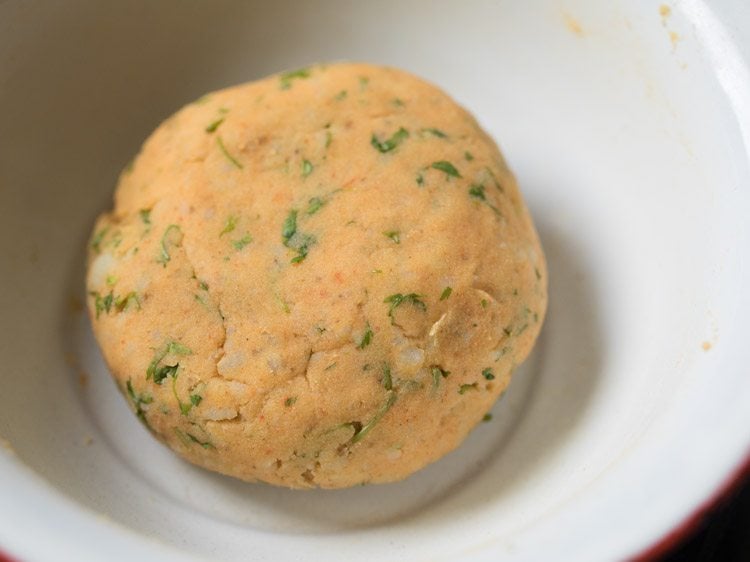
7. Make medium size balls from the mixture. Shape or flatten them into round flattened patties.
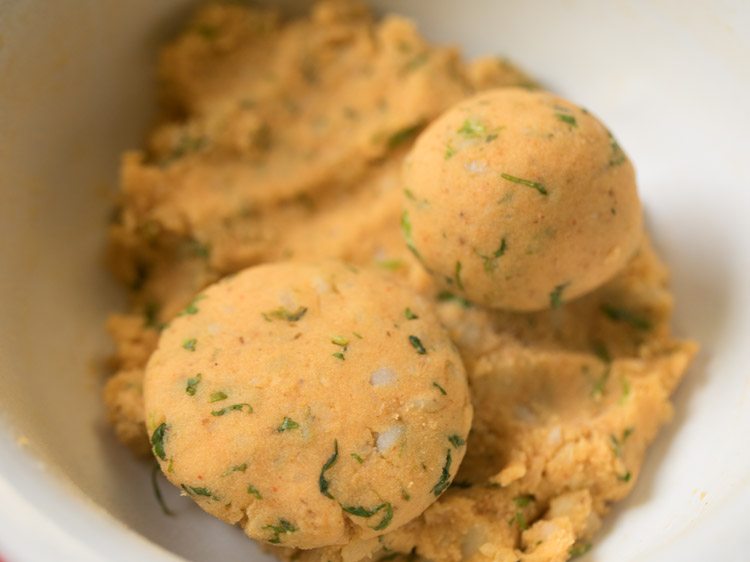
Fry Potato Tikki
8. Heat 1.5 to 2 tablespoons oil on a tawa or skillet or frying pan. Keep the heat to medium and then place the aloo tikki on the tawa or pan.
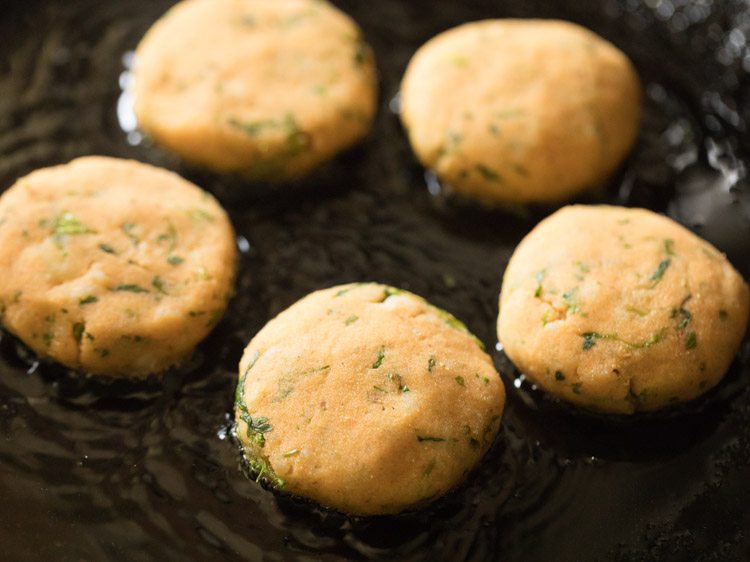
9. Begin to fry the tikkis.
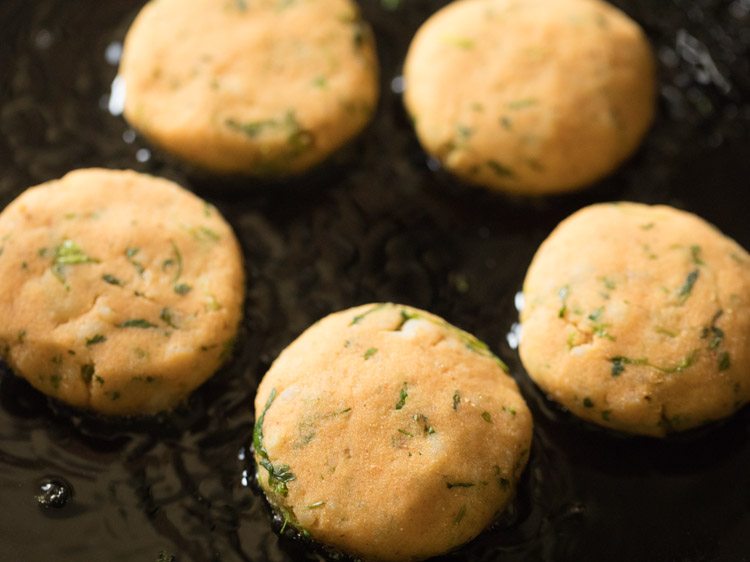
10. When one side is golden and crisp, flip each tikki and fry the second side.
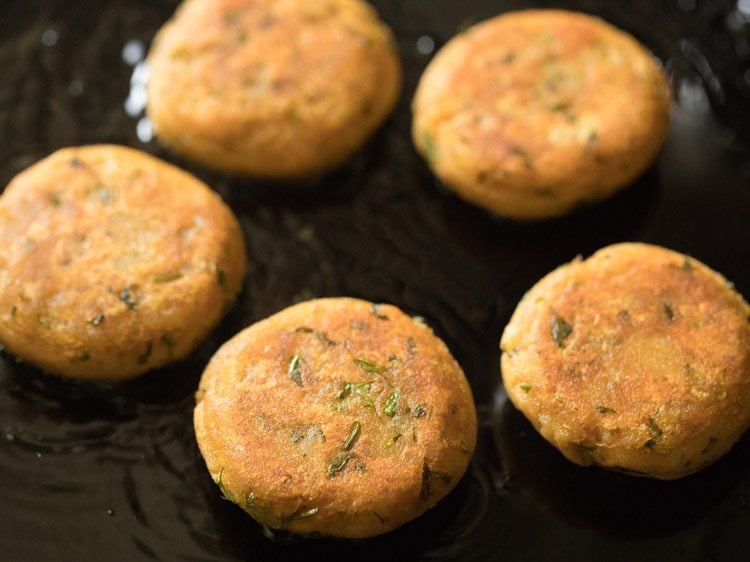
11. Flip the tikkis again when the second side is golden and crisp.
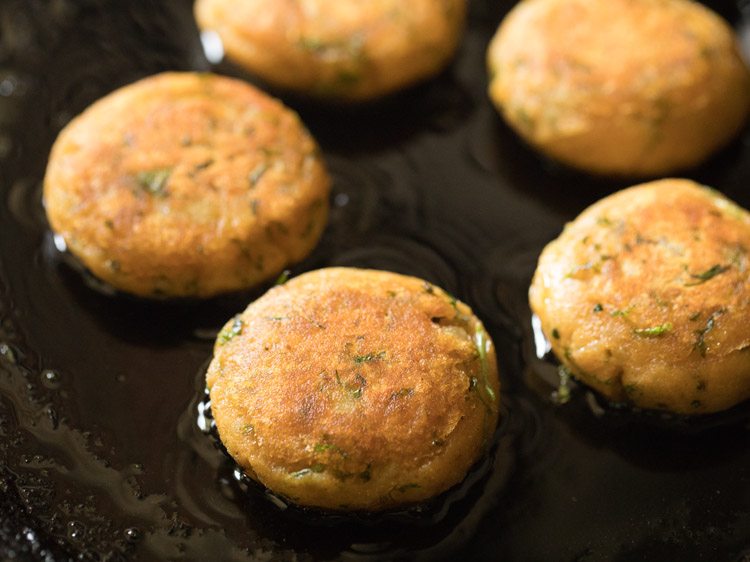
12. Flip once or twice more and fry till all the potato patties are crisp and evenly golden.
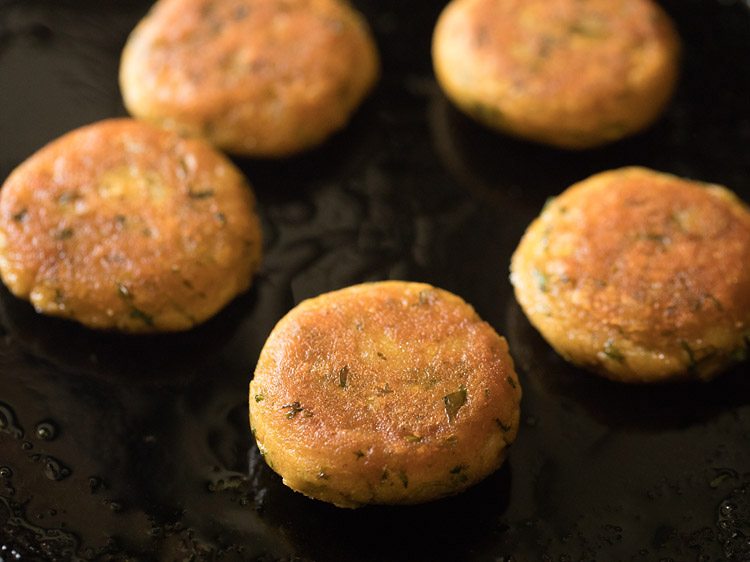
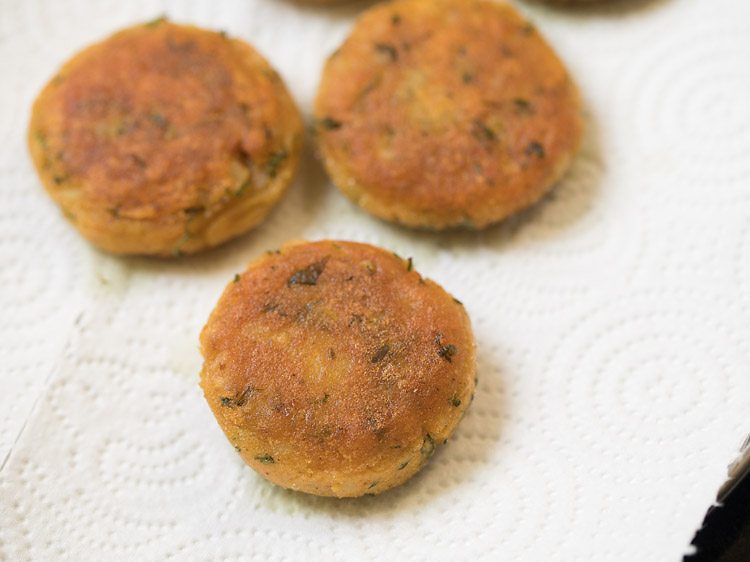
13. Remove the potato tikkis and place them on kitchen paper towels. For frying the next batch, again add 1.5 to 2 tablespoons oil and fry in a similar way.
Make Aloo Tikki Chaat
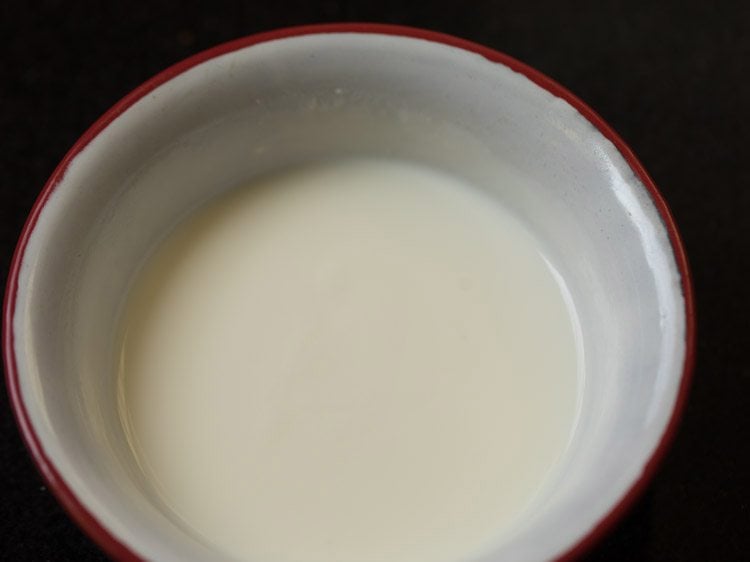
14. In a bowl, take ½ cup fresh curd (yogurt) and whisk till smooth.
15. Place 2 to 3 fried aloo tikkis in each serving plate or bowl. The tikkis have to be hot when you start assembling them.
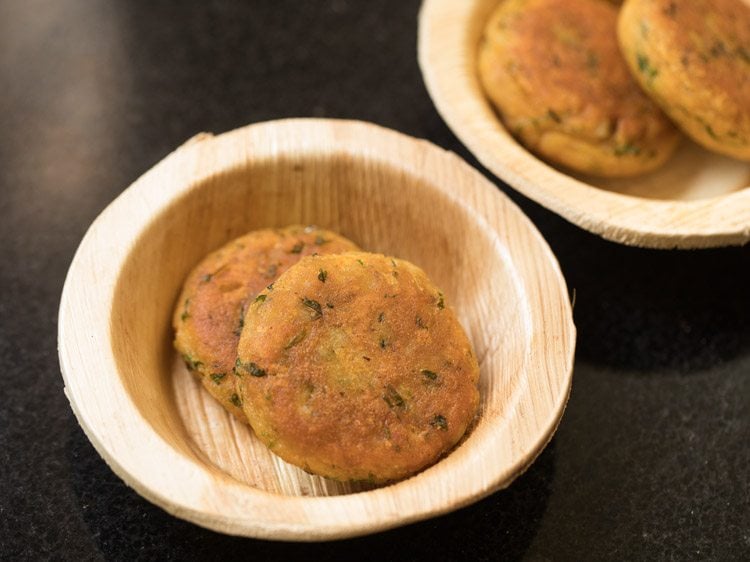
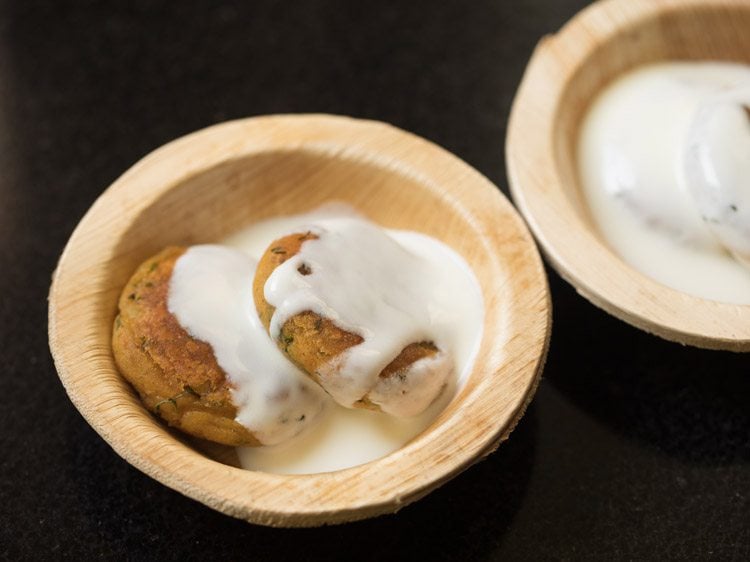
16. Pour some whisked curd as required. Curd can be skipped if you want.
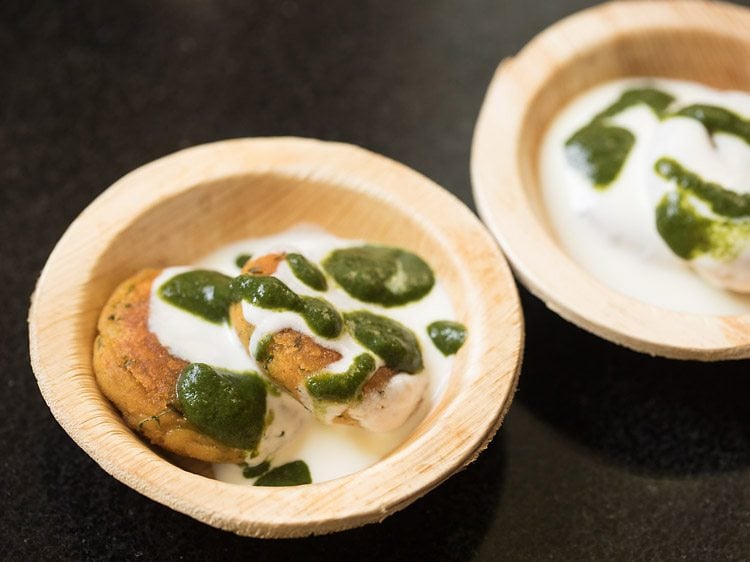
17. Then, drizzle some Green Chutney. Add as required.
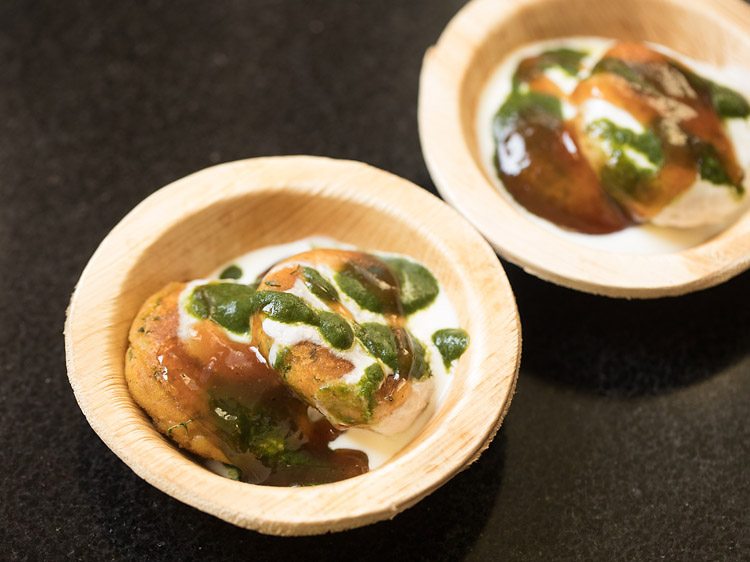
18. Now, drizzle some sweet Tamarind Chutney. Add as required.
19. Sprinkle 2 to 3 pinches of chaat masala and 1 to 2 pinches of black salt all over. At this step you can add some sev, chopped onions and chopped coriander leaves.
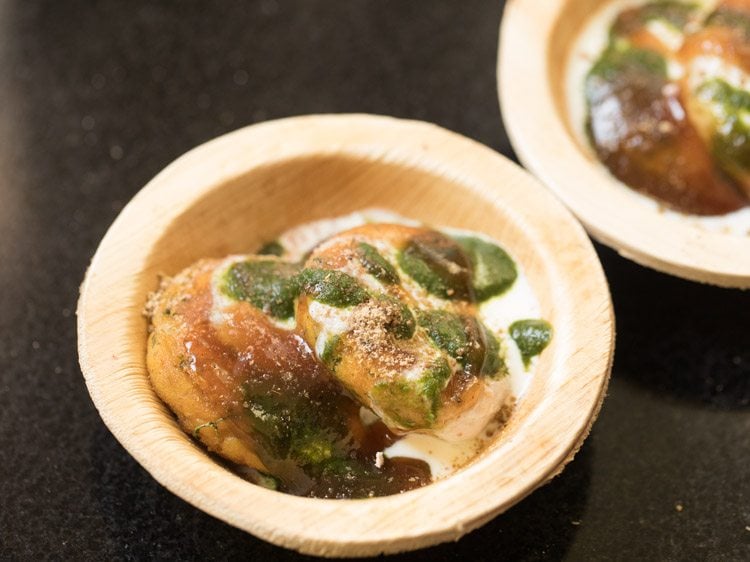
20. Serve Aloo Tikki Chaat immediately.
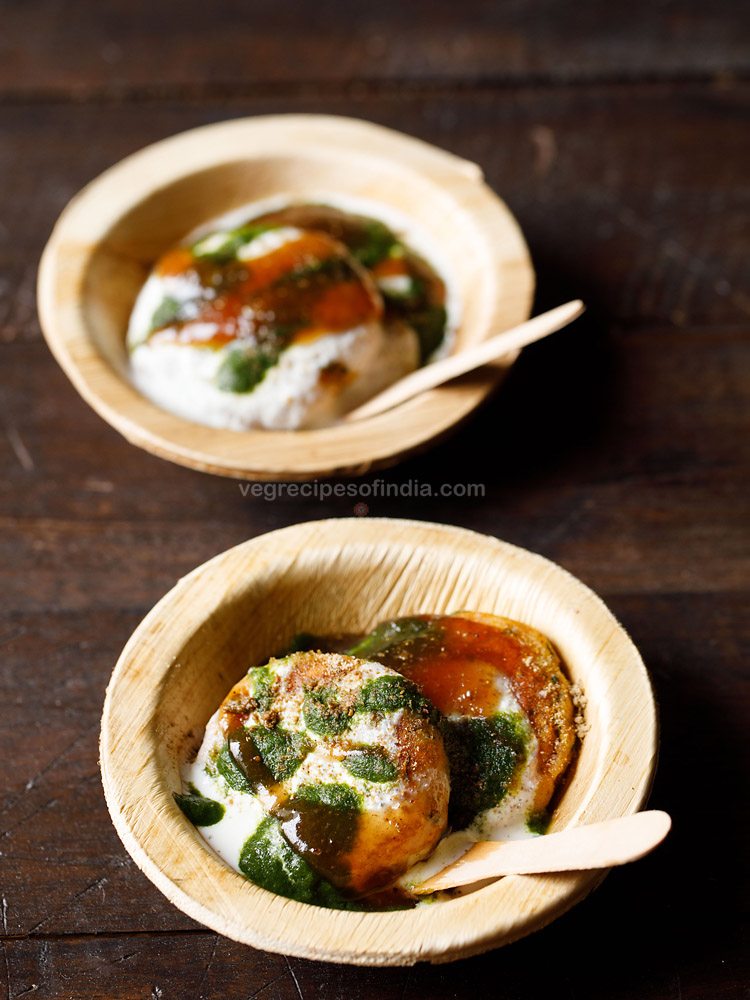
Why This Recipe Works
Aloo Tikki is actually a celebrity in the world of street foods in North India. No matter how many times you have eaten it, there’s always more to it and you really can’t get bored of it, ever. Same goes for the category of dish called chaat. Because, for an Indian, chaat is almost their lifeline! You can’t separate both these from us.
So, when brought together as this Aloo Tikki Chaat, it’s only fireworks! A filling and smashing snack to satiate all your hunger cravings. Also, Aloo Tikki in itself is versatile. Beside using it in this recipe, you can make fusion dishes like Aloo Tikki Burger, Aloo Tikki Chole, Frankie and more with it.
Aloo Tikki Chaat is a sure shot winner preparation. Spicy, sweet, sour, salty, tangy, savory, crispy, crunchy – name the profile, it’s all there in this dish. A unique amalgamation of flavors and textures. What’s more awesome is that you can customize it, and turn it into an even more bingeworthy dish!